How to Restore Old Photos: Scratches, Tears & Fading Fix 2026
TL;DR: The Short Answer
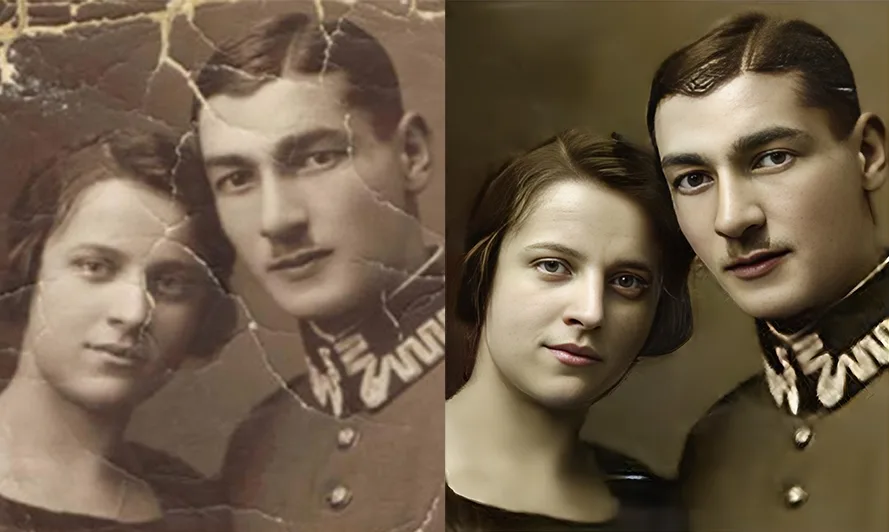
You can restore almost any old photo — even badly damaged ones — in five steps: scan at 600 DPI (1200 DPI for small prints) as a TIFF, repair physical damage first (scratches, tears, missing corners), fix tone and faded color, run AI enhancement for faces and detail, then archive both the original scan and the restored file. For small scratches use the Spot Healing Brush; for long tears use Clone Stamp; for missing corners use Content-Aware Fill or Generative Fill. For genuinely soft faces, an AI tool like Remini (mobile) or Topaz Photo AI (desktop) will beat any manual filter. Never work on the original scan — always duplicate it.
What Can Actually Be Restored?
Old photos degrade in predictable ways, and each damage type has a matching tool. Some fixes take seconds; others take patience. Here is what you are up against.
| Damage type | Cause | Best fix | Difficulty |
|---|---|---|---|
| Dust, small scratches | Storage, handling | Spot Healing Brush | Easy |
| Long creases, tears | Folding, bending | Healing Brush + Clone Stamp | Medium |
| Missing corners, large gaps | Physical tearing | Content-Aware Fill / Generative Fill | Hard |
| Fading, yellowing, sepia | Light, age, chemicals | Curves + White Balance + HSL | Easy |
| Water stains, mold | Humidity | Clone Stamp + AI restoration | Hard |
| Soft, blurry faces | Focus, camera shake | AI deblur (Remini, Topaz) | Medium |
The golden rule of restoration: fix physical damage first, color and tone second, sharpness last. If you colorize or sharpen before removing scratches, the scratches get colorized and sharpened too, and they become much harder to remove.
Step 1: Scan It Right — This Determines Everything
A great restoration starts with a great scan. If you scan at 300 DPI as a JPEG, every later step will fight against lost detail and compression artifacts. Do this instead:
- Use a flatbed scanner if you can. Phone scanning apps work in a pinch, but a flatbed captures far more detail and avoids glare.
- Scan at 600 DPI minimum for standard prints (4×6, 5×7). For wallet-size or heavily damaged prints, go to 1200 DPI. For negatives and slides, 2400+ DPI.
- Scan in color, even if the photo is black and white — color scanning captures more tonal information in the paper.
- Turn off all scanner auto-fixes (auto color, auto contrast, dust removal). You want the raw scan; you will fix everything yourself.
- Save as TIFF or PNG, never JPEG. JPEG compression adds artifacts that AI tools will mistake for damage.
- Leave a small border around the photo in the scan — it gives repair tools clean reference pixels at the edges.
Adobe’s official old photo restoration guide recommends the same non-destructive approach: lock the background layer and do every edit on a separate layer above it.
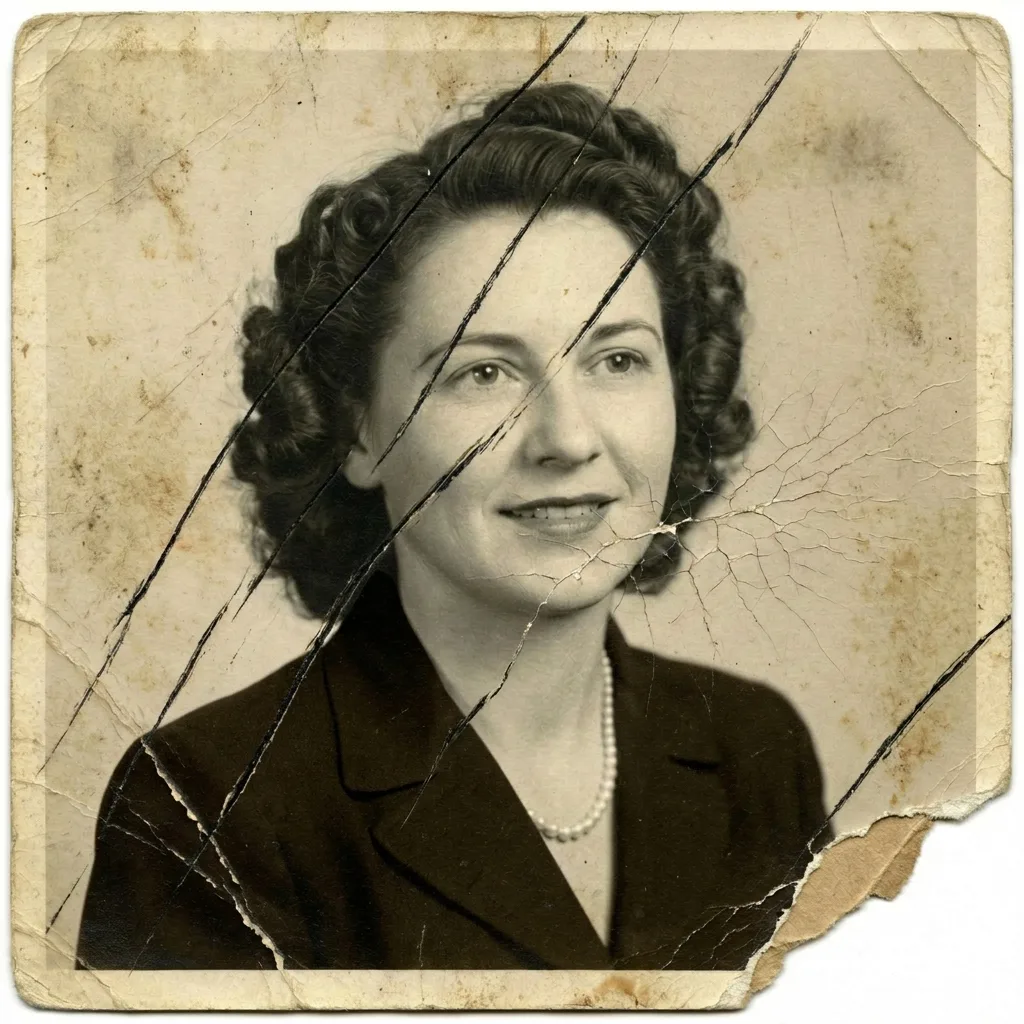
Step 2: Repair Physical Damage (Scratches, Tears, Missing Corners)
Open your scan in Photoshop, duplicate the layer (Ctrl/Cmd+J), and zoom to 100%. Work through the damage in this order.
Small scratches, dust, and spots — Spot Healing Brush. Set the brush slightly larger than the spot, check Content-Aware, and click. Photoshop samples surrounding texture and blends the repair automatically. This handles 80% of damage in most photos.
Long creases and tears — Healing Brush + Clone Stamp. For a long crease, hold Alt (Option on Mac) to sample clean texture next to the tear, then paint along the crease with the Healing Brush. For wider tears, switch to Clone Stamp with hardness at 0–30% — it copies exact texture, which the Healing Brush cannot always match. Change brush size often as you move through the image. If you do this often, a solid photo editing guide will speed up your layer and mask workflow.
Missing corners and large gaps — Content-Aware Fill or Generative Fill. Select the missing area, go to Edit > Content-Aware Fill, and let Photoshop reconstruct it from surrounding pixels. For complex missing areas (a shoulder, a background), Generative Fill will invent plausible detail — but verify it looks right, because AI can invent details that were never there.
After physical repair, run Photoshop’s Photo Restoration Neural Filter (Filter > Neural Filters > Photo Restoration). It has separate sliders for scratch reduction, face enhancement, and image enhancement. Run it after your manual cleanup so it does not waste effort repairing scratches you already removed.
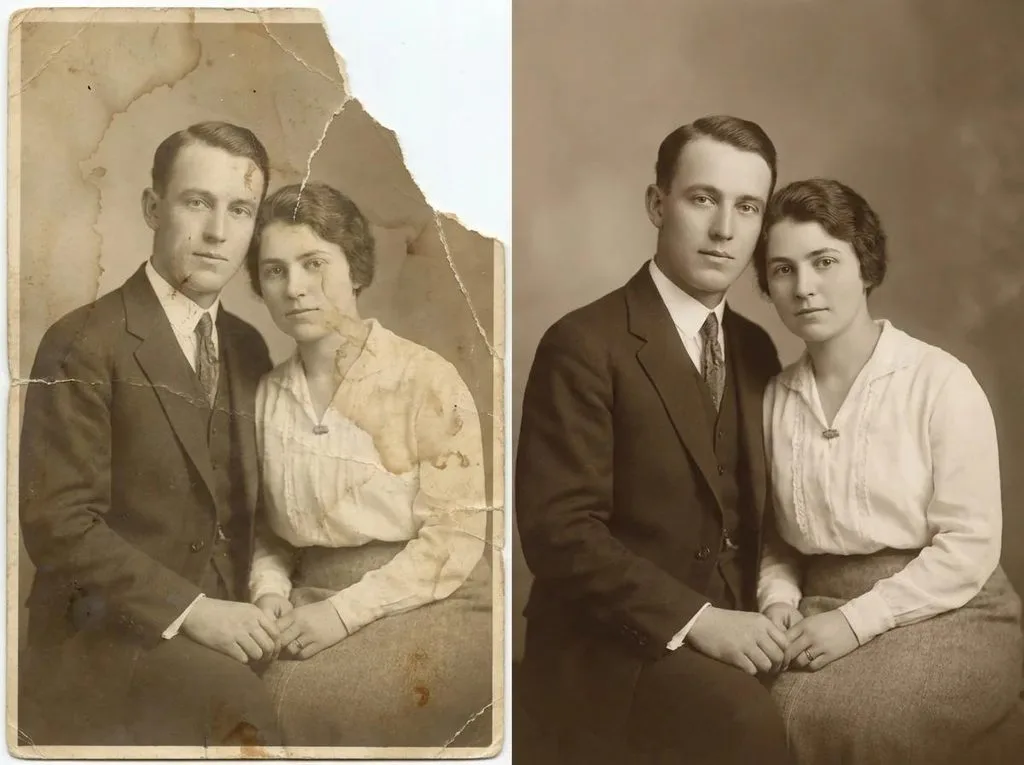
Step 3: Fix Tone, Contrast, and Faded Color
Old photos fade. Blacks turn gray, whites turn yellow, and the whole image loses contrast. Fix this with adjustment layers (never on the image itself):
- Set the black and white points with a Curves or Levels adjustment layer. Drag the black slider in until you hit real black, and the white slider in until you hit real white. This single step revives most faded photos.
- Fix yellowing and sepia shift with White Balance or a Color Balance adjustment layer. Push the Temperature slider slightly toward blue to cancel yellow. For a strong color cast, go to HSL and desaturate the orange and yellow channels.
- Boost contrast gently (+20 to +40) and pull the Blacks down (−20 to −40) to anchor the dark end.
- Reduce noise and grain if the old scan is speckled — but keep some film grain, because a perfectly smooth old photo looks fake. Our noise reduction guide walks the line between clean and plastic.
For faces, once tone is fixed, light portrait retouching — brightening eyes, softening deep blemishes — finishes the job. But go easy: the goal is to preserve the person, not to turn them into a stranger.
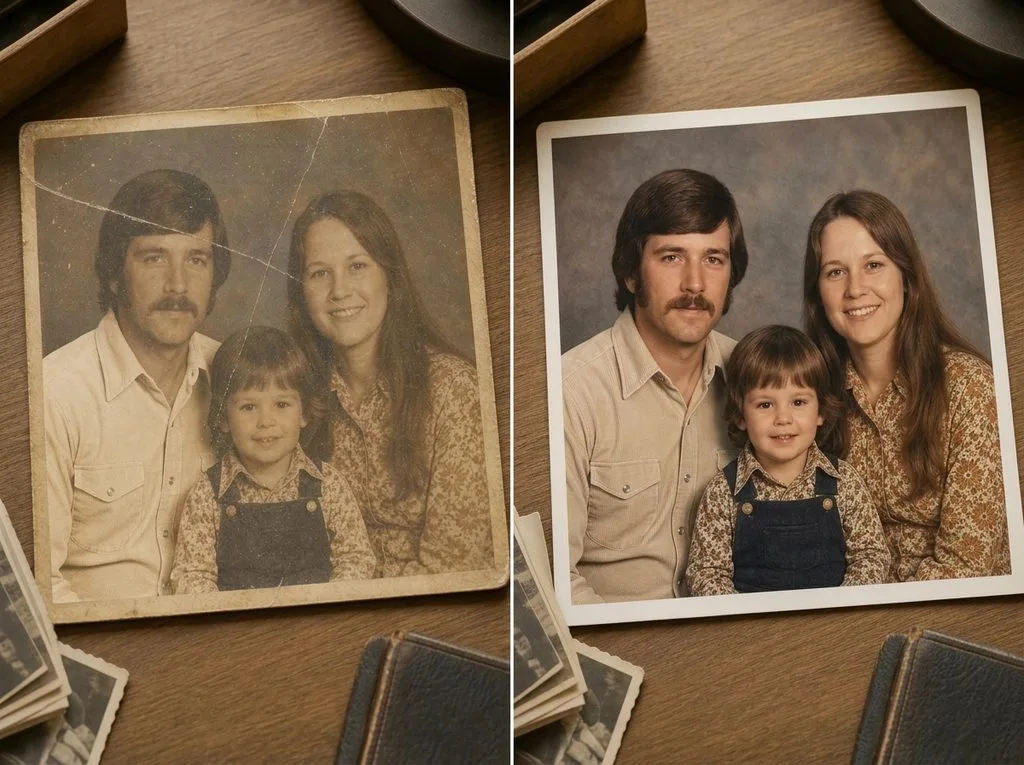
Step 4: AI Restoration — When Manual Isn’t Enough
For soft faces, severe damage, or when you simply want speed, AI restoration tools do in seconds what used to take hours. Here is how the top 2026 tools compare.
| Tool | Best for | Price | Strength |
|---|---|---|---|
| Adobe Photoshop (Neural Filters) | Manual precision + AI | ~$9.99–22.99/mo | Full layer control; best for pros |
| Remini | Mobile face enhancement | ~$9/mo or credits | Best face recovery on phone |
| Topaz Photo AI | Desktop, local processing | ~$199/yr (subscription only now) | Best deblur + denoise, no upload |
| MyHeritage | Genealogy/family photos | Free with account | Tuned on historical portraits |
| VanceAI / Hotpot | Quick online fixes | Free + paid tiers | Fast, browser-based |
| GFPGAN / CodeFormer | Free open-source face fix | Free | Best free option, runs locally |
Two things to know before you use AI: it invents detail that may not have been in the original (especially in faces), and it can change a person’s identity if pushed too hard. Always compare the AI result side by side with the original scan. If great-grandmother suddenly looks like a different person, dial the enhancement back. Our roundup of the best photo editing software covers these tools in more depth.
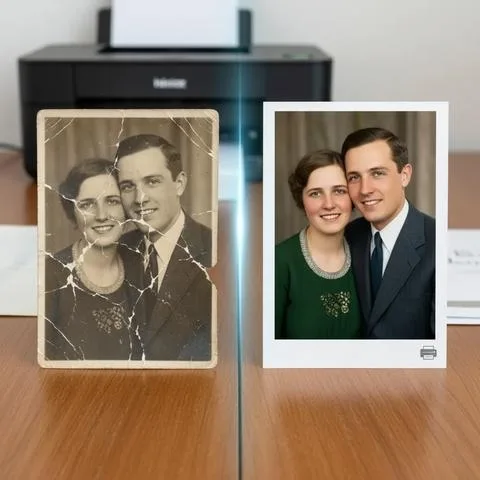
Step 5: Optional Colorization, Sharpening, and Archiving
Once the photo is clean and tonally correct, you have two finishing options:
- Colorize (optional): If the original is black and white and you want color, run an AI colorizer (Palette.fm, MyHeritage, or Photoshop’s Colorize Neural Filter) on the restored file, not the damaged scan. Treat AI colors as an artistic interpretation, not a historical record.
- Sharpen lightly: Old photos are soft by nature. A gentle Unsharp Mask (Amount 50–80%, Radius 0.5–1.5px) adds crispness without creating halos.
- Archive everything: Save the original scan, the repaired grayscale, and the final colorized version separately. Store them in at least two places (cloud + external drive). Never overwrite the original scan.
When to Hire a Professional
Hire a restoration service when: a large central area is missing, the photo has severe water or fire damage, the face is badly torn, or the photo is a one-of-a-kind heirloom. Pros have large-format scanners, years of Clone Stamp practice, and the patience to rebuild a face pixel by pixel. For everything else, the workflow above will get you 90% of the way there.
5 Common Restoration Mistakes
- Scanning at 300 DPI as JPEG. You starve every later step of detail.
- Colorizing or sharpening before repairing damage. Scratches get colorized and sharpened.
- Working on the original scan. One wrong save and the original is gone. Always duplicate.
- Letting AI over-enhance faces. If the person looks different, dial it back.
- Removing all grain. Smooth plastic skin looks fake. Keep some film texture.
Frequently Asked Questions
How do you restore old photos at home?
Scan at 600 DPI as a TIFF, open in Photoshop, duplicate the layer, remove scratches with the Spot Healing Brush, fix tears with Clone Stamp, correct contrast and color with adjustment layers, then optionally run an AI enhancer and colorizer. Always work on a copy.
What is the best DPI to scan old photos for restoration?
600 DPI minimum for standard prints. Use 1200 DPI for wallet-size or heavily damaged photos, and 2400+ DPI for negatives and slides. Save as TIFF, not JPEG.
Can scratched and torn photos be restored?
Yes. Small scratches take seconds with Spot Healing; long tears need Clone Stamp; missing corners use Content-Aware Fill or Generative Fill. Even large central tears can be rebuilt, though severe damage may need a professional.
What is the best AI tool to restore old photos?
For mobile face enhancement, Remini. For desktop quality and privacy, Topaz Photo AI. For genealogy photos, MyHeritage. For full manual control plus AI, Photoshop’s Neural Filters. Free option: GFPGAN/CodeFormer.
How do you fix faded color in old photos?
Set black and white points with Curves or Levels, push White Balance toward blue to cancel yellowing, desaturate orange/yellow in HSL, and gently boost contrast. Do all of this on adjustment layers, never on the image itself.
Does AI restoration change how a person looks?
It can. AI invents detail that may not have been in the original, and heavy enhancement can change facial identity. Always compare side by side with the original scan and dial it back if the person looks different.
Should I restore or colorize first?
Restore first — repair scratches, tears, and fading, then colorize the clean file. Colorizing a damaged scan means the damage gets colorized too and becomes much harder to remove.
Final Verdict
Every old photo in a shoebox is a small piece of someone’s history, and most of them can be brought back with a single afternoon and the workflow above. Scan well, repair damage before anything else, fix tone gently, use AI as an assistant not an author, and never overwrite the original. Do that, and the faces in those photos will look back at you like they were taken yesterday — while still looking exactly like themselves.