How to Fix Water-Damaged Photos: Save, Dry & Restore (2026 Guide)
TL;DR: The Short Answer
A water-damaged photo can usually be saved — but only if you act within the first 48 hours and never use heat. The correct sequence is: handle by the edges, gently rinse in clean cool water, separate stuck prints by soaking (never peel), air-dry face-up on unprinted paper towels with a fan, and freeze anything you cannot dry within 48 hours. Hair dryers, irons, ovens, and direct sunlight cause irreversible damage. Once the prints are dry, scan at 600 DPI as TIFFs and repair stains, mold spots, and fading digitally in Photoshop with Clone Stamp, Healing Brush, and Curves — or use an AI restoration tool for heavy damage.
The First 48 Hours: Act Before Mold Grows
Water damage has a clock. After about 48 hours in warm, damp conditions, mold begins to grow on the emulsion, and mold stains are the hardest damage to remove. So your first job is not restoration — it is stabilization. You are buying time so the photo can be restored later.
Handle every wet print by the edges only. When a photo is wet, the emulsion (the image layer) softens and can slide off the paper with one light touch. Never blot the surface, never rub it, and never lay another print face-down on it. If the photo is covered in mud or silt, gently rinse both sides in a tray of clean, cool water — change the water often, and let the current carry the dirt away rather than scrubbing.
FEMA’s official Save Your Family Treasures guidance confirms the same rule: hair dryers, irons, ovens, and prolonged sunlight do irreversible damage. Increase airflow with fans, open windows, and dehumidifiers instead.
Step 1: Separate Stuck Photos — Soak, Never Peel
If photos are stuck together or stuck to an album page, glass, or another print, pulling them apart is the single most common way people finish the job the water started. The emulsion tears rather than separates, and the image goes with it.
The fix is soaking, not force:
- Fill a clean tray with cool, clean water (distilled if available).
- Submerge the stuck stack fully and let it soak 20–60 minutes. For very old or thick paper, soak longer — even up to 48 hours.
- While still underwater, gently work the prints apart from a corner using a thin silicone spatula or your fingertips, with slow lateral pressure.
- If a print resists, it is telling you it needs more time. Let it soak longer. Never force it.
- If a photo is stuck to glass, do not pry it — bag it while damp and freeze it, then consult a conservator.
The Northeast Document Conservation Center’s emergency salvage leaflet recommends the same approach: separate while damp, or freeze stuck items for later treatment by a conservator.
Step 2: Air-Dry Face-Up — No Heat, No Sun
Once separated, dry each print properly. Wet emulsion is fragile until it dries, so the drying method matters as much as the soaking.
- Lay each photo face-up on a clean, absorbent surface — unprinted paper towels, blotter paper, or a clean cotton towel. Never use newspaper or printed paper towels; the ink transfers onto wet emulsion.
- Change the blotting paper every hour or two at first, then every few hours.
- Keep photos from touching each other while drying. Hang larger prints on a clothesline with a plastic clip at one corner, away from the image area.
- Run a fan in the room for air circulation. A dehumidifier helps even more.
- Never use a hair dryer, heat gun, iron, oven, microwave, or direct sunlight. Heat makes the emulsion crack, curl, and separate from the paper.
- Most prints dry in 24–48 hours under good conditions. They will curl at the edges — that is normal and disappears under a flat weight once fully dry.
Step 3: Freeze What You Cannot Dry in Time
If you have more than 20–30 wet photos, or you simply cannot dry them all before mold sets in, freezing is your best friend. Freezing stops mold growth completely and halts chemical deterioration, buying you weeks or months to dry them properly. This is the same method the National Archives uses after large water disasters.
How to freeze photos correctly:
- Interleave each photo (or small stuck stack) with freezer paper or wax paper so they do not stick to each other.
- Place the interleaved stack in a clean, resealable plastic bag and squeeze out excess air.
- Put it in a frost-free freezer set to the lowest temperature.
- When you are ready, thaw slowly in the refrigerator first, then air-dry as above.
- Do not freeze glass negatives, glass plates, or daguerreotypes — water expands inside the glass and shatters them. Air-dry those immediately and consult a conservator.
Mold Safety: Handle Before It Spreads
If you see fuzz, smell mustiness, or find spots that look like foxing (small brown speckles), mold has arrived. Mold can permanently stain paper and emulsion, and it is a health hazard.
- Wear nitrile gloves and a dust mask when handling moldy prints.
- Never brush dry mold — it scatters spores and spreads the infestation.
- If still damp, gently rinse in cool water to lift loose spores, then dry immediately with strong airflow.
- Dried mold stains that will not rinse away are treated digitally after scanning. Physical bleaching or cleaning at home usually does more harm than good.
- For heavy mold on valuable prints, consult a conservator. A guide to photo retouching covers the digital side of stain removal once you have a scan.
Step 4: Scan the Dried Prints
Once every print is fully dry — wait an extra day to be sure — digitize them. This is the point where the physical rescue ends and the digital restoration begins.
- Use a flatbed scanner. Scan at 600 DPI minimum, 1200 DPI for small or heavily stained prints.
- Scan in color even for black-and-white photos. A color scan captures more tonal information in stains and paper.
- Turn off all scanner auto-fixes. You want the raw scan; every correction belongs in one controlled step later.
- Save as TIFF or PNG, never JPEG. Compression artifacts look like new damage.
- Leave a small border around the print in the scan — it gives repair tools clean reference pixels at the edges.
After scanning, the original print goes into archival storage: acid-free sleeves, a cool dry room, away from sunlight. The digital file is what you restore.
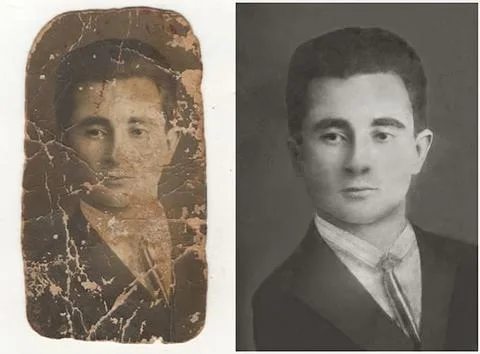
Step 5: Digital Restoration — Fix Stains, Fading, and Mold Spots
Open the scan in Photoshop (or GIMP, which is free), duplicate the layer, and work on the copy. Water damage leaves a predictable set of problems, and each has a matching tool.
| Damage | Best tool | How to use it |
|---|---|---|
| Water stains, dark blotches | Clone Stamp (S) | 0–30% hardness, 30–50% opacity, sample clean texture, paint over stain |
| Mold spots, foxing | Spot Healing / Healing Brush | Alt-sample clean area, paint over spots; use Healing Brush for larger areas |
| Overall fading, low contrast | Curves / Levels adjustment layer | Set black and white points; boost contrast gently |
| Yellowing, color shift | White Balance / Color Balance layer | Push temperature toward blue; desaturate orange/yellow in HSL |
| Soft, blurry areas from emulsion damage | AI restoration (Neural Filters / Topaz) | Run as first pass, then hand-correct faces |
| Rippling, warping | Crop + Free Transform (slight) | Straighten; minor warp is acceptable, heavy warp needs pro |
For faces, take it slow. Water damage often leaves a stain across a cheek or forehead. Clone Stamp at low opacity, multiple light passes, changing sample point often, beats one heavy stroke every time. For stubborn color stains, frequency separation lets you fix the color layer without touching the texture layer — a technique worth learning for any serious restoration.
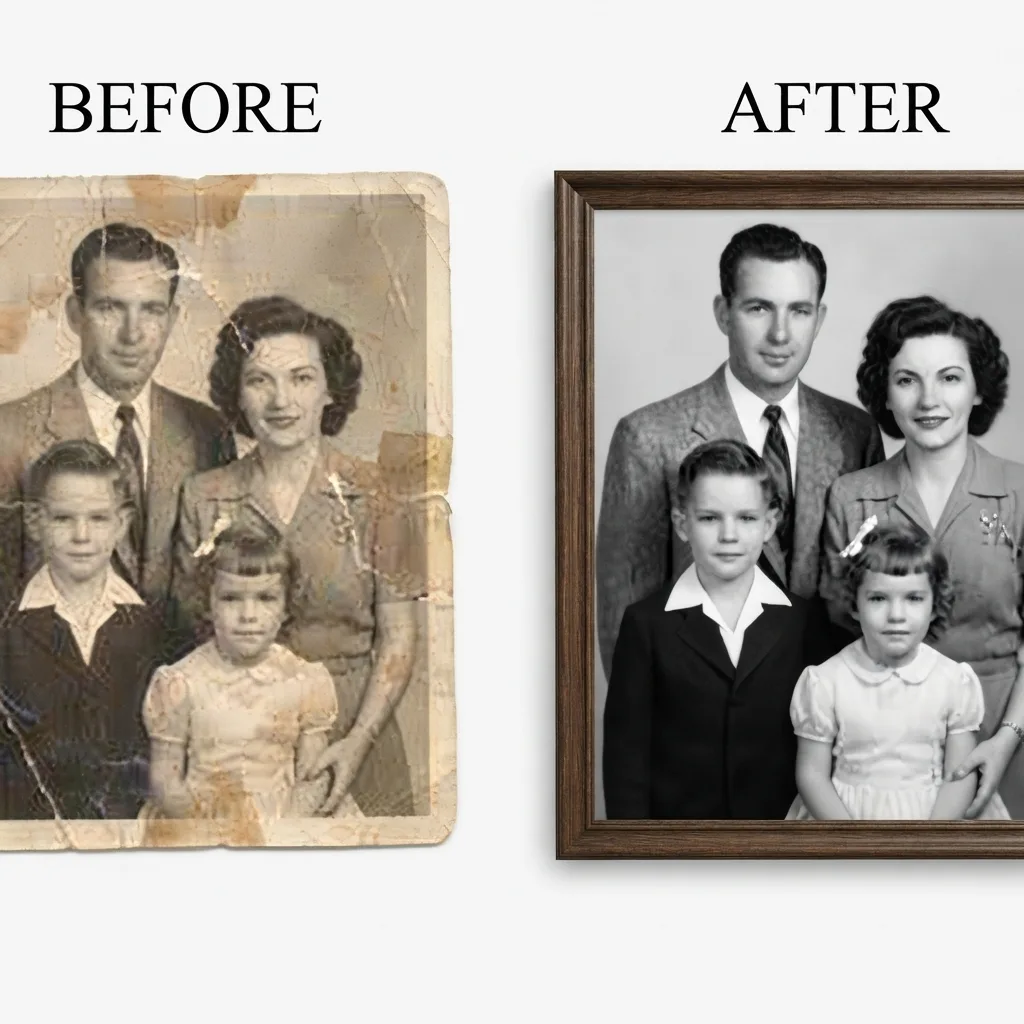
AI Restoration for Heavy Damage
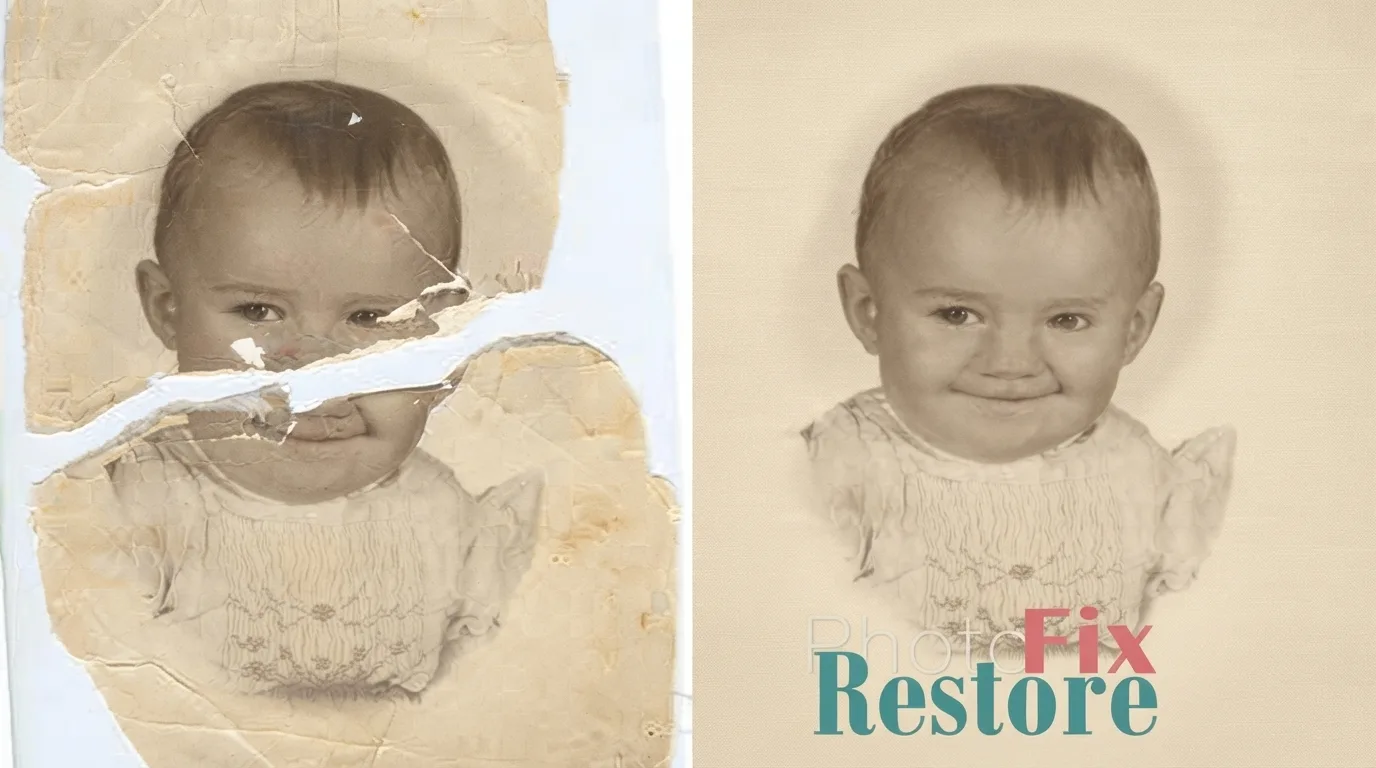
When a photo is heavily stained, mold-eaten, or partially stuck, manual repair can take hours. AI restoration tools do in seconds what used to take an afternoon — run them as a first pass, then zoom to 100% and clean up what they missed.
- Photoshop Photo Restoration Neural Filter — scratch and stain reduction plus face enhancement, all inside Photoshop.
- Topaz Photo AI — desktop, local processing, best detail preservation, no upload required.
- VanceAI / Hotpot.ai — fast browser-based fixes, free credits available.
- Remini — mobile, strongest for face recovery.
Two cautions: AI can erase real texture along with a stain, so always compare side by side with the scan. And AI changes a person’s identity if pushed too hard on a face. If great-grandmother suddenly looks like a stranger, the enhancement went too far. A comparison of best photo editing software covers these tools in more depth.
When to Hire a Conservator or Professional
Hire a professional conservator when: the photo is stuck to glass, it is a daguerreotype or glass plate, mold covers more than a small area, the emulsion is lifting or sliding, or it is a one-of-a-kind heirloom. Conservators have wet benches, freeze-drying equipment, and chemical treatments that cannot be replicated at home. For everything else — stains, fading, mold spots on a dry print — the digital workflow above will get you most of the way there, and outsource photo editing is a middle option if you have a stack of them.
5 Common Water-Damage Mistakes
- Using a hair dryer or heat. Heat cracks emulsion and curls paper permanently. Use airflow, not heat.
- Peeling stuck photos apart. Soak them; peeling tears the image off.
- Blotting the wet surface. Wet emulsion smudges. Drain and air-dry; never touch the face.
- Waiting too long to freeze. After 48 hours, mold starts. Freeze what you cannot dry.
- Scanning as JPEG with auto-fix on. Scan raw, at 600+ DPI, as TIFF.
Frequently Asked Questions
Can water-damaged photos be saved?
Yes, most can — if you act within 48 hours. Rinse gently, separate stuck prints by soaking, air-dry face-up with airflow, and freeze anything you cannot dry in time. Never use heat. Once dry, scan and restore digitally.
How do you separate photos stuck together from water?
Never peel them. Submerge the stuck stack in clean, cool water for 20–60 minutes (up to 48 hours for old paper), then gently work them apart underwater with a silicone spatula. If they resist, soak longer.
Should you freeze water-damaged photos?
Yes, if you cannot dry them within 48 hours. Freezing stops mold and chemical decay, buying weeks or months. Interleave with freezer paper, bag, and freeze. Do not freeze glass negatives, plates, or daguerreotypes.
Can you use a hair dryer on wet photos?
No. Heat causes the emulsion to crack, curl, and separate from the paper. Use room-temperature airflow — a fan, open windows, dehumidifier — and avoid direct sunlight.
How do you remove water stains from photos?
Once the print is dry and scanned, remove stains digitally with Clone Stamp and Healing Brush in Photoshop, sampling clean texture. Physical stain removal at home usually damages the print further.
How do you handle mold on photos?
Wear gloves and a mask, never brush dry mold (it spreads spores), rinse damp prints gently in cool water, and dry immediately with strong airflow. Dried mold stains are removed digitally after scanning.
What DPI should I scan water-damaged photos at?
600 DPI minimum, 1200 DPI for small or heavily damaged prints. Scan in color, turn off auto-fix, and save as TIFF.
Final Verdict
Water damage looks catastrophic, but most photos survive it if you resist the urge to rush. Rinse, soak apart, air-dry without heat, and freeze what you cannot handle in time. Once dry, the real restoration happens digitally — stains and mold spots are just pixels to a Clone Stamp, and AI handles the rest. Act fast, stay gentle, and that photo you thought was ruined will likely be hanging on the wall again within a week.