Why Are My Photos Blurry? 10 Causes Ranked — and How to Fix Each One
TL;DR: The Short Answer
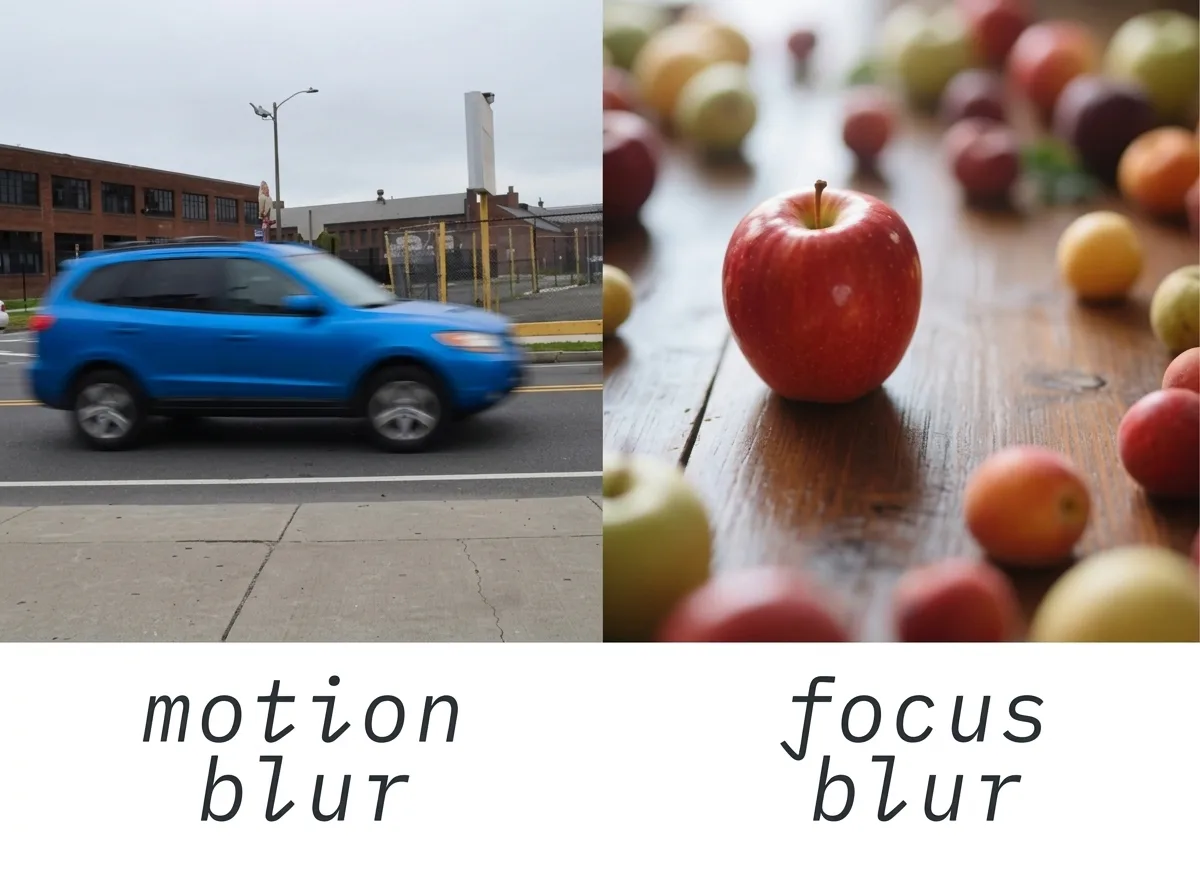
Blurry photos have one of two signatures, and telling them apart in 30 seconds points you straight to the fix. Zoom to 100% and look at fine detail — eyelashes, text, tree branches. If you see directional smearing or ghosting (everything trails in one direction), it’s motion: either your camera moved (camera shake, the #1 cause by far) or your subject moved. If you see uniform, even softness with no direction, it’s focus or optics: missed autofocus, depth of field too shallow, diffraction from a tiny aperture, or a lens shot wide open. A grainy speckle over everything means high ISO noise masquerading as blur. The single most common fix: raise your shutter speed to at least 1 over your focal length (1/200s at 200mm, 1/50s at 50mm — double it for crop sensors) and accept a higher ISO — a sharp noisy photo is always better than a clean blurry one. Missed focus has no fix in post — the detail was never captured; AI sharpening invents detail, it doesn’t recover it.
The 30-Second Self-Diagnosis
Before you change a single setting, identify which kind of blur you have:
| What you see at 100% zoom | Diagnosis | Fixable in post? |
|---|---|---|
| Directional streaks / ghosting across whole image | Camera shake | Partially (AI shake reduction) |
| Subject smeared, background sharp | Subject motion | No |
| Uniform softness, eyes not sharp | Missed focus | No (detail never captured) |
| Thin band sharp, rest soft | Depth of field too shallow | No |
| Everything soft equally, shot at f/16+ | Diffraction | Partially (sharpening) |
| Grainy / speckled, especially shadows | High ISO noise | Yes (AI denoise) |
| Overall low contrast, hazy | Dirty lens / UV filter | Partially (contrast) |
| Soft corners, shot at f/1.4–f/2 | Lens wide open | Partially |
| Blocky / pixelated when enlarged | Low resolution / upscale | Partially (AI upscale) |
| Looks fine on computer, blurry on Instagram | Social media compression | Preventable (pre-size) |
Cause #1: Camera Shake (The #1 Culprit)
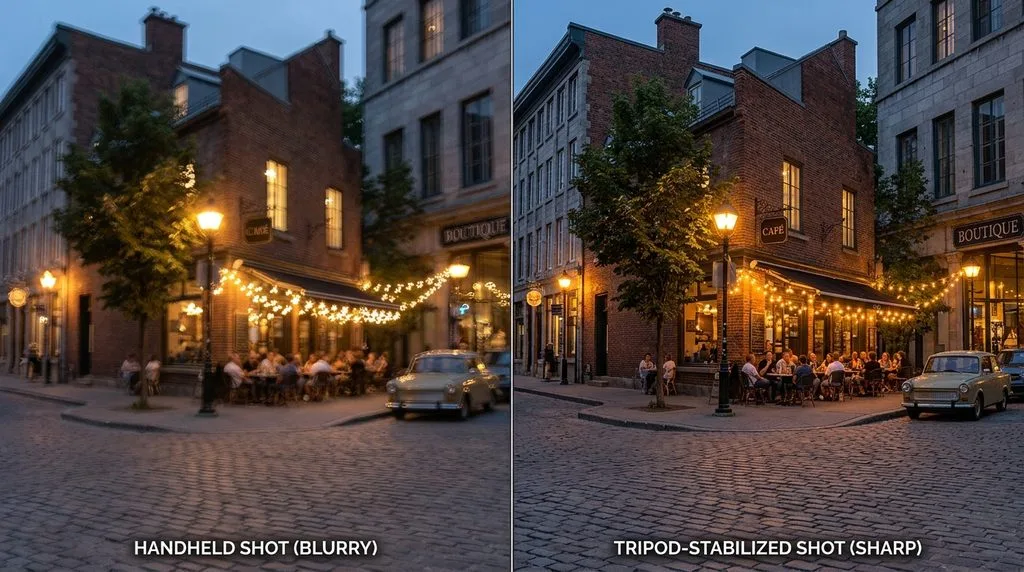
What it is: Your hands moved while the shutter was open. Even microscopic movement — a trembling finger, a deep exhale, jabbing the shutter button — smears the entire frame in one direction. It happens in low light because the camera slows the shutter to gather light, and it crosses the threshold where your hands become visible.
How to tell: Directional ghosting across the whole image at 100%. The background and subject are both equally smeared.
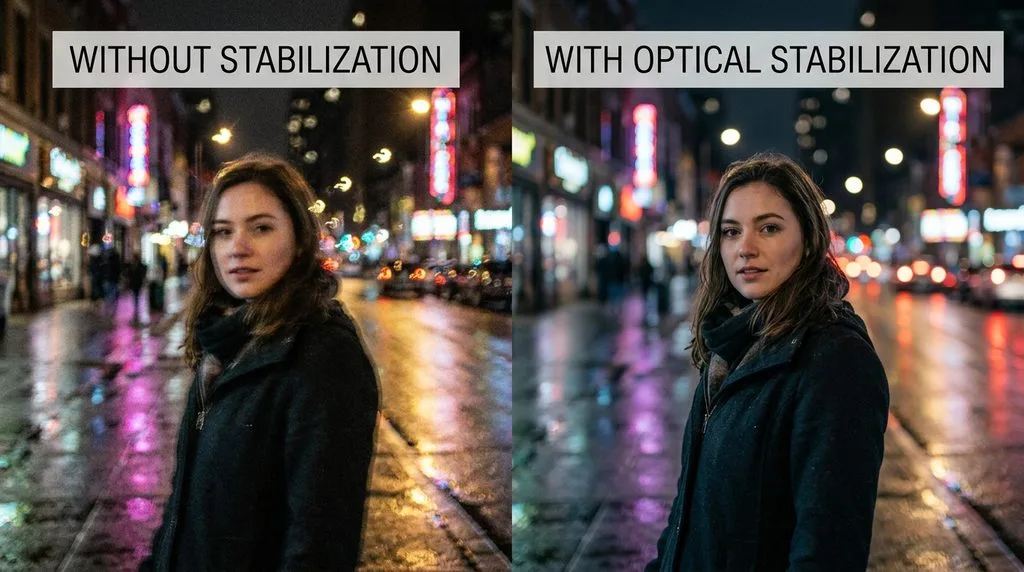
The fix — the reciprocal rule: Your shutter speed should be at least 1 ÷ focal length. At 50mm, shoot 1/50s or faster. At 200mm, 1/200s or faster. Double it for crop-sensor cameras (1.5×/1.6× crop magnifies shake). A guide to telephoto lenses explains why long focal lengths magnify every tremor. Image stabilization (IS/VR/OS) buys you 2–4 stops — with it, you can handhold down to ~1/15s at 50mm. Turn stabilization off on a tripod — it can hunt and cause blur. For low light, a $40–70 tripod eliminates shake entirely. A guide to compact cameras with viewfinders covers cameras that let you brace the camera against your face — steadier than holding it at arm’s length.
Cause #2: Subject Motion (Different From Shake)
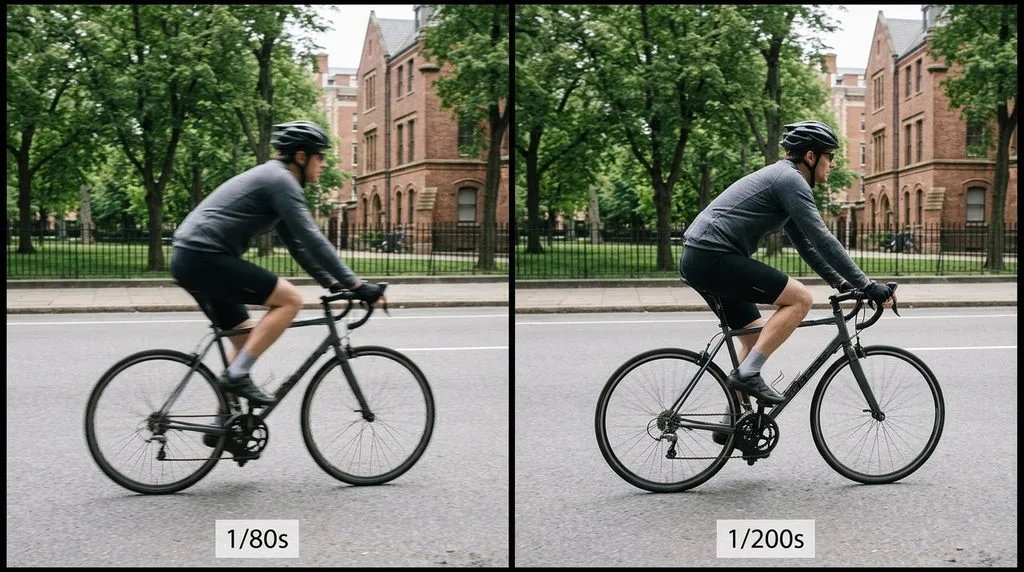
What it is: The camera was perfectly still, but the subject moved during the exposure. How to tell: the background is crisp; only the moving person/object is blurred. If the grass and horizon are sharp but your kid is smeared, your subject moved — not your camera.
The fix: Faster shutter. 1/500s freezes walking subjects; 1/1000s+ freezes athletes, birds, cars. Use continuous autofocus (AF-C / AI Servo) for moving subjects so focus tracks them. A guide to budget action cameras covers devices built for high-motion capture with fast electronic shutters.
Cause #3: Missed Focus (No Post-Processing Fix)
What it is: Autofocus locked onto the wrong thing — the wall behind the person, the tip of the nose instead of the eyes, or it hunted and never settled. How to tell: uniform softness with no directionality; something in front of or behind the subject is sharp.
The fix:
- Use single-point AF and place the point on the nearest eye for portraits. Wide/zone AF picks the closest thing, which is often not your subject.
- AF-S / One-Shot for still subjects; AF-C / AI Servo for moving subjects. Using AF-S on a moving child guarantees missed focus.
- Back-button focus separates focusing from the shutter button — focus with your thumb, fire with your index. No more refocusing when you recompose.
- Focus-recompose error: if you focus on the eyes then tilt the camera to reframe, at wide apertures the focus plane shifts and eyes go soft. Use a focus point that covers the eyes instead.
- Low light / low contrast (a white wall, fog, backlit subject) makes AF hunt — switch to manual focus and magnify live view.
Critical: Missed focus cannot be fixed. The detail was never recorded. AI sharpening invents plausible detail — verify it, especially on faces and text.
Cause #4: Depth of Field Too Shallow
What it is: At f/1.4, f/1.8, f/2 — popular for blurred backgrounds — only a razor-thin plane is sharp. One eye is sharp, the other isn’t. The tip of the nose is soft. Ears are mush.
The fix: Stop down to f/4–f/5.6 for portraits (both eyes sharp, background still blurred). f/8–f/11 for groups and landscapes. Use the depth-of-field preview button on your camera to see exactly what’s sharp. For macro and product work where you need front-to-back sharpness, focus-stack several shots at different focus distances rather than stopping to f/22.
Cause #5: Diffraction (The Small-Aperture Trap)
What it is: Every photographer learns “small aperture = everything sharp.” It’s true up to a point. Past roughly f/11 on most modern sensors, a physical effect called diffraction bends light around the aperture blades and softens the entire image — regardless of focus. By f/16, images are measurably softer than at f/8. By f/22, the softness is visible even in medium prints.
The fix: Your lens’s sharpest aperture is almost always f/4 to f/8 — 2–3 stops down from wide open. For deep scenes (landscapes, products), use focus stacking (blend multiple frames focused at different distances) instead of f/22. f/11 is the practical ceiling for maximum sharpness.
Cause #6: High ISO Noise Masquerading as Blur
What it is: At high ISOs (3200, 6400, 12800), digital noise — a grainy speckle — obscures fine detail. In-camera or software noise reduction then smooths away texture to clean the grain, leaving a soft, plastic look. How to tell: zoom in — you’ll see speckled grain, especially in shadows and solid-color areas like skies.
The fix: A guide to fixing grainy photos covers noise reduction in detail. Lightroom’s AI Denoise (2023+) recovers remarkable detail. But the real rule: a sharp noisy photo beats a clean blurry photo — every time. If the choice is ISO 6400 at 1/200s (sharp) vs ISO 800 at 1/30s (blurry), take 6400. Noise is fixable; blur is not.
Cause #7: Dirty Lens, Smudged Sensor, or a Cheap UV Filter
What it is: A fingerprint, sea spray, or a $5 UV filter on the front of your lens scatters light and lowers contrast. Everything looks slightly hazy and soft, like looking through a fogged window. How to tell: overall low contrast, softness that doesn’t correspond to any focus plane.
The fix: Clean the front element with a microfiber cloth in circular motions (breathe on it first if needed). Remove cheap UV filters — they’re the #1 unrecognized cause of soft images. If spots appear at small apertures (f/11, f/16) in the same place, your sensor has dust — get it cleaned professionally or use the sensor-cleaning mode.
Cause #8: Lens Shot Wide Open (or Just a Soft Lens)
What it is: Every lens is softest at its maximum aperture (f/1.4, f/2.8). Wide open, lens aberrations (coma, chromatic aberration, field curvature) reduce corner sharpness and contrast. Kit lenses and cheap zooms are noticeably soft at both extreme ends.
The fix: Stop down 2 stops (f/1.4 → f/2.8, f/2.8 → f/5.6) for the sharpest results. Test your own lens — shoot the same scene at f/2.8, f/4, f/5.6, f/8, f/11 and compare at 100%. You’ll find your personal sweet spot.
Cause #9: Low Resolution / Over-Upscaling
What it is: A 640×480 screenshot or a heavily compressed JPG stretched to fill a screen. There simply aren’t enough pixels. Blocky edges, visible pixel squares, mush.
The fix: You can’t create detail that was never captured. AI upscalers (Topaz, Gigapixel) invent plausible detail — good for textures and landscapes, risky for faces and text. Start with the highest-resolution source you can get. Screenshots: save as PNG, not JPG.
Cause #10: Social Media Compression (Looks Fine on Computer, Blurry Online)
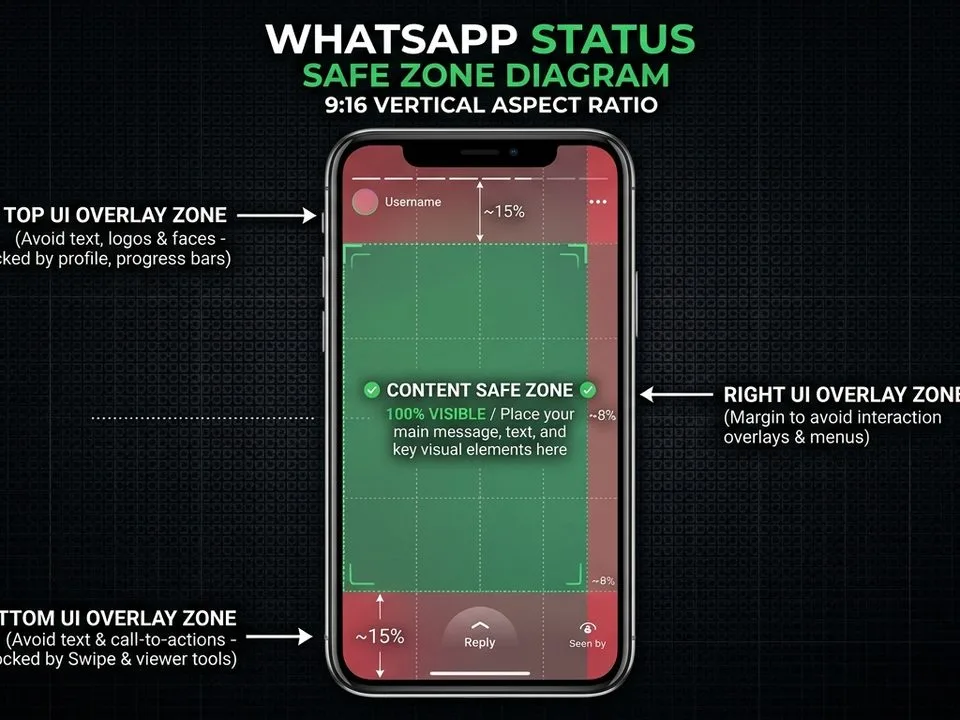
What it is: Instagram, Facebook, WhatsApp, X — every platform re-compresses every upload to ~70–85% JPEG. If you upload a 12MB 4096px photo, the platform downscales it and re-compresses aggressively. If you upload HEIC (iPhone default), it converts to JPEG — another re-encode. Stack two or three re-encodes and you get blocky, muddy softness.
The fix: Pre-size to the platform’s exact display dimensions (Instagram 1080px wide, X 1600×900, etc.), export at JPEG quality 80–85, sRGB, so the platform has little work to do. Never upload WebP/HEIC — convert to JPG first. For WhatsApp, use the HD button or send as Document for original quality.
Post-Processing: Sharpening That Actually Helps
If the photo is slightly soft (not motion-blurred, not missed-focus), sharpening can rescue it:
- Unsharp Mask (Photoshop/GIMP): Amount 50–150%, Radius 0.3–2.0px (smaller for high-res, larger for web), Threshold 0–10. Threshold protects flat areas (skin, sky) from noise.
- High Pass filter: duplicate layer, Filter > Other > High Pass (radius ~1–3px), blend mode Linear Light or Overlay. Non-destructive edge sharpening.
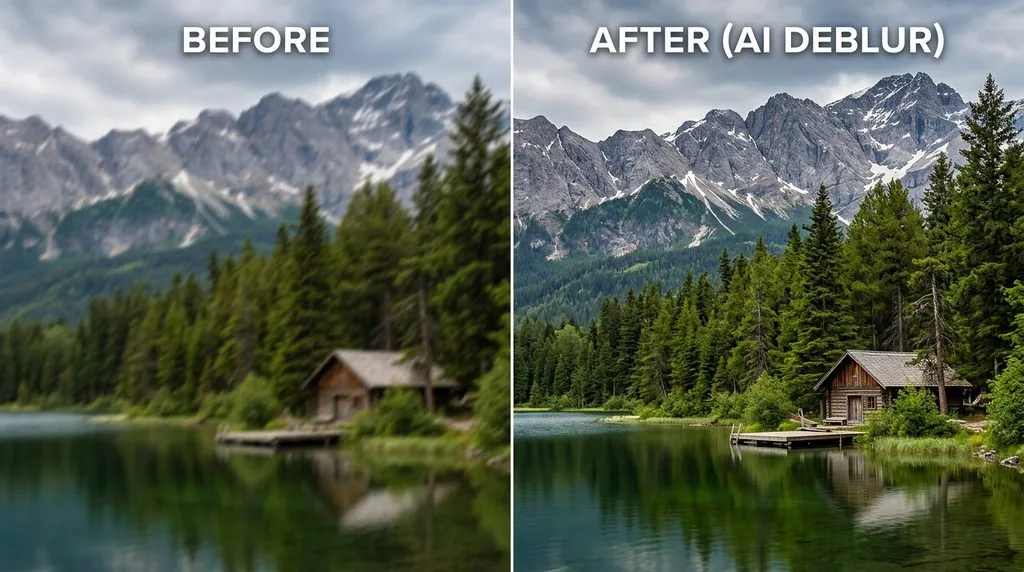
- AI sharpening (Topaz Photo AI, Adobe Shake Reduction): separate models for motion blur, focus blur, and general softness. Best for slight camera shake. Verify faces — AI invents detail.
- Rule: sharpen after resizing, last in the workflow, and judge at 100% view. Too much sharpening creates white halos around edges — worse than softness.
5 Habits That Guarantee Sharp Photos
- Check shutter speed before firing. If it’s below 1/focal length, raise ISO or open aperture.
- Focus on the nearest eye. Single-point AF, always.
- Shoot at f/5.6–f/8 — your lens’s sweet spot. Avoid f/16+.
- Keep elbows in, brace the camera, squeeze (don’t jab) the shutter.
- Review at 100% on the back screen — a 3-inch LCD hides blur. Zoom in to check eyes before you leave the shot.
Frequently Asked Questions
Why are my photos blurry even with a fast shutter speed?
If shutter speed is fast (1/200s+) and it’s still blurry, it’s almost always missed focus or depth of field too shallow — not motion. Check that autofocus locked on the subject (not the background), and stop down to f/4–f/5.6. A dirty lens or cheap UV filter can also cause overall softness.
Can you fix a blurry photo?
Sometimes. Slight camera shake and general softness respond to AI sharpening (Topaz, Adobe Shake Reduction) and Unsharp Mask. Missed focus and severe motion blur cannot be truly fixed — the detail was never captured. AI tools invent plausible detail, which is risky for faces and text. If the shot matters, reshoot.
What shutter speed do I need to avoid blur?
The reciprocal rule: shutter speed ≥ 1 ÷ focal length. At 50mm, 1/50s minimum; at 200mm, 1/200s. Double it for crop-sensor cameras (1.5×/1.6× crop). For moving subjects, use 1/500s (walking) or 1/1000s+ (sports, birds). Image stabilization lets you handhold 2–4 stops slower.
Why are my iPhone/phone photos blurry?
Usually one of three things: low light (the phone uses a slow shutter and high ISO), motion (tapped shutter while moving), or a smudged lens (phone lenses get fingerprints constantly — wipe with your shirt). Clean the lens, tap to focus on the subject, and hold still for a half-second after tapping.
Does high ISO make photos blurry?
Not directly — high ISO creates noise (grain), which can look like softness, and noise reduction smooths detail. But the bigger risk is that low ISO forces a slow shutter, which causes real blur. A sharp noisy photo is always fixable; a clean blurry one is not. Raise ISO to keep shutter speed up.
Why are my photos sharp on the camera but blurry on the computer?
Because the camera’s 3-inch LCD is too small to reveal blur. Always zoom to 100% (magnify button) on the back of the camera to check critical focus — especially eyes. What looks sharp at 3 inches often reveals missed focus at 24 inches.
Why do photos look blurry on Instagram/Facebook?
Social platforms re-compress every upload. If you upload a large 4096px photo or an HEIC file (iPhone default), the platform downscales and re-encodes it — sometimes twice. Pre-size to exact platform dimensions (Instagram 1080px wide), export JPEG quality 80–85 in sRGB, and convert HEIC to JPG before uploading.
What is the sharpest aperture on my lens?
Almost always f/4 to f/8 — about 2–3 stops down from the maximum aperture. Wide open (f/1.4, f/2.8) lenses suffer from aberrations; past f/11, diffraction softens everything. Test your own lens by shooting the same scene at every aperture and comparing at 100%.
Final Verdict
Blurry photos are almost always a shutter-speed problem first, a focus problem second, and an optics problem third. Memorize the reciprocal rule (1/focal length, doubled for crop sensors), focus on the nearest eye with single-point AF, shoot at f/4–f/8 (never f/16+ for maximum sharpness), and accept higher ISO rather than slower shutter. If it’s still soft, clean your lens and remove cheap UV filters. Diagnose with the 30-second test — directional smear = motion, uniform softness = focus/optics — and you’ll never waste another shoot guessing.