How to Remove Objects from Photos: Photoshop & AI (2026 Guide)
TL;DR: The Short Answer
You remove an object from a photo by selecting it, then filling the gap with pixels that match the surrounding background — and the right tool depends on the object’s size and what sits behind it. Small objects (a spot, a wire, a blemish) on simple texture: Spot Healing Brush, one click. Medium objects (a sign, a stranger, a trash can) on natural backgrounds (grass, sky, walls): Content-Aware Fill or the Remove Tool — Photoshop’s AI fills the gap in seconds. Complex objects (a person, a car, overlapping subjects): Generative Fill — select, leave the prompt empty, click Generate, pick the best of three variations. Precision work (skin, architectural lines, reflections, repeating patterns): Clone Stamp at low opacity, because AI sometimes invents the wrong brick orientation or a fake reflection. Always work on a duplicate layer, expand the selection by 5–10 pixels to catch shadows and edges, and check at 100% zoom.
First: Match the Tool to the Object and Background
However, the biggest mistake in object removal is reaching for the most powerful tool every time. For example, Generative Fill on a tiny dust spot is overkill; Spot Healing on a person in front of a brick wall leaves a smear. Instead, choose the tool based on two factors: how big the object is, and what kind of background it sits on.
| Object size | Background type | Best tool | Time |
|---|---|---|---|
| Tiny (spot, dust, wire) | Any | Spot Healing Brush | 2 seconds |
| Small (blemish, bird, cup) | Simple/soft | Healing Brush + Clone Stamp | 30 seconds |
| Medium (sign, stranger, pole) | Natural (grass, sky, water) | Content-Aware Fill / Remove Tool | 1 minute |
| Medium-large (person, car, furniture) | Complex (patterns, lines) | Generative Fill (3 variations) | 2 minutes |
| Large / overlapping (group, building) | Any complex | Generative Fill + manual Clone Stamp touch-up | 5–10 minutes |
| Precision (skin, jewelry, reflections) | Any | Clone Stamp, 30–50% opacity, multiple passes | 10+ minutes |
The core principle: AI fills invent content; clone tools copy existing content. When the background is unique and real (a face, a specific reflection, a hand-painted wall), copying from elsewhere in the image beats inventing. When the background is generic (sky, grass, water), AI invents it perfectly. A guide to AI upscaler tools covers the same AI-vs-manual tradeoff if you want to go deeper.
Method 1: Spot Healing & Healing Brush — Small Objects, One Click
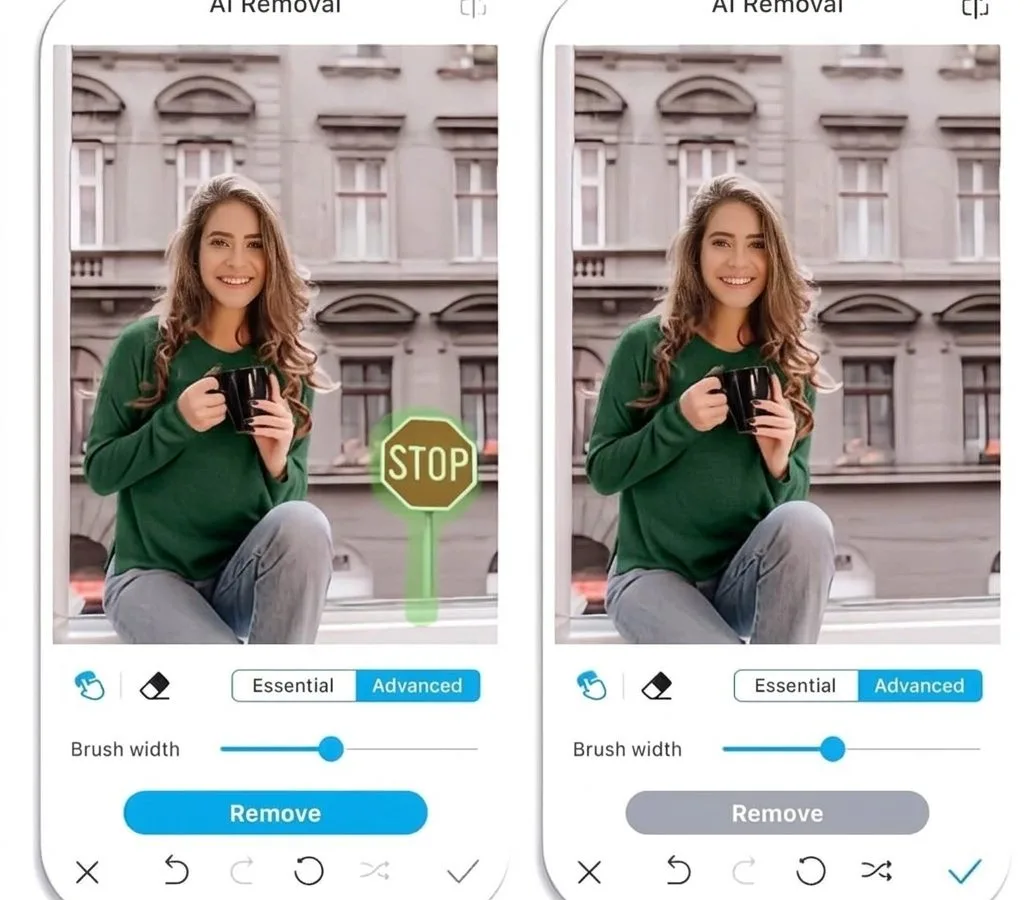
For anything smaller than your thumbnail — a dust spot, a stray hair, a power line, a bird in the sky — the Spot Healing Brush is all you need.
- Duplicate the layer (Ctrl/Cmd+J). Never work on the original.
- Select the Spot Healing Brush (J). Check Content-Aware in the options bar.
- Brush slightly larger than the object. Click once, or drag along a wire. Photoshop samples surrounding texture and blends it in.
- For larger small objects, switch to the Healing Brush (same J, cycle through): Alt-click a clean area to sample, then paint over the object. This gives you control over the source texture — essential when Spot Healing picks the wrong texture.
Similarly, For wires and thin lines, use a brush just wider than the wire and drag along its length. A single pass usually removes it entirely.
Method 2: Content-Aware Fill — Medium Objects on Natural Backgrounds
First, Content-Aware Fill analyzes the pixels around your selection and fills the gap with synthesized texture. It works best on natural, non-repeating backgrounds — grass, sky, water, foliage, sand.
- Select the object. Use the Object Selection Tool (W) — click the object and Photoshop auto-outlines it. Or use the Lasso Tool (L) for a freehand selection.
- Expand the selection by 5–10 pixels: Select > Modify > Expand > 8px. This catches the object’s shadow and edge halo, which a tight selection leaves behind.
- Feather 2–5 pixels: Select > Modify > Feather. This softens the edge so the fill blends invisibly.
- Go to Edit > Content-Aware Fill. A window opens with a preview. Use the Sampling Brush (Subtract mode) to paint over areas you do NOT want sampled — another person’s face, a logo, a window.
- Set Output to New Layer, click OK. The object disappears on a separate layer, so you can mask or lower opacity if needed.
Adobe’s official Content-Aware Fill guide confirms the same workflow and the Subtract-mode sampling tip.
Method 3: The Remove Tool & Generative Fill — Complex Objects, AI Does the Work
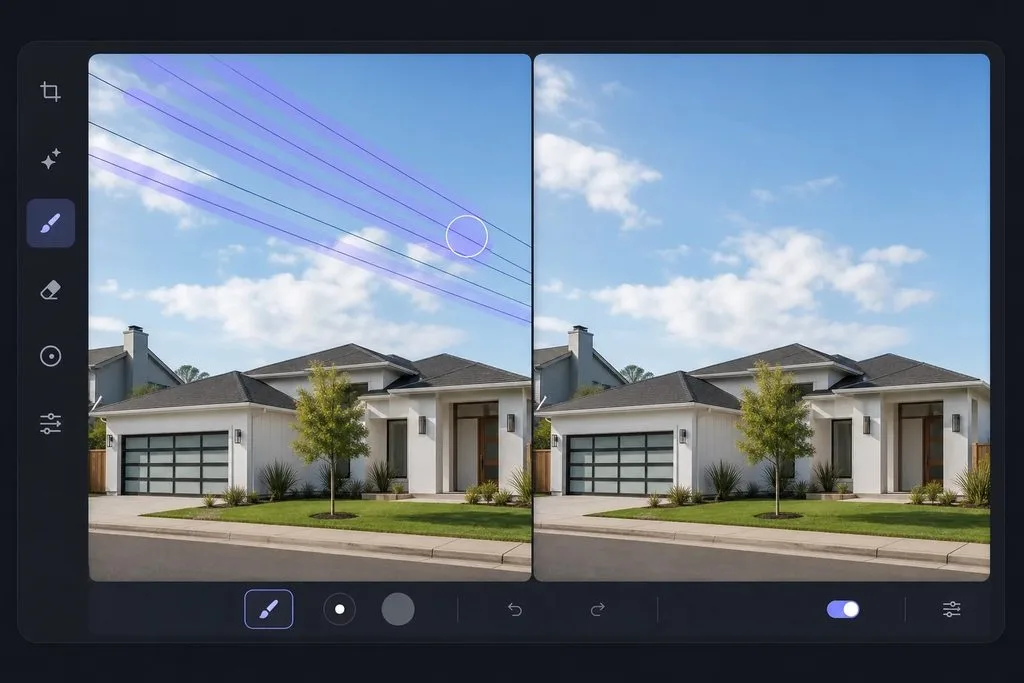
Photoshop’s Remove Tool (2023+, grouped with Spot Healing under J) and Generative Fill (powered by Firefly) handle the hard cases — people, cars, furniture, anything overlapping.
Remove Tool (brush-based, fastest):
- Select the Remove Tool (press J, cycle until it appears).
- Paint over the object. That’s it — Photoshop runs AI inpainting in the background and replaces the painted area.
- For large objects, paint in sections rather than one big stroke — smaller areas give cleaner results.
Generative Fill (most powerful, 3 variations):
- Select the object with Object Selection or Lasso. Expand 5–10px, feather 2–5px.
- In the Contextual Task Bar that appears, click Generative Fill.
- Leave the prompt box empty for pure removal. (If you type “remove car,” Photoshop sometimes tries to put a car there — empty prompt = fill with background.)
- Click Generate. Photoshop returns three variations in the Properties panel. Cycle through them — Variation 2 is often the cleanest, but check all three.
- Click the variation you want. It lands on a new Generative Layer.
- Add a black layer mask and paint white to restore any original edges the AI blurred — hair, fingers, fence lines. This final mask step is what separates a pro removal from an obvious one.
A guide to removing a specific color covers selection and masking techniques that pair well with object removal.
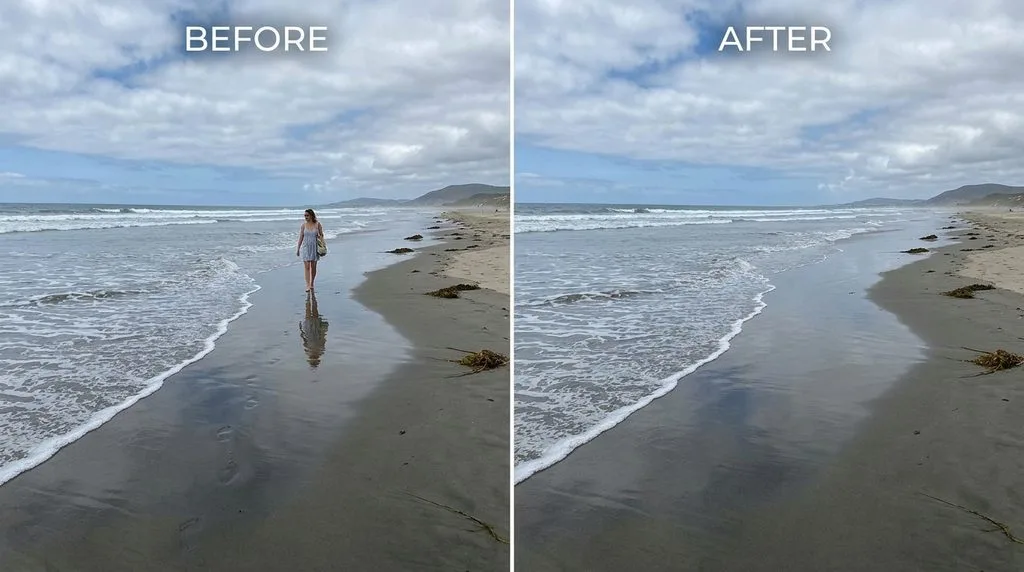
Method 4: Clone Stamp — When AI Invents the Wrong Thing
AI fills are statistical guesses. When the background is unique — a brick wall where the pattern must line up, a reflection in glass, skin next to the object, a repeating wallpaper — AI often gets it wrong. The Clone Stamp never invents; it copies exactly.
- Select the Clone Stamp Tool (S). Set hardness to 0–30% (soft edge), opacity 30–50%.
- Alt-click a clean area next to the object to set the source point. Match the texture and lighting direction.
- Paint over the object in short strokes. Re-sample (Alt-click) frequently as you move, so you don’t repeat a telltale pattern.
- Use multiple passes at low opacity rather than one heavy pass — it blends invisibly.
- For repeating patterns (brick, tile, fence), sample from a point that continues the pattern’s line. Zoom to 100% and align the source carefully.
When AI removal leaves a smudge or a wrong-pattern patch, Clone Stamp is the cleanup tool that fixes it. Use both: AI for the big area, Clone Stamp for the last 5%. A solid photo editing guide covers Clone Stamp and layer workflows in depth.
Method 5: Free & Online Tools — No Photoshop Needed
If you don’t have Photoshop, these tools handle most removals in a browser or on a phone:
| Tool | Platform | How it works | Best for |
|---|---|---|---|
| cleanup.pictures | Web (browser) | Paint over object, AI fills instantly | Quick one-off removals, free |
| Google Photos Magic Eraser | Android/iOS/Web | Tap object, AI removes + can camouflage | Google One subscribers, phone |
| Snapseed (Healing) | Android/iOS | Brush over object, healing algorithm | Free, precise, no account |
| YouCam / Fotor / Cutout.pro | Web + mobile | AI object remover, one-click | Portraits and people removal |
| Photoshop Express | Windows/mobile | Healing + spot removal | Adobe ecosystem, free tier |
For ChatGPT-based editing workflows, a guide to ChatGPT photo editing prompts covers how to describe removals precisely to AI tools.
The Pro Tips That Make Removals Invisible
Anyone can make an object disappear. Making it look like it was never there takes these extra steps:
- Remove the shadow too. A removed lamp post with its shadow still on the ground is the #1 giveaway. Select the shadow separately and fill it too.
- Expand the selection 5–10px. A tight selection leaves a faint halo — the object’s edge contrast. Expanding catches it.
- Feather 2–5px. A hard-edged fill leaves a visible seam. Feathering blends it.
- Work on a duplicate or new layer. Never destroy the original. If the AI fill is wrong, you still have the original underneath.
- Check at 100% zoom, then step back. Halos and seams invisible at thumbnail size jump out at 100%. Then zoom out to 50% — a removal that looks fine close-up sometimes shows a tonal mismatch from a distance.
- Match lighting and grain. If you shot at high ISO, the AI-filled area may be smoother than the surrounding grain. Add a tiny bit of noise (Filter > Noise > Add Noise, 1–2%) to match.
- Remove in pieces. For large objects, remove half, let the fill settle, then remove the other half. The AI has more context to work with.
5 Common Object-Removal Mistakes
- Tight selection, no feather. Leaves a halo and a visible seam. Expand 5–10px and feather 2–5px.
- Forgetting the shadow. The object is gone but its shadow remains — the single most obvious giveaway.
- Using AI on unique backgrounds. Brick walls, reflections, skin — AI invents the wrong pattern. Use Clone Stamp.
- Typing a prompt in Generative Fill for removal. Empty prompt = pure background fill. Typing “remove X” sometimes makes Photoshop try to add X.
- Not checking at 100%. Every removal looks clean at thumbnail size. Zoom in before you call it done.
Frequently Asked Questions
How do I remove an object from a photo for free?
Use cleanup.pictures in a browser — paint over the object and it disappears instantly, no account needed. On a phone, Snapseed’s Healing tool is free and precise. Google Photos Magic Eraser works for Google One subscribers.
What is the best tool to remove objects in Photoshop?
For small objects: Spot Healing Brush. For medium objects on natural backgrounds: Content-Aware Fill or the Remove Tool. For complex objects (people, cars): Generative Fill with an empty prompt, pick the best of 3 variations. For precision: Clone Stamp at 30–50% opacity.
Does Generative Fill really remove objects?
Yes. Select the object, click Generative Fill, leave the prompt empty, and click Generate. Photoshop returns three AI-filled variations. It works best on generic backgrounds (sky, grass, walls). On unique backgrounds (reflections, faces, repeating patterns), it sometimes invents wrong detail — use Clone Stamp to touch up.
How do I remove a person from a photo?
Select the person with the Object Selection Tool (W), expand the selection 5–10px, feather 2–5px, then use Generative Fill with an empty prompt. Pick the cleanest of three variations, then add a mask and paint back any original edges (hair, fingers) the AI blurred. Also remove the person’s shadow.
Can you remove objects from a photo without Photoshop?
Yes. cleanup.pictures, Fotor, Cutout.pro, and YouCam all work in a browser. On a phone, Snapseed (free), Google Photos Magic Eraser, and YouCam Perfect handle most removals. Results are best on simple backgrounds.
Why does my object removal leave a smudge or halo?
Usually a selection that was too tight or not feathered. Expand the selection by 5–10 pixels (Select > Modify > Expand) and feather 2–5 pixels before filling. If the smudge remains, go over it with the Clone Stamp at low opacity.
How do I remove something from a photo with a complex background?
Use Generative Fill first to handle the bulk, then zoom to 100% and touch up with the Clone Stamp — sampling real texture from nearby areas. For repeating patterns (brick, tile), align the Clone Stamp source to continue the pattern’s line. Never rely on AI alone for complex backgrounds.
Final Verdict
Object removal used to be a pro skill that took hours; now it takes minutes — but the last 5% still separates an invisible removal from an obvious one. Pick the tool that matches the object and background, expand and feather the selection, remove the shadow too, work on a new layer, and check at 100%. When AI invents the wrong brick or a fake reflection, the Clone Stamp is the safety net that fixes it. Do that, and the object will be gone so completely nobody will ever know it was there.