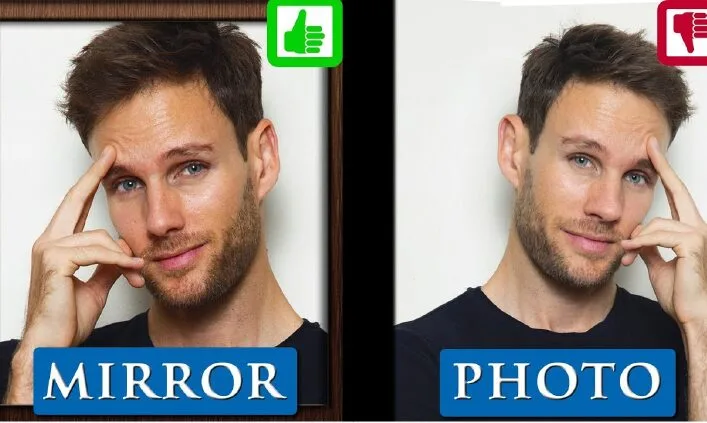
Quick Answer
You look worse in photos than in real life because of ten combined factors: the mere-exposure effect that biases you toward your mirror image, wide-angle lens distortion on selfies, unflattering focal length compression, harsh overhead lighting, awkward camera angles, forced expressions, poor posture, distracting backgrounds, wardrobe choices, and the frozen-frame effect that captures micro-flaws your eyes never see in motion. Every one of these has a proven fix, and this guide walks through each of them step by step.
Introduction: The Camera Sees You Differently — Here’s Why It Matters
You glance in the bathroom mirror before heading out. Your hair sits right, your smile looks warm, and your confidence feels intact. An hour later, a friend snaps a candid photo, and suddenly a stranger stares back. The jawline looks off, the nose seems bigger, and the smile appears frozen. If this feels painfully familiar, welcome to one of the most universal frustrations of the smartphone era.
You are not suddenly less attractive when a shutter clicks. Psychology, optics, and simple photography habits all conspire to widen the gap between the face you know and the face your camera captures. Researchers have studied this phenomenon for more than fifty years, and photographers have engineered practical fixes for every single cause.
This guide unpacks ten evidence-backed reasons behind the “photo vs reality” gap and pairs each one with a photographer-tested solution you can use today. Whether you dread LinkedIn headshots, avoid group photos, or brace yourself every wedding season, the strategies below will change how you show up on camera.
Quick Fix Now: Already sitting on photos you almost love? Our expert team at Photofixal photo retouching can polish them into images you’re proud to share in minutes.
The Psychology: Why Your Brain Rejects Your Own Photos
Before we blame the camera, we need to talk about your brain. Two well-documented psychological effects distort how you judge every image of yourself, and understanding them removes half the sting immediately.
Reason 1: The Mere-Exposure Effect Makes Mirrors Feel “Right”
Social psychologist Robert Zajonc first documented the mere-exposure effect in 1968. In plain terms, humans prefer stimuli they encounter frequently. Because you spend years staring at your reflection, your brain treats the mirrored version as the “real” you.
A landmark 1977 study by Mita, Dermer, and Knight tested this directly. Researchers showed participants both mirror-image and true-image prints of their own faces. Participants overwhelmingly preferred the mirror-image versions, while their close friends preferred the true-image versions. The takeaway: your friends see the “real” you every day, and they love how you look. You just haven’t caught up yet.
How to fix it:
- Turn off your camera’s mirror-flip setting so previews match the final saved file.
- Set an un-flipped selfie of yourself as your phone wallpaper for two weeks.
- Scroll through past photos in short, quick sessions rather than long, critical stares.
- Consider owning a true mirror (a non-reversing mirror) to slowly familiarize yourself with your unflipped face.
Reason 2: You’re Comparing a Frozen Frame to a Moving Memory
Real-life recognition never depends on a single millisecond. Friends and family see you laughing, gesturing, blinking, and shifting expression across thousands of tiny frames per second. A photo, meanwhile, freezes 1/125th of a second — often mid-blink or mid-syllable.
Your brain evolved to detect faces in motion, not on paper. When motion vanishes, every asymmetry suddenly screams for attention. Psychologists sometimes call this the “frozen face” bias, and it affects everyone equally — even professional models.
How to fix it:
- Ask your photographer to shoot in burst mode so you get 8–15 frames to choose from.
- Pick photos where your eyes look engaged rather than perfectly wide open.
- Judge each image at arm’s length, not zoomed in at 200%.
- Compare your photos to those of others taken in the same lighting, not to your mirror memory.
The Optics: How Camera Hardware Rewrites Your Face
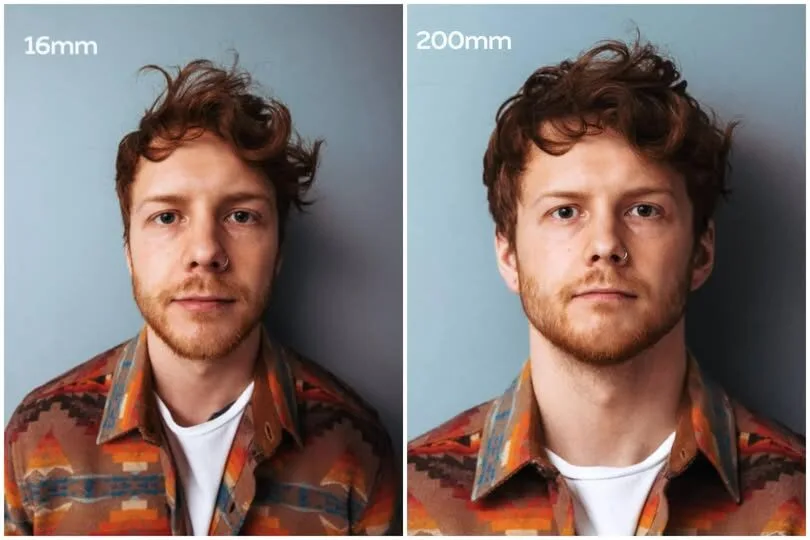
Hardware plays a bigger role than most people realize. The gear you use — especially your phone’s front camera — literally reshapes your face through the laws of optics. Understanding a few basics about camera parts instantly explains why some photos look “off” even when everything else feels perfect.
Reason 3: Wide-Angle Lens Distortion Enlarges Everything Close to the Lens
Nearly every smartphone selfie camera uses a wide-angle lens with a focal length roughly equivalent to 22–28mm. Whatever you push closest to that lens gets magnified. Hold the phone at arm’s length in front of your face, and your nose sits closest — so your nose looks bigger, your forehead balloons, and your ears retreat into the background.
Professional portrait photographers avoid this by shooting at 50mm to 135mm. According to Digital Photography School, an 85mm lens is widely considered the gold standard for flattering headshots because it compresses features naturally without stretching them.
How to fix it:
- Switch to your phone’s rear camera with the 2x or 3x telephoto lens whenever possible.
- Stand further away and crop in afterward, rather than pushing the lens close to your face.
- For serious headshots, ask a photographer to use an 85mm or a 70–200mm zoom.
- Turn on “portrait mode” only for headshots at a proper distance — not for extreme close-ups.
Reason 4: Focal Length Compression Changes Your Facial Proportions
Even without severe distortion, different focal lengths change how your face’s depth reads on a 2D image. Shorter lenses stretch features away from center. Longer lenses “flatten” the face, bringing cheekbones, nose, and ears into a more balanced plane. This is why professional headshot photographers deliberately choose longer glass — it preserves the proportions humans see face-to-face.
If you own a mirrorless or DSLR camera, upgrading your lens matters more than upgrading your body. Compare your current setup against options in our mirrorless cameras roundup, which lists bodies that pair beautifully with 50mm and 85mm primes.
How to fix it:
- Shoot portraits at 50mm minimum on full-frame sensors (roughly 35mm on APS-C).
- Step back and zoom in — never walk closer with a wide lens.
- Extend your arm fully for selfies and angle the phone slightly downward.
- Use two hands to hold the phone steady, keeping your elbows loose to avoid a hunched shoulder line.
Struggling with distorted product shots or portraits? Our precise clipping path service isolates your subject cleanly for a natural, professional finish every time.
The Environment: Light, Angles, and Backgrounds Everyone Ignores
Even a supermodel looks rough under fluorescent office lights. Environment often outranks genetics when it comes to how you photograph on any given day.
Reason 5: Harsh, Direct, or Overhead Lighting Sculpts Ugly Shadows
Overhead office fluorescents, midday sun, and on-camera flash all share one flaw: they blast light directly downward or straight at your face. Direct overhead light drops shadows into your eye sockets (“raccoon eyes”), deepens smile lines, and highlights every pore. Straight-on flash flattens everything and washes out skin tone.
Soft, diffused, angled light does the opposite. It wraps around your face, minimizes texture, and adds a natural glow — the same reason golden hour portraits look so cinematic.
How to fix it:
- Face a window (not backlit by it) for soft, indirect light.
- Shoot during golden hour — the hour after sunrise or before sunset — for warm, low-angle light.
- Avoid direct on-camera flash. Bounce it off a ceiling or wall instead.
- Indoors, place a lamp with a shade at eye level, roughly 45 degrees to one side.
- Cloudy days are your friend; overcast skies act like a giant softbox.
Reason 6: The Camera Sits at the Wrong Height for Your Face
Camera height changes your face’s geometry dramatically. A low angle exaggerates your jaw, nostrils, and any hint of a double chin. An extreme high angle shrinks your forehead and widens your eyes but can feel unnatural. The sweet spot for most faces sits slightly above eye level — roughly at eyebrow height.
How to fix it:
- Raise the camera to eyebrow level for the most balanced results.
- Push your forehead slightly toward the lens (photographers call this the “turtle”) to define your jawline.
- For group shots, ask the photographer to stand on a low stool or shoot from mid-forehead height.
- Never let someone shoot up at you from waist height — it’s the most unflattering angle in existence.
Reason 7: The Background Is Fighting Your Face for Attention
A cluttered background steals visual weight from your face. Bright colors, sharp lines, and busy patterns behind you make your skin look duller by contrast. Cameras also meter exposure based on the whole scene, so a bright window behind you can leave your face underexposed and murky.
How to fix it:
- Pick clean, blurred, or single-color backgrounds.
- Step at least 6 feet away from the wall behind you to create natural depth-of-field blur.
- Watch for accidental “background growth” — poles, plants, or lamps sprouting from your head.
- For product-style clean shots, a professional background removal service can strip distractions after the fact.
Want a spotless, distraction-free portrait background? Try our fast, affordable background removal service and watch your subject pop.
The Human Factor: Expression, Posture, and Wardrobe
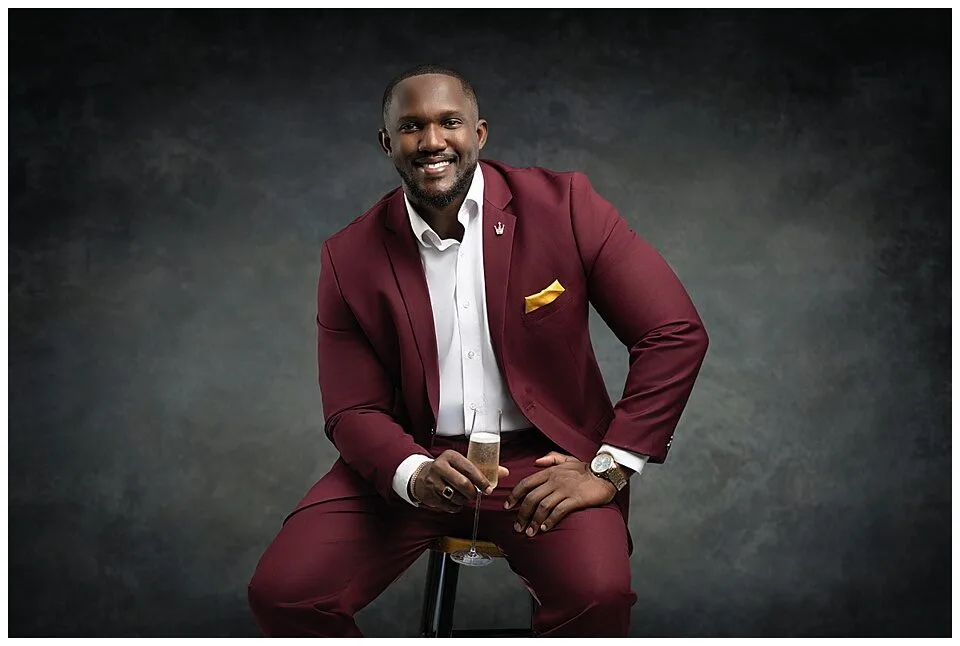
Even with perfect lighting and lenses, your body language decides half the outcome. These reasons are also the most fixable, and they cost nothing to correct.
Reason 8: You’re Holding a Frozen Smile That Reads as Fake
The moment someone says “cheese,” most people lock their face into a rigid grin that muscles cannot hold naturally for more than two seconds. The result is forced eyes, tight cheeks, and a stiff mouth. Genuine smiles activate the orbicularis oculi muscle around the eyes — the hallmark of the Duchenne smile, a movement you cannot fake by pushing your lips alone.
How to fix it:
- Think of a genuinely funny memory just before the shutter clicks.
- Breathe out through slightly parted lips instead of clamping down on a grin.
- Try the “half-smile-then-full” trick: start soft, then let it grow as the camera fires.
- Ask the photographer to chat between shots; candid conversation beats posed rigidity every time.
- Slightly close your eyes (“smize”) for a warmer, more relaxed look.
Reason 9: Bad Posture and Static Poses Kill Confidence
Slouched shoulders, stiff arms, and squared-off hips make even the most attractive person look nervous. Photographers train models to introduce tension and asymmetry — bent elbows, shifted weight, an angled torso — because the human eye reads asymmetry as dynamic and confident. Modern posing guides like the NPR feature on confident posing all repeat the same core rules.
How to fix it:
- Angle your body about 30–45 degrees to the camera rather than facing it straight-on.
- Shift your weight to your back foot.
- Bend at least one joint (elbow, knee, or wrist) to break stiffness.
- Elongate your neck with the “turtle” technique — forehead slightly forward and slightly down.
- Roll your shoulders back and drop them away from your ears.
- Keep your hands doing something: touching your hair, holding a jacket, resting in a pocket.
Reason 10: Wardrobe Choices Are Sabotaging Your Skin Tone
Busy patterns pull the camera’s autofocus away from your face. Bright neons cast unflattering color reflections onto your skin. Baggy or wrinkled clothing adds visual weight where you do not want it. Your wardrobe communicates as loudly as your smile.
How to fix it:
- Choose solid, mid-tone colors: navy, olive, burgundy, dusty rose, forest green, or cream.
- Avoid tight logos, thin stripes, and small checks — they create moiré patterns on digital sensors, showing up as rainbow ripples.
- Make sure your outfit fits close but not tight; clean drape photographs better than clingy fabric.
- Match neckline to face shape: V-necks lengthen round faces; crew necks soften long faces.
- Iron everything. Wrinkles look ten times worse on camera than in the mirror.
Wardrobe color clashing with your background? Our expert color change service can shift any garment shade without a reshoot.
Bonus Fixes: Post-Processing and Professional Retouching
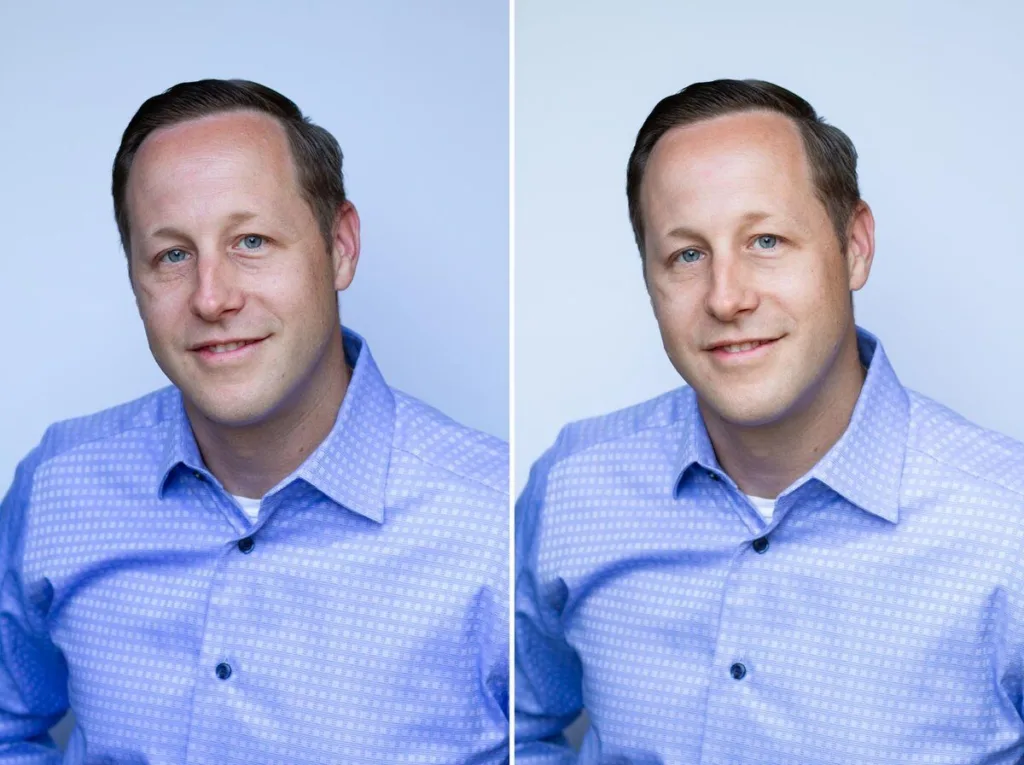
Even after nailing lighting, posing, and expression, the final 10–15% of quality often comes from thoughtful editing. Professional retouching does not mean turning you into a plastic doll — it means removing distractions your eye would never notice in real life: a stray hair across the forehead, a coffee stain on a collar, uneven skin tone from mixed lighting.
Simple Post-Production Wins Anyone Can Apply
- Correct exposure and white balance first, before touching skin. Many “bad” photos are simply misexposed.
- Reduce clarity or texture by 10–15% in Lightroom to soften midtone skin without erasing pores.
- Straighten the horizon and crop tighter — often reframing alone rescues a photo.
- Whiten teeth and brighten eyes subtly — no more than a nudge, or you cross into uncanny valley.
- Preserve natural skin texture in every retouch.
- Remove distractions, not features. Skin tags, moles, and freckles that make you you should stay.
If Photoshop feels intimidating, browse our Photoshop tools guide for a friendly starting point, or explore AI photo editing tools that automate the trickiest steps.
When Hiring a Pro Retoucher Makes Sense
Certain photos genuinely deserve professional retouching:
- LinkedIn headshots and executive portraits where credibility depends on polish.
- Wedding and family portraits you plan to print or frame long-term.
- E-commerce product images featuring models, where skin, fabric, and background must synchronize.
- Personal branding photos for coaches, creators, and speakers who appear on their own websites.
- Actor and performer headshots where casting directors scan hundreds of images per hour.
For beauty-forward shots, a specialized beauty retouching service preserves natural texture while smoothing skin evenly. For executive photos, a purpose-built headshot retouching service handles the tight tolerances required by professional platforms.
Selling clothing or apparel online? Our expert ghost mannequin service delivers clean, invisible-model product shots that convert browsers into buyers.
Advanced Techniques for the Truly Photo-Shy
If photos still feel painful after applying every fix above, dig a little deeper. Sometimes small technical choices unlock the biggest changes.
Understand How Your Camera “Sees”
Different sensors, formats, and file types render skin tones and detail differently. If you shoot on a phone, our comparison of HEIF vs JPEG explains why one format can preserve more highlight detail on your face than the other. If you’re upgrading gear, our list of the top 10 popular camera brands makes shopping easier.
Practice Your Angles Deliberately
- Do a 10-minute mirror session twice a week, testing angles, tilts, and expressions.
- Record yourself on video to see how your face looks in motion, then screenshot the best frames.
- Study photos you love of yourself — identify the lighting direction, camera height, and expression, then repeat those conditions.
- Keep a “reference folder” of your best photos and study what they share.
Fix Common Photo Complaints Fast
| Common Complaint | Root Cause | Fast Fix |
|---|---|---|
| Big nose | Wide-angle selfie lens | Use rear camera, step back |
| Double chin | Low camera angle | Raise camera, push forehead forward |
| Dead eyes | Locked smile | Blink, laugh, then look up |
| Shiny skin | Overhead flash | Move to soft window light |
| Squinty eyes | Direct sunlight | Turn 90°, use open shade |
| Washed-out face | Bright background | Reposition or use exposure lock |
| Blurry face | Slow shutter, motion | Use 1/200s shutter or faster |
| Weird colors | Mixed lighting sources | Set white balance manually |
| Uneven skin | Harsh flash | Diffuse the light source |
| Awkward hands | Frozen posture | Give hands a task or prop |
Bonus: How to Look Better in Any Photo (Step-by-Step Checklist)
Follow this quick pre-photo checklist and you will improve nearly every image:
- Check your lighting first — face a soft, indirect source.
- Choose your best angle — camera at eyebrow height, body
FAQs
Do I actually look like my mirror image or my photos?
Neither perfectly. Other people see the un-flipped version, so photos are generally closer to how the world sees you. However, mirrors, smartphones, and cameras all interpret reality differently. The most accurate representation of you is how you appear in motion—not in any single image.
Why do I look better in some photos and terrible in others?
Lighting direction, focal length, camera angle, and facial expression all change from shot to shot. Even small adjustments—like taking a step to the side, using a different lens, or smiling naturally—can dramatically improve the final photo.
Are front cameras really worse than rear cameras?
Yes, in most cases. Front-facing cameras typically use wider lenses and smaller sensors, which can distort facial features. Rear cameras often include portrait or telephoto lenses that produce much more flattering results. If possible, use the rear camera and trigger the shutter with your phone’s volume button.
Does professional retouching make photos look fake?
Not when it’s done well. Skilled retouchers preserve natural skin texture, pores, and facial asymmetry while correcting distractions. The result should still look like you—just a more polished and well-rested version.
Why do I look worse in group photos than in solo shots?
Group photos are often taken with wide-angle lenses to fit everyone into the frame, which can introduce distortion. They also tend to have harsher lighting and allow less time to pose. On top of that, people naturally compare themselves to everyone else in the photo, which can amplify self-criticism.
Can I train myself to be more photogenic?
Absolutely. Being photogenic is largely a learned skill. Understanding your best angles, practicing subtle facial expressions, using flattering lighting, and becoming more comfortable in front of the camera can make a significant difference. Practicing for just 15 minutes a week can produce noticeable improvements within a month.
Is it worth investing in a proper camera instead of relying on my phone?
For everyday photography, a modern smartphone is more than capable. However, if you regularly shoot portraits, professional headshots, or content for social media or business, a mirrorless or DSLR camera paired with a 50mm or 85mm lens will usually deliver noticeably more flattering and professional-looking results.
How do I get better photos without hiring a photographer?
Follow these four simple rules:
- Use soft light coming from the side.
- Position the camera at about eyebrow height.
- Turn your body roughly 45 degrees toward the camera.
- Shoot in burst mode to capture natural expressions.
These four habits alone can noticeably improve your photos without any professional equipment or editing.
Final Thoughts: Make Peace With the Camera
The gap between your mirror self and your photo self is real — but it’s rarely about how you actually look. It’s about familiarity, optics, environment, and split-second timing. Every reason on this list has a proven fix, and most of those fixes cost nothing but attention.
Start with the easiest wins: use your rear camera, face a window, angle your body, and think of a genuine laugh right before the shutter clicks. Layer in better lighting, more flattering focal lengths, and thoughtful wardrobe choices. When the moment truly matters — a wedding portrait, a personal-brand headshot, an important professional photo — bring in a skilled retoucher to polish the final result.
You are not “unphotogenic.” You just haven’t met the right combination of light, lens, and moment yet. Now you have the roadmap to find them.
Ready to transform photos you already love into images you can’t stop sharing? Book our premium headshot retouching today and see the difference expert polish makes.