Corporate Headshots in 2026: Male Poses, What to Wear & the Retouching Line You Shouldn’t Cross
TL;DR: The short version
- Default pose: body turned 30–45°, face back to lens, chin slightly forward and down, soft smile, squinch. Fixes 90% of bad headshots.
- Wear navy, charcoal, gray, or brown. Skip black (flat under studio light), bright white without a jacket (overexposes), and fine stripes/checks (moiré can’t be fully edited out).
- Background: light gray is the safest universal pick; navy for finance/law, white for healthcare, charcoal for executive gravitas.
- Bring 2–3 outfits, every pair of glasses you own, and a steamer. No fresh haircut the day before.
- Retouch lightly. Even skin tone, kill blemishes, keep pores. Over-retouched faces destroy trust.
- AI headshots are cheap and fast, but LinkedIn’s synthetic-media detector (shipped Q3 2025) silently demotes flagged photos, and 66% of recruiters reject known AI shots. Use real photography for anything career-critical.
- Update every 2–3 years. Budget $150–$500+ for a shoot; retouching runs $50–150 per image on top.
Why your headshot is the highest-leverage update on your profile
First impressions form in one-eighth of a second — faster than you can blink — and these days most of them start online. Recruiters screen you on LinkedIn, clients research you on company About pages, investors look up executives before a pitch. Your headshot is the new handshake.
The numbers aren’t subtle. LinkedIn’s own member data shows profiles with a professional photo get up to 21× more profile views, 9× more connection requests, and 36× more messages than profiles without one. A photo also counts as a profile-completeness signal to their algorithm, which pushes you up in recruiter search — roughly a 7× lift by most analyses. Snappr studied tens of thousands of LinkedIn photos and found that law, consulting, and investment banking professionals consistently have the highest-quality headshots, and people with larger networks tend to have better photos — the two reinforce each other. For the full data breakdown, see this headshot impact data.
LinkedIn technical specs (get these right or the platform mangles your photo):
| Spec | Requirement |
|---|---|
| Recommended upload | 400×400 px minimum; 800×800 px for retina sharpness |
| Maximum upload | 7680×4320 px, 8 MB |
| Format | JPG or PNG |
| Aspect ratio | 1:1 square (LinkedIn crops non-square uploads) |
| Display shape | Circle — corners and anything below the chest get discarded |
| Face fill | Roughly 60% of the frame |
Because LinkedIn crops to a circle, full-body shots and arms crossed high on the chest get butchered. Keep the action above the elbows. And if you’re a senior executive, founder, or thought leader, don’t use the exact same photo everywhere — LinkedIn, your company site, and press releases should each carry a slightly different shot. The same headshot across every platform looks amateurish.
The three micro-moves that fix 90% of bad headshots
Master these before you worry about poses. They apply to every single pose below, and photographers use them on every shoot.
The chin push. Push your forehead a little toward the lens, then tip your chin slightly down. It feels ridiculous — like a chicken pecking at seed — and it looks sharp on camera. It tightens the jawline and kills the shadow under the chin that reads as a double chin. Most people pull their head back when nervous, which is exactly what creates that shadow. Do the opposite. If you want to know what the post-production version looks like, here’s how editors handle a double chin in Photoshop — but nailing it in-camera always beats fixing it later.
The squinch. Wide-open eyes read as surprised or nervous. To look focused and confident, slightly lift your lower eyelids — as if squinting to read small text across a room. It’s a micro-movement, not a full squint. Peter Hurley named it and built an entire headshot empire on it.
The subtle jaw clench. Lightly clench your back teeth (not your jaw — you don’t want to look like you’re grinding). This defines the jawline and removes that soft, slack-neck look. Combined with a soft closed-mouth smile (or a serious neutral if you’re a CFO, general counsel, or chair), these three moves separate “guy who got his photo taken” from “executive.”
How to Pose: The Poses That Actually Work
Pick two or three based on your industry and role, and cycle through them on set. Review shots between setups — a pose that feels awkward can look great on camera, and vice versa. Quick map:
| Pose | Projects | Best for |
|---|---|---|
| Conversational turn | Approachable, competent | Everyone — the LinkedIn default |
| Executive squared | Authority, gravitas | C-suite, law partners, finance |
| Relaxed crossed arms | Confidence, power | Executives, speakers, lawyers |
| One hand in pocket | Relaxed, natural | Nervous subjects, wider crops |
| Cuff / lapel adjust | Polished, in-motion | Entrepreneurs, personal branding |
| Engaged lean (seated) | Warm, hardworking | Founders, sales, coaches |
| Shoulder-only wall lean | Candid, approachable | Creative, tech, media |
| Over-the-shoulder glance | Personality, candid | Website/social — NOT LinkedIn |
| Holding glasses / prop | Thoughtful, creative | Designers, founders, thought leaders |
1. The Conversational Turn — the LinkedIn default

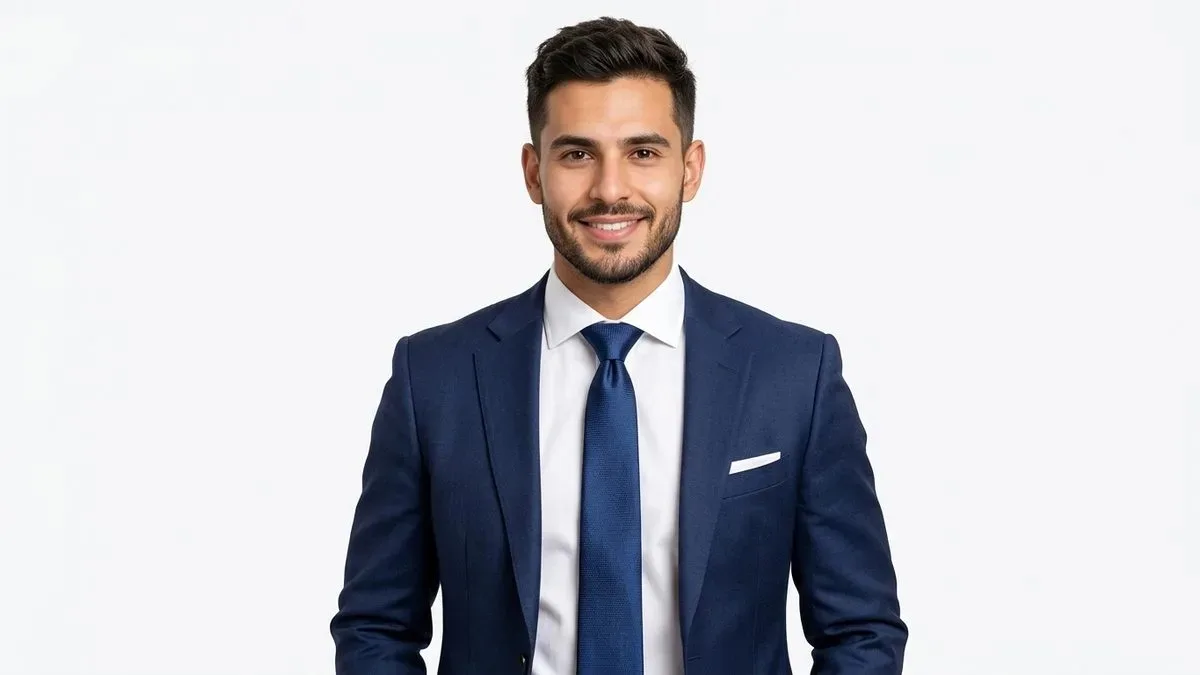
Turn your body 30–45° away from the camera, then turn your face back to the lens. Let the shoulder closer to the camera sit a touch lower than the far one. Drop your shoulders away from your ears. Hands relax at your sides or slip one into a pocket. This narrows your torso, adds depth, and keeps you from looking like a mugshot. Square shoulders straight-on make anyone look boxy. Pair it with an easy smile and the squinch. This is the pose that works for consultants, product managers, engineers, and associates in law and finance — anyone who needs to look competent but approachable. Photographer Doug Burke points out that when you have a friendly conversation with a stranger, you naturally turn slightly — it’s a less confrontational posture that puts viewers at ease. For a full role-by-role pose matrix, this posing guide maps every industry.
2. Executive Squared — the authority pose
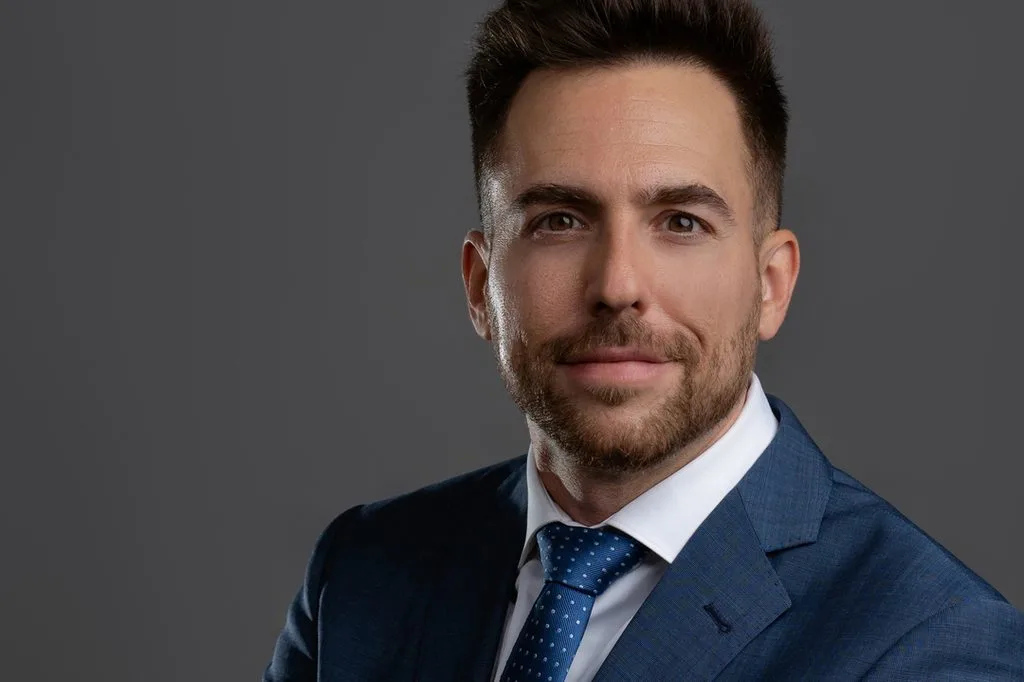
Stand mostly square to the camera, shoulders back and even (not raised), chin level and pushed slightly forward. One hand can rest lightly on a lapel or sit at the waist. Expression: closed-mouth smile or confident neutral with the squinch. This reads as authority and gravitas — it’s the C-suite, law partner, and senior finance pose. It’s too severe for most junior roles, so if you’re early in your career, the conversational turn serves you better. Camera at or slightly above eye level; shooting from below with a squared stance reads as arrogant. Note: pulling off a straight-on shot requires a strong, warm expression — a big smile with teeth showing can balance the confrontational angle.
3. Relaxed Crossed Arms — power without the defensiveness

Crossed arms get a bad rap, and for good reason — done wrong they look defensive. Done right, they project confidence. Turn your body about 45°, drop your shoulders low, cross your arms at mid-forearm (not gripped high on the chest), keep your fingers visible instead of tucked into your armpits, and smile. The smile is what balances the power. This works for executives, speakers, lawyers, and tech leads in waist-up crops. Skip it for healthcare — patients read crossed arms as dismissive — and avoid it for tight head-and-shoulders crops where the arms get cut off.
4. One Hand in Pocket — the nervous-hand reset

Most awkwardness in a headshot starts with “what do I do with my hands.” The pocket pose solves it instantly — but there’s a right way and a wrong way. Hook your thumb over the edge of the pocket with the rest of the hand loose inside. Don’t jam your whole fist to the bottom of the pocket — that pulls your shoulder up and reads as tense. If you’re broader through the chest, only tuck the fingertips so your arms don’t push outward and widen your frame. Keep the other hand relaxed at your side or resting on a lapel. Both hands in pockets rounds the shoulders forward, so stick to one. This works best in three-quarter framing where the pocket is actually visible; in a tight crop the hands disappear anyway.
5. The Cuff / Lapel Adjust — hands with a job
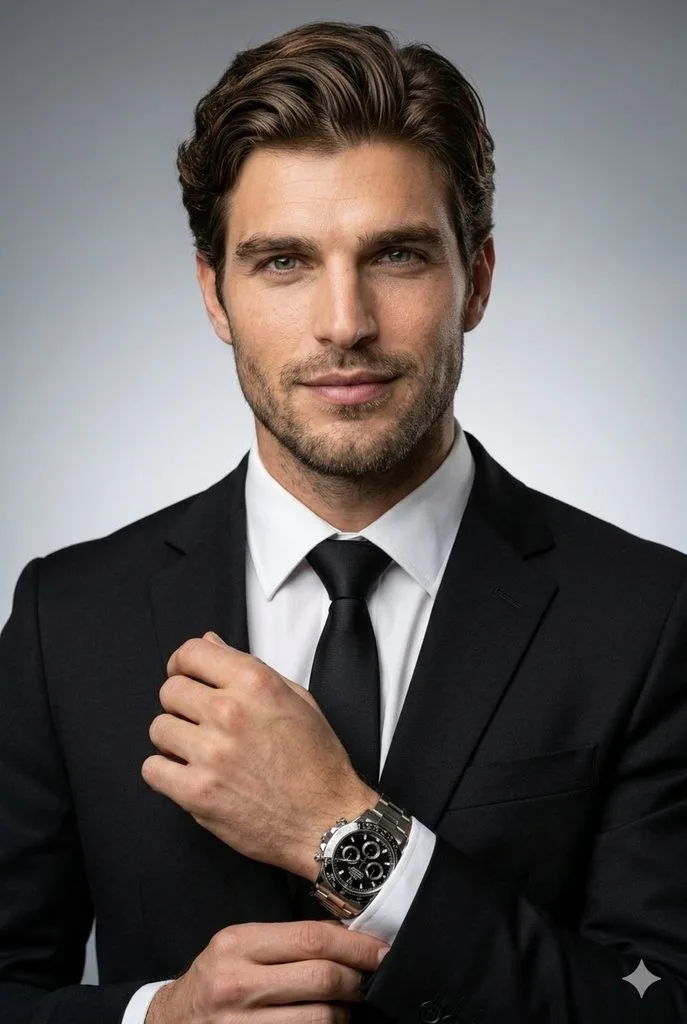
Giving your hands a small, purposeful task — adjusting a cuff, touching a watch, lightly holding a lapel — pulls your shoulders back and draws the eye to your face. Keep it subtle: you’re mid-adjustment, not fussing. Eyes stay locked on the lens, not on your hands. This is the go-to for entrepreneurs and personal-brand profiles, and it adds a touch of motion that a stiff standing pose can’t. One trick photographers use (Burke’s version): pretend you’re holding a four-foot Italian sub at waist height. It sounds absurd, but it instantly pulls your shoulders back and gives your hands something natural to do.
6. The Engaged Lean — seated, forearms resting

Sit on the edge of a chair (or perch on a desk), turn slightly, and lean forward from the hips with your forearms resting lightly on a surface or loosely clasped. Back straight, eyes straight into the lens, full warm smile. Leaning forward reads as engaged and hardworking — it’s the founder, sales leader, coach, and real-estate agent pose. It also naturally hides any softness under the chin because you’re not letting your neck relax. Don’t slouch into the chair back; that hunches your shoulders and kills the energy.
7. Shoulder-Only Wall Lean — candid and approachable
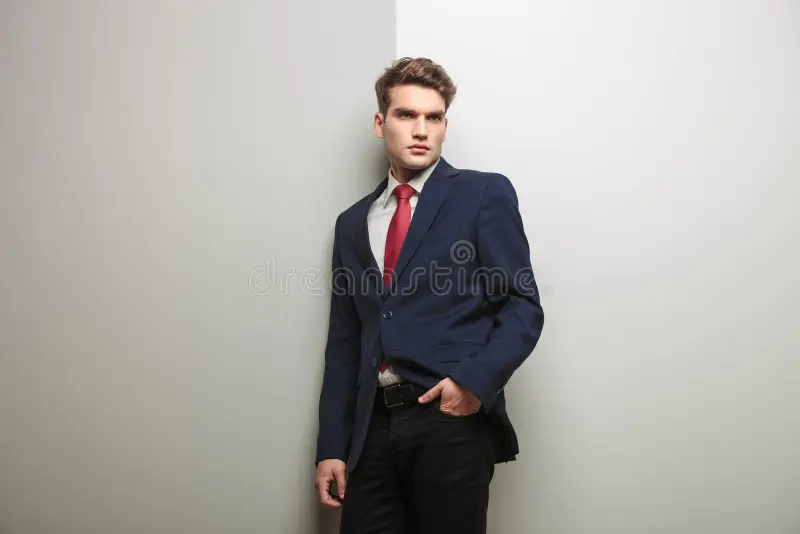
Find a clean, bright wall. Make contact with one shoulder only — not your whole back. Pressing your entire back against a wall flattens your body and pushes your head forward, which is the opposite of what you want. Angle your body away from the wall, drop one hand into a pocket (thumb out), and relax into the shoulder that’s bearing your weight. This reads as candid and approachable — great for tech, creative, and media professionals, and for About pages where you want personality. Use a clean, uncluttered wall; a busy background kills it.
8. Over-the-Shoulder Glance — personality shot (not LinkedIn)
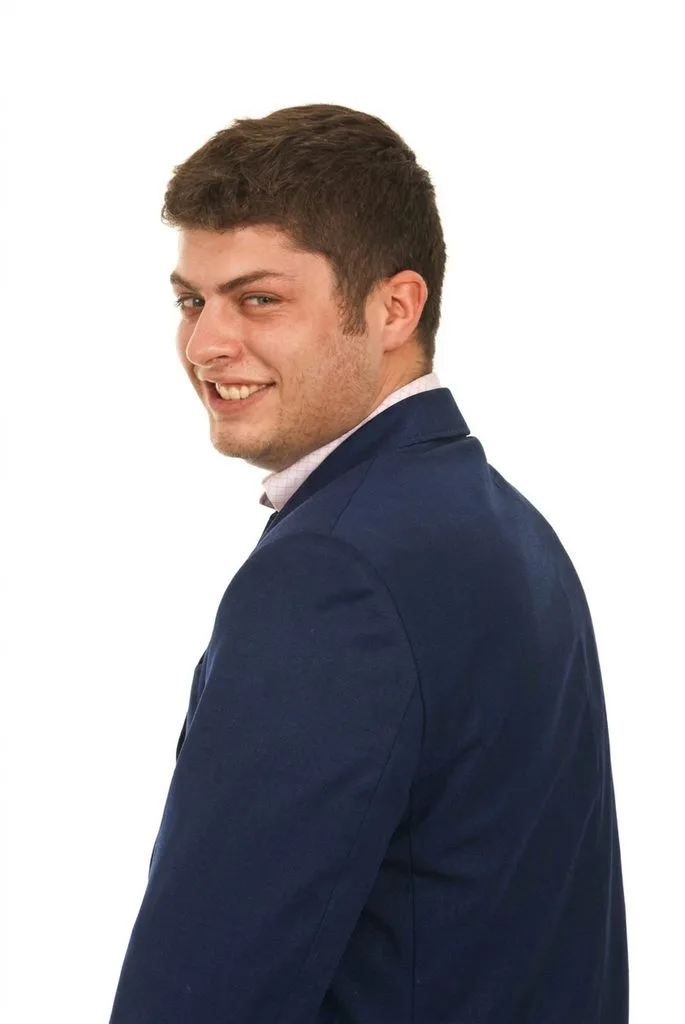
Turn your body 45° away (or even fully side-on), then look back over your shoulder into the lens. Warm, confident smile. This is a candid, personality-driven shot that works beautifully for a website banner, speaker page, or social media. It is not your LinkedIn main photo — LinkedIn wants a straight-on, recognizable headshot, and the over-shoulder angle gets mangled by the circle crop. Keep it in your rotation for secondary uses.
9. Holding Glasses / Creative Asymmetry — the thoughtful pose

Take a stronger turn, shift your weight to your back leg, add a subtle head tilt, and hold a pair of glasses (or another small prop) at chest level. Gaze direct or just off-camera. This is the designer, marketer, artist, and thought-leader pose — it signals creativity and thoughtfulness. The prop gives your hands a job and adds visual interest. Keep the prop small and relevant; a giant object distracts from your face.
Bonus for About pages: Walking toward the camera in mid-stride, arms loose, in an office environment, adds energy and motion. It’s a lifestyle shot, not a headshot — use it on team pages or in marketing collateral, not as your profile photo.
Backgrounds: pick the right one for your industry and your team
The backdrop is half the portrait, and for team shoots it’s the difference between a cohesive brand and a random collage.
Light to medium gray is the safest, most versatile choice. It flatters every skin tone, works with every outfit color, photographs consistently under different lighting, and looks polished on every platform. If you’re shooting a team of 20+ people with different skin tones and wardrobe choices, medium gray is almost always the right answer — it’s the most forgiving backdrop and requires the least per-person adjustment.
By industry: navy blue drives trust perception and is the go-to for finance and law. White is standard for healthcare directories. Charcoal and dark gray are the fastest-growing trend in 2026 and add executive gravitas — they’re the choice for C-suite and leadership pages. Environmental backgrounds (offices, labs, urban settings) work when kept clean and softly blurred behind the subject; a sharp, cluttered background competes with your face.
For companies, consistency matters more than the specific color. Consistent branding across team headshots correlates with 23–33% higher revenue in brand-consistency studies, and a uniform backdrop makes an About page look like one company instead of a collection of random selfies. Decide direction, body angle, and backdrop with the client before the shoot day, then keep it identical for everyone.
What to Wear for Corporate Headshots: The Wardrobe Playbook
Start with one question: how do I want to be perceived? If you wouldn’t wear it to meet your most important client, don’t wear it for your headshot. And dress for the job you want, not the job you have — look at how senior people in your industry dress on LinkedIn and match that level. The goal is to look like the best version of you on a good day.
Color psychology in a tight crop
| Color family | Projects | Notes |
|---|---|---|
| Dark (navy, charcoal, deep burgundy) | Authority, formality, dominance | Safest corporate choice |
| Light (pale blue, soft gray, white) | Approachability, friendliness | Great for client-facing roles |
| Bright / saturated | Confidence, energy | Use sparingly — can clash with skin tone |
| Muted / earthy | Conservative, less threatening | Good for education, nonprofit, healthcare |
| High-contrast pairings | Influence, authority | Dark jacket + light shirt + darker tie |
Suits and blazers. Navy, charcoal, medium gray, and rich brown are your four workhorses. They provide contrast without harshness. Avoid black — under studio lighting it absorbs light, photographs flat and dull, and can create bad contrast with your complexion. If you only own black suits, borrow or buy a navy one for the shoot. Jackets usually sit unbuttoned for headshots (a buttoned jacket creases at the bottom of the frame), and a well-tailored fit beats a trendy cut every time.
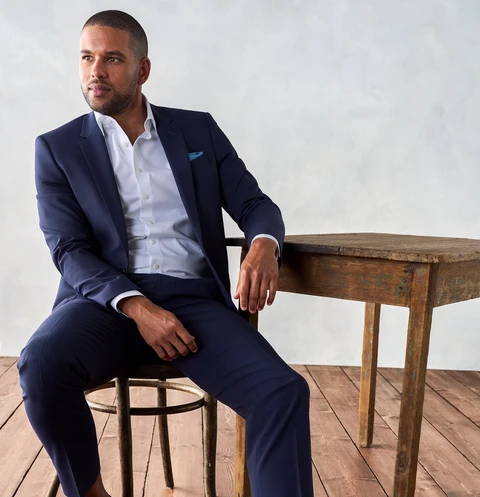
Shirts. White, light blue, and pale gray solids. Avoid bright white without a jacket — it overexposes and blows out detail. Avoid fine stripes, small checks, herringbone, and houndstooth — they cause moiré, that wavy rainbow interference pattern that appears in digital photos. Moiré cannot be fully removed in editing; you have to avoid it on set. Solid colors or very large-scale patterns (wide stripes, big checks) are safe. Skip the undershirt — it peeks out and distracts. Ditch the floppy collar.
Ties. Navy, burgundy, deep green, charcoal — always darker than your shirt for contrast. Silk texture photographs well. Avoid dramatic or novelty patterns. Knot choice: Four-in-Hand reads casual and modern; Windsor reads most formal. Bow ties work if you’re in a creative field, academia, or you’re an entrepreneur — wear them with conviction or not at all. A simple tie bar and a complementary (not matchy-matchy) pocket square add polish.
What to avoid — the shortlist
- White blazer — reads as a doctor’s lab coat.
- White shirt + black tie + black suit — reads as a waiter.
- Logos and text on clothing — people read the words instead of your face.
- T-shirts, hoodies, untucked shirts — too casual for corporate unless your whole brand is built on it.
- Worn-out, pilled, or wrinkled clothing — a steamer fixes wrinkles, not pilling.
- Big, chunky jewelry, hoops, dangling earrings — distracts. Simple studs or a pendant above the crop line work.
- Skin-tone colors — you blend into your own neck.
Industry dress code at a glance
| Industry | Outfit | Notes |
|---|---|---|
| Finance, law, consulting | Full dark suit + crisp shirt + tie | Conservative colors, no exceptions |
| Tech, startups | Blazer, no tie — or 3/4 zip / polo | Stiff formality looks out of place |
| Creative, marketing, media | Blazer no tie, textured layers | Show personality, keep it polished |
| Healthcare, education, nonprofit | Business casual — oxford + chinos, add blazer to elevate | Approachability matters most |
| Sales, real estate, client-facing | Suit or blazer + shirt, full smile | You’re selling trust |
Grooming and prep — the night before and morning of
- Try on every outfit beforehand, including sitting down. A jacket that looks great standing can bunch when you sit.
- Steam or iron everything. Your photographer will have a steamer on set, but show up ready.
- Bring 2–3 outfit options — tie and no-tie versions, different colors. You’ll pick the winner on set.
- Bring every pair of glasses you own. Anti-glare coatings vary; some reflect worse than others. (And yes, glasses glare can be removed in post — but it’s faster and cleaner if you bring a non-reflective pair.)
- No brand-new haircut the day before. Get it cut 5–7 days out so it settles.
- Natural, matte makeup (for everyone — yes, men too, even if it’s just powder to kill shine). Bring powder for touch-ups.
- Get a good night’s sleep and lay off the salt and alcohol the night before. Puffy eyes show in every shot.
One counterpoint worth hearing: Peter Hurley stopped giving wardrobe rules years ago. His take: you have to love what you’re wearing, because if you don’t feel good in it, that discomfort shows in your face. He tells clients to overpack — spread across cuts, colors, and necklines — because neckline and cut change the picture more than anything. Texture beats loud print every time. And his line sums it up: “I am not photographing your clothes. I am photographing what your face does when you are not worried about them.” For a full men’s wardrobe breakdown with outfit combinations, this wardrobe guide covers every industry.
Technical specs photographers actually use (so you can talk the talk)
If you’re hiring a photographer — or you are one — these are the settings that separate a corporate headshot from a selfie:
- Focal length: 85–135mm on full frame (85mm f/1.4 is the pro favorite). A 50mm lens stretches facial features by up to 12% (Nikon Optical Engineering Lab data) because you have to shoot closer. On crop sensors, use a 56mm equivalent. Focus on the nearest eye.
- Camera settings: f/5.6 to f/8 (keeps both eyes sharp), 1/200 or 1/250 shutter (flash sync speed), ISO 100, 5600K white balance.
- Lighting recipe: Key light at 30–45° off-axis, slightly above eye level (loop lighting — the corporate standard). Fill light opposite the key at 1/2 to 1/3 intensity to soften shadows under the eyes and chin. A kicker/hair light behind the subject at 45° separates the head from the background. Peter Hurley’s signature setup is a single 32″ octabox at 45° left, 30° above eye level, metered to a 3:1 lighting ratio with an incident light meter — no histogram guessing.
- Camera height: at or slightly above eye level. Shooting from below elongates the nose and reads as arrogant; shooting from above shrinks you.
- Pacing: 30 minutes per person is the sweet spot for corporate on-site shoots — enough time to warm up and cycle through poses, not so long that workday interruptions derail the schedule.
Adobe’s corporate headshot tips hammer one point above all: consistency. Same background, same lighting, same color balance, same direction across the whole team. Decide it with the client before shoot day, keep it identical for everyone, and don’t let one executive’s “can we do mine outdoors” request break the set.
AI Headshots vs. a Real Shoot: What the 2026 Data Says
AI headshots exploded onto the market — $25–$100 gets you 80–150 variations in 30 minutes to 2 hours, versus $300–$1,050+ and 2–4 weeks for a traditional photographer. For 70–80% of casual use cases (internal directories, speaker submissions where nobody cares), they’re fine. But for anything career-critical, the data is turning against them.
A Ringover survey of 1,087 recruiters found that 76.5% preferred AI images in blind tests — but 66% said they’d be put off by a candidate’s headshot once they learned it was AI-generated. The gap between “looks polished” and “is actually you” is exactly where trust breaks. Worse, LinkedIn shipped a synthetic-media detector in Q3 2025. Profile photos flagged as likely AI-generated lose ranking in search and “People You May Know” surfaces — and the flag is invisible. You don’t get a notification. Your impressions just quietly drop. By early 2026, three of the largest applicant tracking systems (Greenhouse, Workday, Lever) added optional AI-portrait flagging, and enterprise companies are moving away from AI team headshots because of trust gaps, amplified bias, and authenticity policies.
AI also can’t direct a nervous executive in real time, fix weak posture, or catch an asymmetrical jacket collar. It can only remix what you feed it. The practical answer: use a real shoot for your main LinkedIn photo and anything client-facing; use AI as a cheap supplement for secondary uses where turnaround matters more than authenticity.
The Retouching Question: What’s Normal, What’s Overdone
A good retoucher removes temporary stuff — blemishes, flyaway hairs, hot spots on the forehead, under-eye bags lightened, teeth whitened a touch, skin tone evened out. A bad one smooths your face into plastic, changes your jawline, removes every pore and wrinkle, and hands you back a photo of someone who sort of looks like you but isn’t you.
The industry standard for skin work is frequency separation — it splits the image into a tone/color layer and a texture layer, so you can smooth blotchiness and redness on one layer without wiping out pores on the other. Done right, the skin looks like skin. Done wrong (a heavy blur across the whole face), you get that plastic, over-edited look that everyone spots in half a second. Over 78% of professional retouchers surveyed by the Professional Photographers of America use frequency separation as their primary skin technique, and three-layer workflows (texture, tone, structure) produce roughly 23% less visible artifacting than a basic two-layer split.
What a retoucher can’t fully fix: moiré (it’s baked into the pixel data), a bad expression, a double chin caused by bad posture (they can soften it, but the chin push does 90% of the work), and clothing that doesn’t fit. What they can fix: blemishes, glare on glasses, stray hairs, uneven skin tone, background distractions, and subtle jawline refinement. If someone looks at the finished image and thinks “overly retouched,” you’ve gone too far.
Cost, Cadence & the Day-Of Checklist
A traditional corporate headshot session runs $89 to $1,500+ depending on geography, package, and photographer experience — most land in the $150–$500 range. Two costs people forget: licensing (the session fee often only covers studio time; commercial use like press releases, ads, or magazine covers may cost extra) and retouching, which typically runs $50–$150 per photo. Virtual/edited DIY headshots start around $49/photo, and AI packages run $25–$100. If you’re a photographer shooting dozens of team headshots in a day, the editing volume adds up fast, and many studios outsource editing to keep turnaround tight. For a per-image cost breakdown, see these editing costs.
Update your headshot every 2–3 years, or sooner if you change your hair significantly, grow/shave a beard, lose or gain a noticeable amount of weight, or shift industries. A 10-year-old headshot is worse than no headshot — it sets a false expectation and erodes trust when you meet someone in person.
Day-of checklist:
- Arrive 10 minutes early, hydrated, well-rested.
- Bring 2–3 outfits on hangers, steamed.
- Bring all glasses, powder, lip balm, a comb.
- Know your two go-to poses and the chin-push + squinch + jaw clench.
- Review shots on the back of the camera between setups.
- Ask for both tie and no-tie versions if you brought both.
- Warm up with simple straight-on poses first, then move to arms-crossed and candids.
Frequently Asked Questions
Should I smile in my corporate headshot?
Usually yes — a natural, soft smile works for most roles, especially client-facing, sales, and healthcare. Senior executives, CFOs, general counsel, and law partners often use a subtle closed-mouth smile or confident neutral to preserve authority. Match the smile to the role; a giant grin looks out of place in finance.
What’s the best male headshot pose for LinkedIn?
The conversational turn in a head-and-shoulders crop: body angled 30–45°, face to the lens, chin slightly forward and down, relaxed smile, squinch. LinkedIn displays your photo small and circular, so expression matters more than hands or body — keep the action above the elbows. Upload at 800×800 px or higher, JPG or PNG, under 8 MB.
Should men cross their arms in a headshot?
It can work for executives, speakers, and lawyers — if the arms are loosely crossed at mid-forearm, shoulders dropped, fingers visible, and you’re smiling. Tightly crossed arms with raised shoulders look defensive. Skip crossed arms for healthcare headshots and tight head-and-shoulders crops.
Can I wear a black suit for a corporate headshot?
Not ideal. Black absorbs studio light and photographs flat and dull, losing detail in the jacket. Navy, charcoal, medium gray, or rich brown all read better and provide cleaner contrast. If black is your only option, pair it with a light shirt and a bright tie to add separation.
How often should I update my professional headshot?
Every 2–3 years as a baseline. Update sooner if your appearance changes significantly (hair, beard, weight) or if you switch industries and your current shot no longer matches the dress code. Senior executives should maintain 2–3 different shots for different platforms.
What should I do with my hands in a headshot?
Give them a job or keep them out of frame. One hand in a pocket with the thumb out, adjusting a cuff or lapel, resting on a desk, or loosely clasped. Avoid stuffing hands deep in pockets, white-knuckle clasping, or letting them hang stiffly at your sides in a tight crop where only fingertips show.
How much retouching is normal for a corporate headshot?
Light and natural. Expect blemish removal, flyaway cleanup, subtle under-eye and skin-tone correction, and maybe a touch of teeth whitening. You should still look exactly like yourself — pores, fine lines, and all. Budget $50–150 per retouched photo. If the retoucher changes your bone structure or removes all texture, push back.
Can moiré be removed in editing?
Not fully. Moiré — the wavy rainbow pattern caused by fine repeating patterns like thin stripes or small checks interacting with the camera sensor — is baked into the pixel data. Editing can reduce it, but the only real fix is to avoid fine patterns on set. Stick to solids or large-scale patterns.
Are AI headshots acceptable for LinkedIn?
Technically yes, but risky. LinkedIn’s synthetic-media detector (shipped Q3 2025) silently demotes flagged AI photos in search, and 66% of recruiters say they’d be put off by a known AI-generated headshot. Use a real shoot for your main profile photo; reserve AI for secondary, low-stakes uses.
Final word
A great corporate headshot isn’t about looking perfect. It’s about looking like you, at your best, in a frame that makes someone want to click, connect, or hire you. Nail the three micro-moves, pick two poses that fit your role, wear something you actually feel good in against a backdrop that matches your industry, and keep the retouching light. Everything else is detail.
If you’re a photographer or retoucher handling corporate headshots at volume and you want a consistent, natural-looking editing workflow that doesn’t plastic-ify faces, that’s exactly the kind of portrait retouching work we write about and do every day.