Equine Photography: The Complete Guide to Photographing Horses
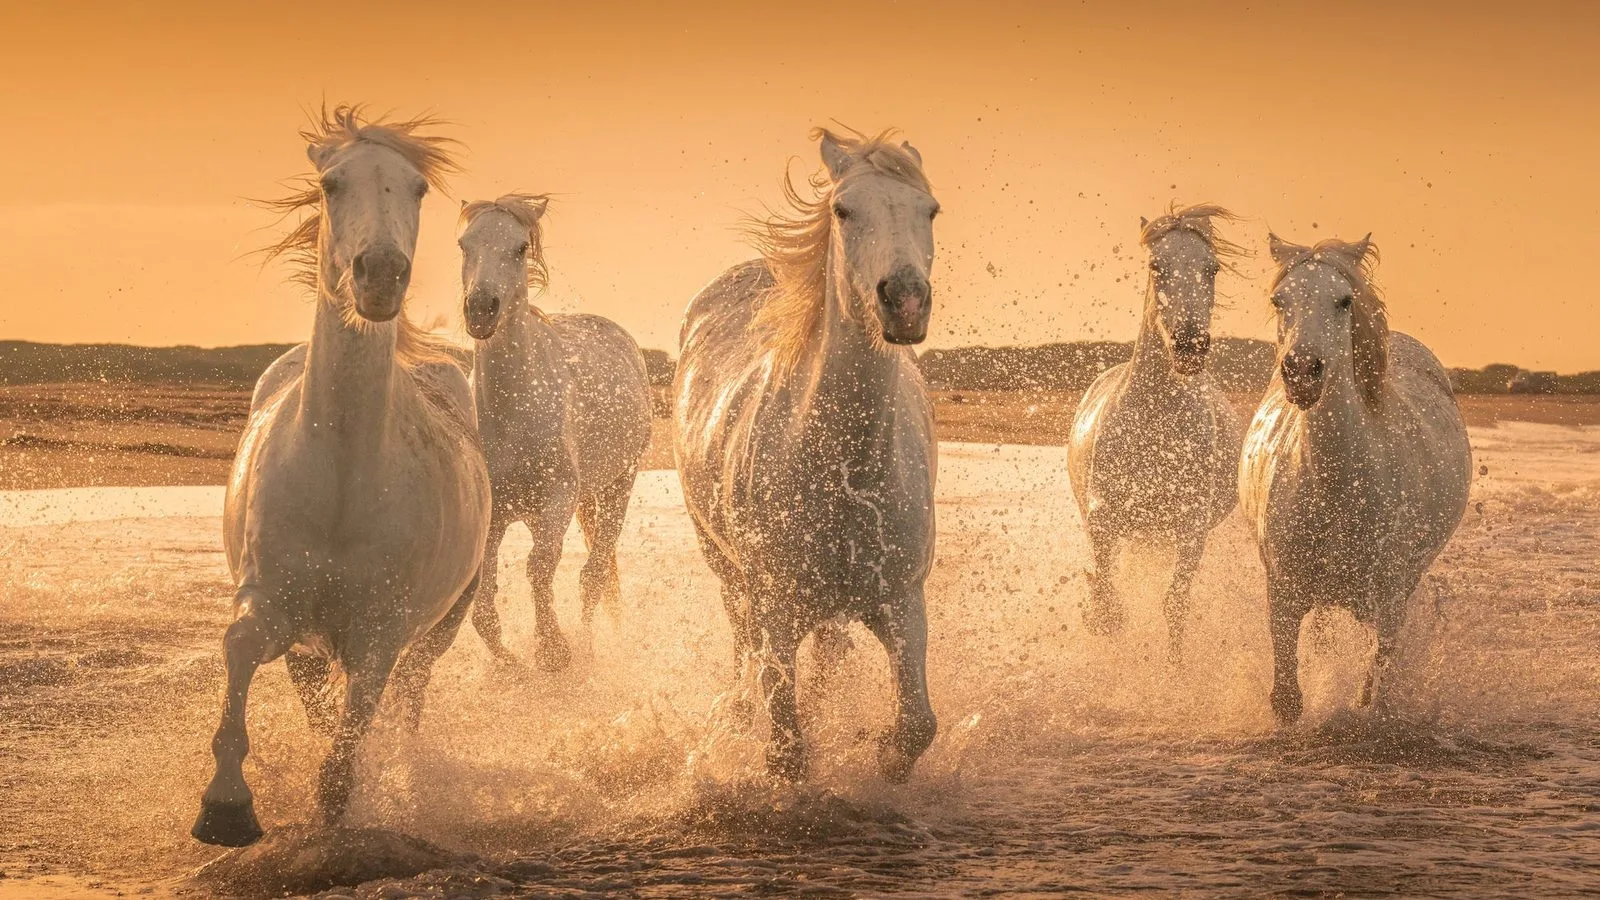
If you take away one thing from this guide, make it this: shoot horses at 1/1000 of a second or faster, set your aperture around f/4 to f/5.6 so the whole animal stays sharp, use continuous autofocus that tracks movement, and work in manual exposure so white arena walls and black coats don’t fool the meter. Get those four settings dialed in, and your keeper rate will jump immediately. The rest — light, posing, safety, editing — is what turns a sharp photo into a memorable one.
What Makes Photographing Horses So Tricky
Most animal photography comes down to three problems, and horses bring all three at once. They’re fast — a galloping horse covers 40 feet per second, and a slow shutter turns those legs into streaks. They’re big — a thousand-pound animal fills the frame, and a slight distortion in lens or angle makes them look wrong in ways everyone notices. And they’re emotional — a stressed horse gives you pinned ears, dancing feet, and a dangerous situation.
That’s why roughly three out of four amateur horse photos end up deleted. It’s rarely the gear. It’s usually a shutter speed too slow, an angle that distorts the legs, or a moment where the horse had its ears back. Fix those three things and you’re already ahead of most people with a camera.
The Four Settings That Matter Most
Let’s break down the exposure triangle plus autofocus, because in equine photography these four settings are the difference between a portfolio shot and a delete.
Shutter speed — the non-negotiable one. A walking horse is fine at 1/250s. A trotting horse needs 1/500s. A canter or gallop needs 1/1000s minimum, and 1/2000s if you want every tendon and muscle fiber frozen. Action disciplines like jumping, rodeo, and racing live at 1/1000s and above. The only time you can go slow is a standing portrait — 1/100s is plenty there, as long as the horse holds still.
Aperture — why you don’t shoot wide open. It’s tempting to crank open to f/1.8 or f/2.8 for that creamy background blur. Don’t. A horse is six feet long from nose to tail, and at f/2.8 you’ll get the eye sharp and the hindquarters soft. f/4 to f/5.6 gives you two or three feet of depth of field at most working distances — enough to cover a horse’s head and chest, or the whole body if you’re far enough back. Save the wide apertures for head portraits and detail shots.
ISO — the one you stop worrying about. Modern sensors handle ISO 3200 and even 6400 beautifully. Set your shutter and aperture first, then push ISO as high as it needs to go to expose correctly. Grain is fixable. Motion blur isn’t. When you’re shooting in a dark indoor arena and the noise starts to show, noise reduction techniques can clean it up in editing without losing detail.
Autofocus — continuous tracking, not single shot. Single-shot autofocus locks focus and then waits. By the time you press the shutter, the horse has moved two feet. Continuous autofocus tracks the subject as it moves and keeps updating the focus. Pair it with a single focus point or a small group — wide area autofocus will grab the fence, the jump standard, or the background instead of the horse. Many pros separate focus from the shutter button entirely (back-button focus) so they can pre-focus on a jump and fire bursts without refocusing.
File format. Shoot raw files for any paid or portfolio work. They give you the latitude to recover blown-out white arena walls and pull detail out of black coats — the two exposure problems that define this genre. JPEG is fine only when you need to hand images off immediately with no editing.
Settings at a Glance (By Scenario)
| Scenario | Shutter | Aperture | Focal length | Key tip |
|---|---|---|---|---|
| Standing portrait | 1/100s+ | f/2.8–f/5 | 85–200mm | Focus on the eye |
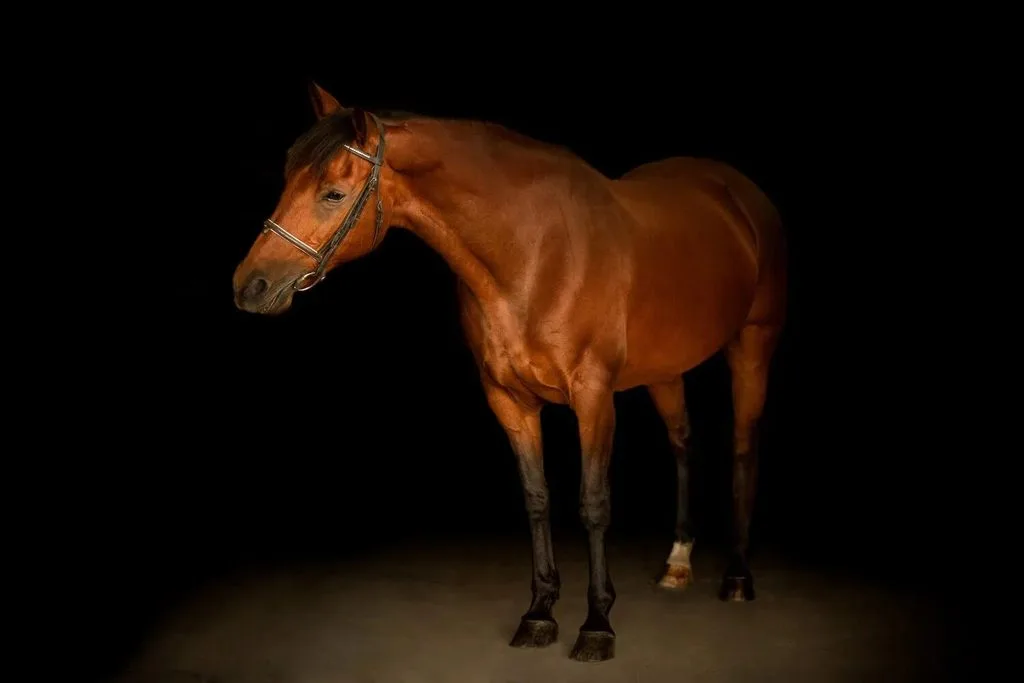
| Black background portrait | 1/100s+ | f/4–f/5.6 | 100–200mm | Expose for the horse, let background go black |
| Dressage / flatwork | 1/640s+ | f/4–f/5.6 | 70–300mm | Shoot at extended trot or collected canter |
| Showjumping (outdoor) | 1/800s+ | f/4–f/5.6 | 70–200mm | Pre-focus on the fence, fire at takeoff |
| Showjumping (indoor) | 1/800s+ | f/2.8–f/4 | 70–200mm fast | Set custom white balance |
| Cross country | 1/800s+ | f/4–f/5.6 | 100–400mm | Anticipate the stride; wear high-vis |
| Racing / polo | 1/1000s+ | f/4–f/5.6 | 300mm+ | Big fields need long reach |
| Horse & rider lifestyle | 1/500s+ | f/2.8–f/4 | 70–200mm | Blur the background; wait for the quiet moment |
Gear: Focal Lengths, Not Brand Names
The workhorse focal length for equine photography is the 70–200mm range with a fast maximum aperture (f/2.8 or thereabouts). It gives you working distance so you don’t crowd a nervous horse, it’s fast enough for dark arenas, and at those focal lengths the horse’s proportions look natural.
What to avoid: anything below about 70mm for full-body shots. A 50mm or 35mm lens held close makes the horse’s head enormous and its legs look like toothpicks. Clients notice immediately. Wide angles have their place — dramatic low-angle shots, creative environmental portraits — but they’re a special effect, not your everyday lens.
When you need more reach — big arenas, cross country courses, polo fields — a 100–400mm zoom or a 300mm+ prime becomes necessary. For portraits and fine-art work, an 85mm or 135mm prime gives gorgeous subject separation and smooth background blur.
Memory cards matter too. You’ll shoot bursts of ten or twenty frames at a time, and a slow card will lock up your camera at the worst moment. If you’re wondering how much space you’ll actually fill, how many photos a memory card holds breaks it down by file size and resolution.
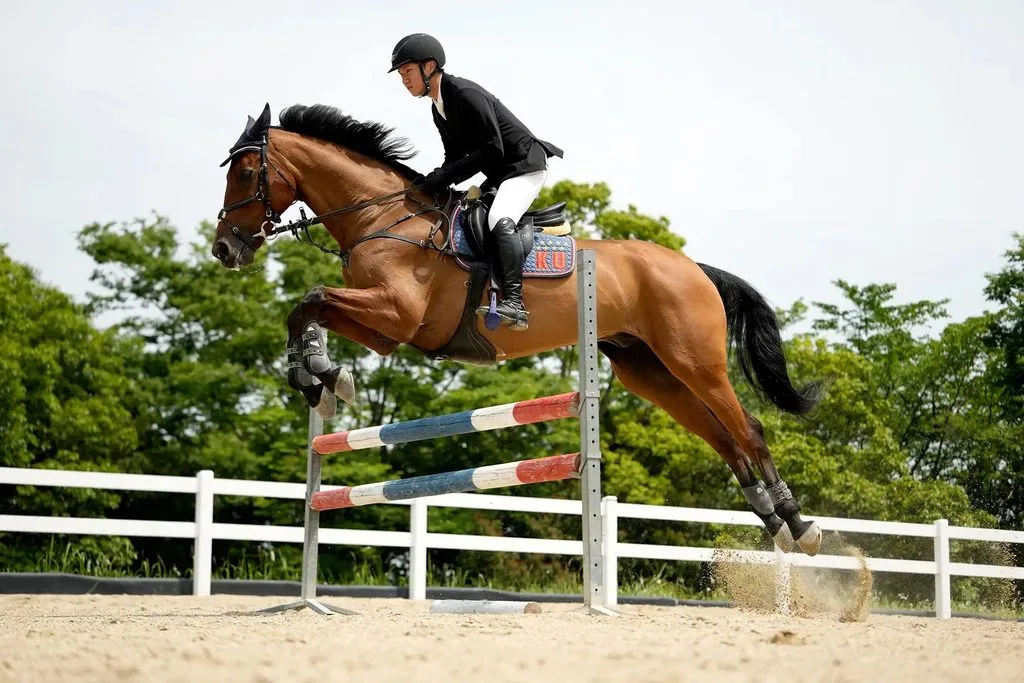
Reading the Horse: Behavior, Ears, and When to Stop
Horses communicate with their bodies, and learning to read them makes you both a safer and a better photographer. Ears pricked forward means alert and interested — the expression you want. Ears flat back means angry or scared — put the camera down. Lopped-back ears and a lowered head mean bored or tired — take a break. Wide eyes, dancing feet, a raised tail, or flared nostrils mean the horse is getting anxious. Stop shooting, give it space, and let the handler calm it down.
Getting both ears forward is the single biggest factor in a sellable equine portrait. You’ll need an assistant — ideally someone the horse knows — standing just behind you with a squeaky toy, a crinkling treat wrapper, a bucket of feed, or soft animal sounds. Time your shutter for the split second both ears prick forward. Use sound apps sparingly; some horses, especially stallions, get overexcited by recorded horse calls.
Know when the session is over. Horses have a limited tolerance for standing still, being posed, and listening to squeaky toys. When they’re done, they’re done. Pushing past that point gives you bad photos and can create a dangerous situation. End on a good note, give the horse a treat, and you’ll be invited back.
Posing the Standing Horse
A standing horse portrait lives or dies on three things: ears, feet, and balance.
Feet square. All four hooves under the body, no leg cocked, no leaning. If the horse won’t square up, shoot it in mid-step — a walking shot always looks better than a badly posed standing one.
Weight forward. A horse standing with its weight over the shoulders looks strong and engaged. Leaning back makes it look weak and unbalanced.
Neck naturally arched. Overbending stretches the topline and makes the neck look too long. Underbending makes it disappear. The sweet spot is a slight, natural curve.
Hindquarters round. The back leg closest to the camera should be set slightly under so the hind end looks round and muscular, not triangular and weak.
Details before you shoot. Wipe slobber off the chin. Pull grass out of the mouth. Straighten bridle keepers and even rein loops. Smooth flyaway manes and forelocks. Clean dirt from nostrils. These five-second fixes save twenty minutes of editing per image.
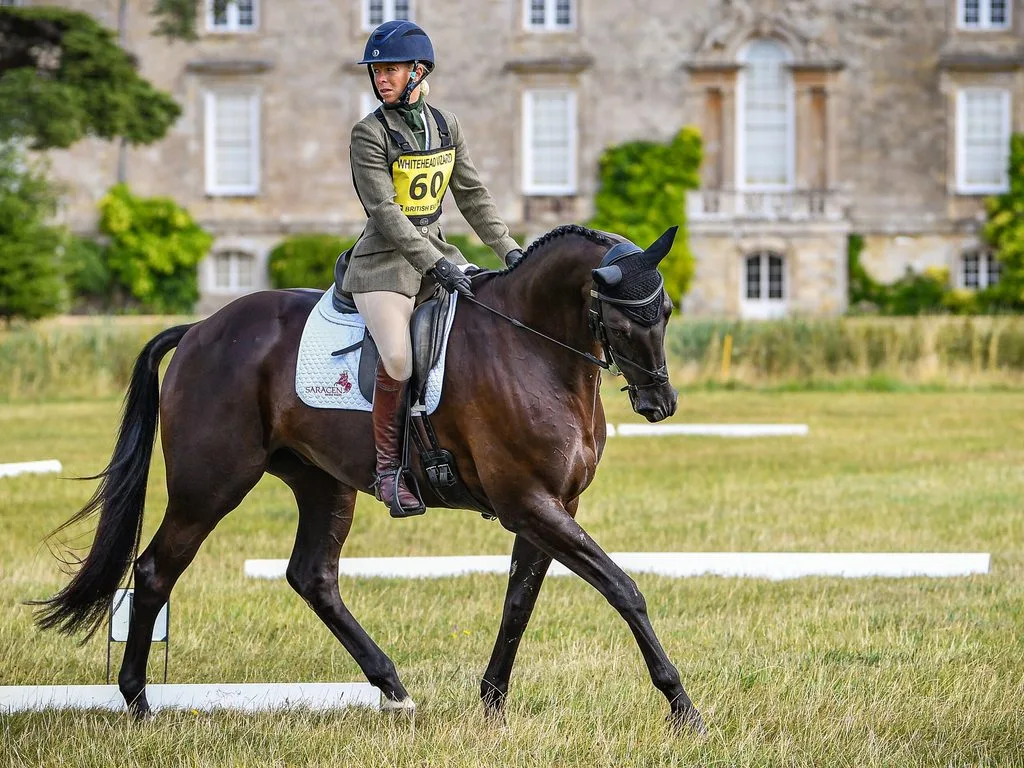
Light: Chase the Edges of the Day
The golden hour — the first hour after sunrise and the last hour before sunset — wraps a horse in warm, soft light that makes coats glow and muscles pop. Midday sun, harsh and overhead, creates deep shadows under the neck and belly and turns a dark horse into a silhouette. If you must shoot at midday, find open shade — the side of a barn, a line of trees — and use that even, soft light instead.
Backlighting is the equine photographer’s secret weapon. Put the sun behind the horse, expose for the horse (overexpose by a stop or two compared to the camera’s reading), and you get a glowing rim of light around the mane, tail, and ears. It’s the look that sells fine-art prints.
Indoor arenas are the hardest light you’ll face. Dim, usually a sickly yellow-green, and full of white walls that fool the meter. Shoot wide open, push ISO high, keep shutter at 1/800s or faster, and set a custom white balance off something white in the arena. Noise beats blur, every time.
Black background portraits are a genre of their own. Shoot in a shaded barn aisle or against a dark wall, expose for the horse so the background falls to near-black, and you get a dramatic studio look with no studio gear. Keep ISO low (100–400) to keep the background clean. In editing, you’ll usually push the background to pure black and dodge the horse so it glows.
Composition: Angle, Background, and the Bond Shot
Get low. Shooting from chest height or below makes a horse look powerful and grand. Shooting from above makes it look small. For full-body portraits, kneel so the camera is roughly at the horse’s chest level.
Clean the background. A tree branch through the withers, a bright barn door behind a dark horse, a parked truck in the pasture — these ruin more photos than bad exposure. Move three feet left or right and the problem vanishes. Look for hedge lines, tree stands, or open sky as clean backdrops.
Shoot the details. Full-body shots are the money frames, but the close-ups — the eye, the muzzle, a hand on the neck, the mane backlit by the sun — are what clients frame on walls. Never leave a session without a handful of detail shots.
Wait for the bond. The best-selling image in equine portraiture isn’t a perfect conformation shot. It’s the quiet moment between horse and human — a forehead press, a hand on the neck, a shared look. Build time into every session for these. Tell the rider to groom, give treats, just be with the horse. Then stand back with your long lens and wait. It will happen.
Action: Anticipation, Timing, and the Peak Frame
Action photography is all about anticipation. You can’t react fast enough to a horse jumping a fence — by the time you see it, the moment’s gone. Instead, watch the stride as the horse approaches, pre-focus on the jump, and start firing a burst a stride before takeoff. The peak frame — all four feet tucked, ears forward, rider in position — will be somewhere in that burst.
Panning (moving the camera smoothly with the horse as it crosses in front of you) lets you get away with slightly slower shutter speeds and adds a sense of motion to the background. Keep the horse in the same spot in the frame, move with it, and fire continuously.
For cross country, wear high-visibility clothing and stay in designated photographer spots. Galloping horses can’t dodge you. For rodeo and western events, position yourself where the action will cross in front of you — barrel racing pattern, roping box, bucking chute. Don’t chase the action; let it come to you.
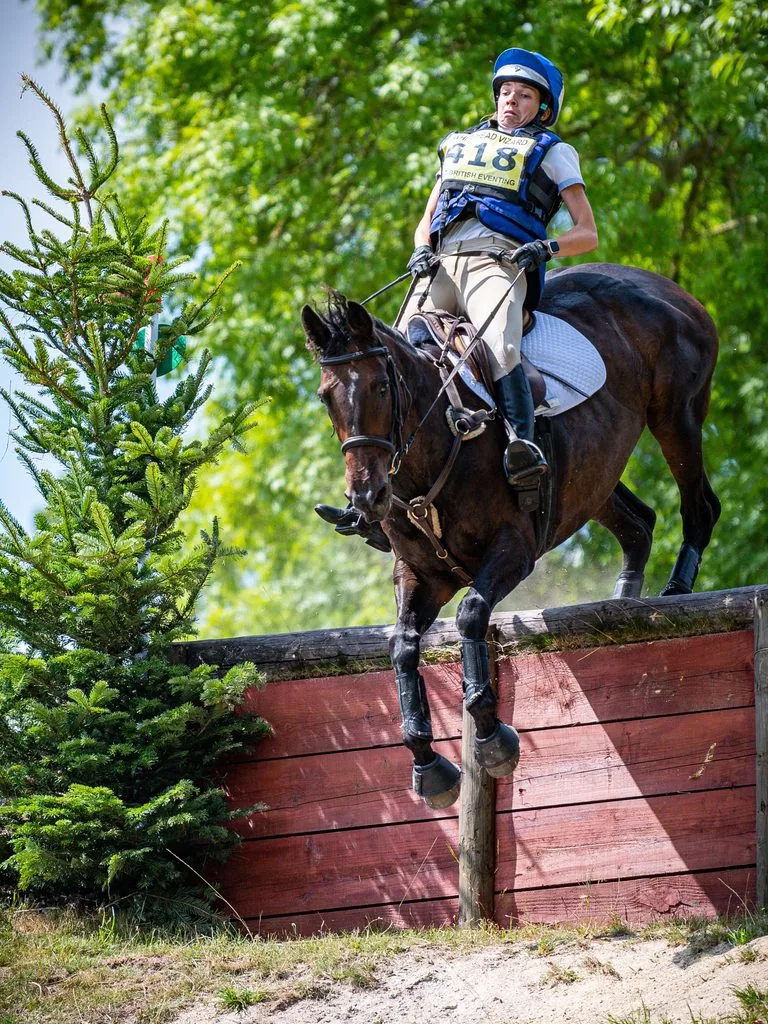
Safety: The Rules Nobody Skips
If you take nothing else from this guide, take this: a horse weighs a thousand pounds and can spook at a plastic bag. Wear boots, not sandals. Never stand directly behind one. Let the handler lead. Arrive early and let the horse get used to you and the sound of your shutter — take a few test frames while the handler reassures it. Keep your camera bag and tripod out of walkways. And if the horse shows signs of stress — wide eyes, dancing feet, pinned ears — stop shooting. A stressed horse gives you bad photos and can hurt someone.
Editing: The Workflow That Sells Prints
A great edit enhances what you captured — it never replaces it. Here’s the standard workflow:
- Cull ruthlessly. Delete anything with motion blur, ears back, bad feet, or wrong focus. You’ll keep maybe one in ten frames. That’s normal.
- Global adjustments. White balance first (critical for indoor arenas), then exposure, contrast, highlights and shadows. Horses come in every color from pure white to pure black, so watch the histogram — don’t clip highlights on a gray coat and don’t crush blacks on a bay.
- Local adjustments. Darken distracting background elements with a radial or graduated filter. Lighten (dodge) the horse’s face and eye. Slightly darken (burn) the edges to draw the eye inward. Add a touch of texture or clarity to the coat and mane — but not to skin on a rider portrait.
- Selective sharpening. Sharpen the eyes, muzzle, and musculature. Don’t sharpen the background or you’ll amplify noise.
- Background cleanup. For fine-art portraits, remove distractions entirely. For black background shots, push the background to pure black.
- Color and finish. Warm the golden tones slightly, cool the shadows a touch. Keep it natural — clients want their horse to look like their horse, not a social-media filter. If you’re preparing files for print, check that your DPI and resolution are set correctly before exporting.
AI editing tools are changing this workflow fast. Background removal, subject masking, and even generative fill for distracting elements can cut editing time dramatically. If you’re exploring what’s available, AI upscaling and enhancement tools can rescue slightly soft frames and turn good shots into great ones. And once you’re done editing, back everything up — cloud storage for photos means a hard drive failure won’t wipe out a client’s session.
The Five Mistakes That Mark an Amateur
- Shutter too slow. Blurry legs mean you were below 1/800s. Fix this before anything else.
- Lens too wide. Below 70mm, a horse’s proportions distort. Stay longer for full-body shots.
- Ears back. An angry or bored expression won’t sell. Wait for both ears forward.
- Messy background. A dumpster, a truck, a branch through the neck — move your feet.
- Focus on the wrong spot. Focusing on the chest when the head is the subject. For portraits, the eye is always the focus point.
Frequently Asked Questions
What shutter speed freezes a galloping horse?
Use 1/1000s as a minimum, and 1/2000s if you want every tendon and muscle fiber sharp. For trotting and dressage, 1/640–1/800s is usually enough. For standing portraits, 1/100s is fine as long as the horse holds still.
What focal length is best for horse photography?
The 70–200mm range is the standard workhorse. It gives you distance from the horse, fast glass for dark arenas, and natural proportions. Add a 100–400mm for big arenas and cross country, and an 85mm or 135mm prime for portraits. Avoid wide angles below 70mm for full-body shots — they distort the horse’s legs and head.
How do you get both ears forward in a horse photo?
Use an assistant behind you with a squeaky toy, crinkling treat wrapper, or soft animal sounds. Time the shutter for the moment both ears prick forward. Use recorded horse sounds sparingly — some horses, especially stallions, get overexcited by them.
What aperture should I use for horse portraits?
For head and shoulder portraits, f/2.8–f/4 gives beautiful background blur while keeping the whole head sharp. For full-body conformation shots, stop down to f/5.6–f/8 so the entire horse is in focus from nose to tail. At f/2.8 on a full-body shot, the hindquarters will be soft.
How do you photograph horses in dark indoor arenas?
Shoot wide open (f/2.8 if your lens supports it), push ISO to 3200–6400 — modern sensors handle it well — keep shutter at 1/800s or faster, and set a custom white balance. Noise is always better than motion blur, and noise can be reduced in editing.
What is black background equine photography?
It’s a fine-art style where you shoot a horse in a shaded area — usually a barn aisle — and expose so the background falls to near-black. The result looks like a studio portrait but requires no studio lighting. In editing, you’ll clean the background to pure black and dodge the horse so it stands out.
How do you stay safe around horses during a shoot?
Work with a handler who knows the horse, never stand directly behind it, wear closed-toe boots, keep gear out of walkways, and let the horse get used to you and the shutter sound before shooting. Watch body language — wide eyes, dancing feet, or pinned ears mean stop. A stressed horse gives bad photos and can be dangerous.
How do you capture the bond between a horse and its rider?
Build unposed time into every session. Ask the rider to groom, give treats, or just stand with the horse. Use a long lens so you’re not crowding the moment, and wait. The forehead presses, nuzzles, and quiet looks happen when the pair forgets the camera is there.
Final Thought
Great equine photography isn’t about the most expensive body or the longest lens. It’s about understanding horses — their rhythm, their fear triggers, that split second when both ears come forward — and having your settings already dialed in so you don’t miss it. The technical side you can memorize in an afternoon. The horse sense takes years. That’s what separates someone who takes pictures of horses from an equine photographer.