How to Batch Edit Photos: The 6-Stage Workflow That Saves Hours (2026 Guide)
TL;DR: The Short Answer
Batch editing works only if you do it in stages, and the most important stage is the one before you touch a slider: cull and group. Cull the rejects first (AI culling tools do this in minutes), then group photos by lighting condition — never batch a sunny outdoor shot with a dark indoor one. Edit one anchor photo fully, then Sync (Ctrl/Cmd+Shift+S in Lightroom) — but sync only the safe settings: white balance, tone curve, color grading, sharpening, noise reduction, lens corrections. Never sync exposure, crop, masks, or spot removal unless every photo was shot in identical light and framing — those settings are per-photo. For heavy volume (weddings, events), AI tools like Imagen learn your editing style from your catalog and apply it to thousands of photos, cutting editing time by up to 96%. Finish with a batch export that adds your watermark, embeds copyright metadata, resizes, and sharpens for output.
Why Most Batch Editing Fails (And How to Avoid It)
The number one mistake in batch editing is treating it as “select all, apply preset, done.” A preset applies identical numbers to every photo — but every photo was shot in slightly different light. The result: half your batch looks great, the other half looks too bright, too warm, or weirdly cropped. Professional batch editing is not about applying one setting everywhere — it is about doing the repetitive 80% in bulk, then touching up the unique 20% per photo.
The six stages, in order:
- Cull — remove rejects before you edit a single one
- Group — sort by lighting condition so each group gets its own anchor
- Anchor edit — fully edit one representative photo per group
- Sync — copy only the safe settings to the rest of the group
- AI assist — let AI handle the per-photo adjustments (exposure, white balance, crop)
- Export — watermark, metadata, resize, sharpen, all in one batch
Skip a stage and you will pay for it later — usually by re-editing half the batch by hand. A guide to wedding editing workflow covers the full event-photography pipeline that batch editing plugs into.
Stage 1: Cull First — Never Edit a Photo You Will Delete
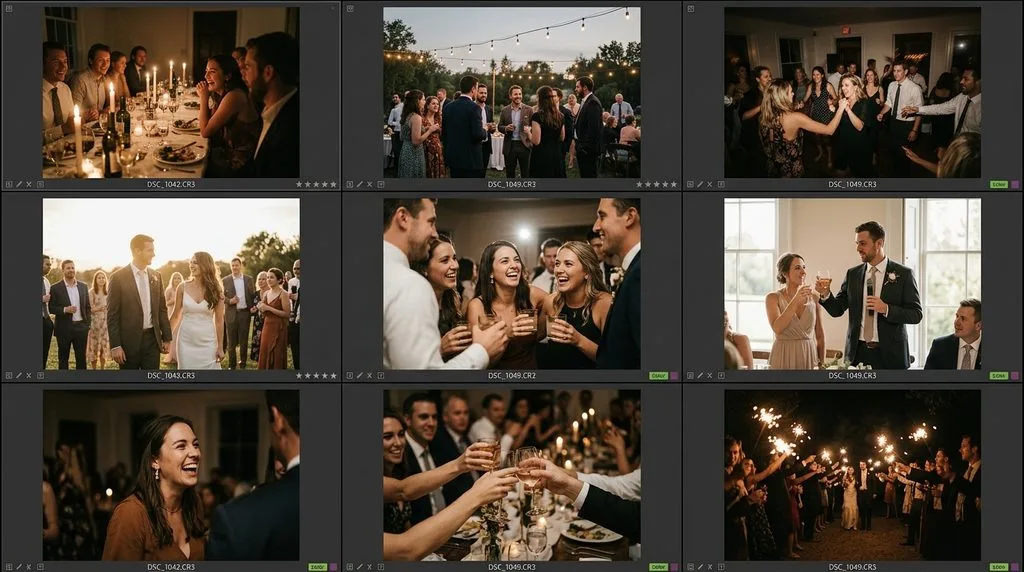
Culling is the highest-leverage step in the entire workflow. Every photo you delete now is a photo you never have to edit, export, or upload. For a wedding shooter delivering 500 photos from 3,000 raw files, culling removes 83% of the work before it starts.
Manual culling (fast):
- In Lightroom Library module, use Flag (P = pick, X = reject, U = unflag) and Star ratings (1–5).
- Caps Lock = auto-advance — press P or X and Lightroom jumps to the next photo automatically. This alone doubles culling speed.
- Work in passes: first pass reject obvious blinks/blurs, second pass pick the best from bursts, third pass final selects.
AI culling (faster):
- Aftershoot and Imagen AI analyze faces, blur, closed eyes, and duplicates, then suggest picks. You keep final say. Aftershoot’s Cull-to-Target lets you set a delivery number (e.g., 400 photos) and the AI culls to land near it.
- Photo Mechanic is the traditional speed king for browsing and tagging thousands of RAWs fast.
Rule: cull to your delivery number, not your comfort number. If the client expects 400 photos, cull to ~450 and leave room to trim during editing.
Stage 2: Group by Lighting — The Step Everyone Skips
This is the secret that makes syncing actually work. A preset applied across mixed lighting produces mixed results. But if you group photos by lighting, one anchor edit per group handles 80% of the work.
How to group in Lightroom:
- In the Library module, select photos from the same scene/location and add them to a Quick Collection or a Collection (press B to add to Quick Collection).
- Or use Color Labels (6 = red, 7 = yellow, 8 = green, 9 = blue) to tag lighting groups as you cull. Red = indoor warm, yellow = outdoor sunny, green = shade, blue = flash.
- Typical groups at a wedding: getting-ready (indoor, warm), ceremony (dim church + flash), portraits (outdoor shade), reception (dark venue + flash), dance floor (colored lights). Each group gets its own anchor edit.
What makes a valid group: same light source, same direction, same approximate brightness. If you moved from shade into sun, that is a new group. If the bride stepped into a sunbeam, that photo is its own group of one — edit it individually.
Stage 3: Edit the Anchor Photo — One Per Group
For each lighting group, pick the most representative photo — the one where the subject is well-lit and the exposure is closest to correct. Edit it fully:
- White balance — set once for the group; this is safe to sync.
- Tone — Exposure, Highlights, Shadows, Whites, Blacks. Exposure is per-photo; the rest are usually safe to sync.
- Tone Curve — your signature contrast shape. Safe to sync.
- Color / HSL / Color Grading — your signature look. Safe to sync.
- Lens Corrections — enable profile corrections and remove chromatic aberration. Safe to sync (same lens).
- Sharpening + Noise Reduction — safe to sync if same camera/ISO range.
- Calibration / Profile — your base camera profile. Safe to sync.
Do not add crop, spot removal, masks, or local adjustments to the anchor — those are unique to each photo and will be wrong everywhere else. A guide to outsource photo editing covers how studios build anchor-style presets for consistent handoffs.
Stage 4: Sync — The Right Settings, The Right Way
Now you copy the anchor’s settings to the rest of the group — but only the ones that belong.
In Lightroom Classic:
- Select the fully-edited anchor photo first (it becomes the “most selected” — highlighted lighter).
- Hold Shift and click the last photo in the group to select everything between.
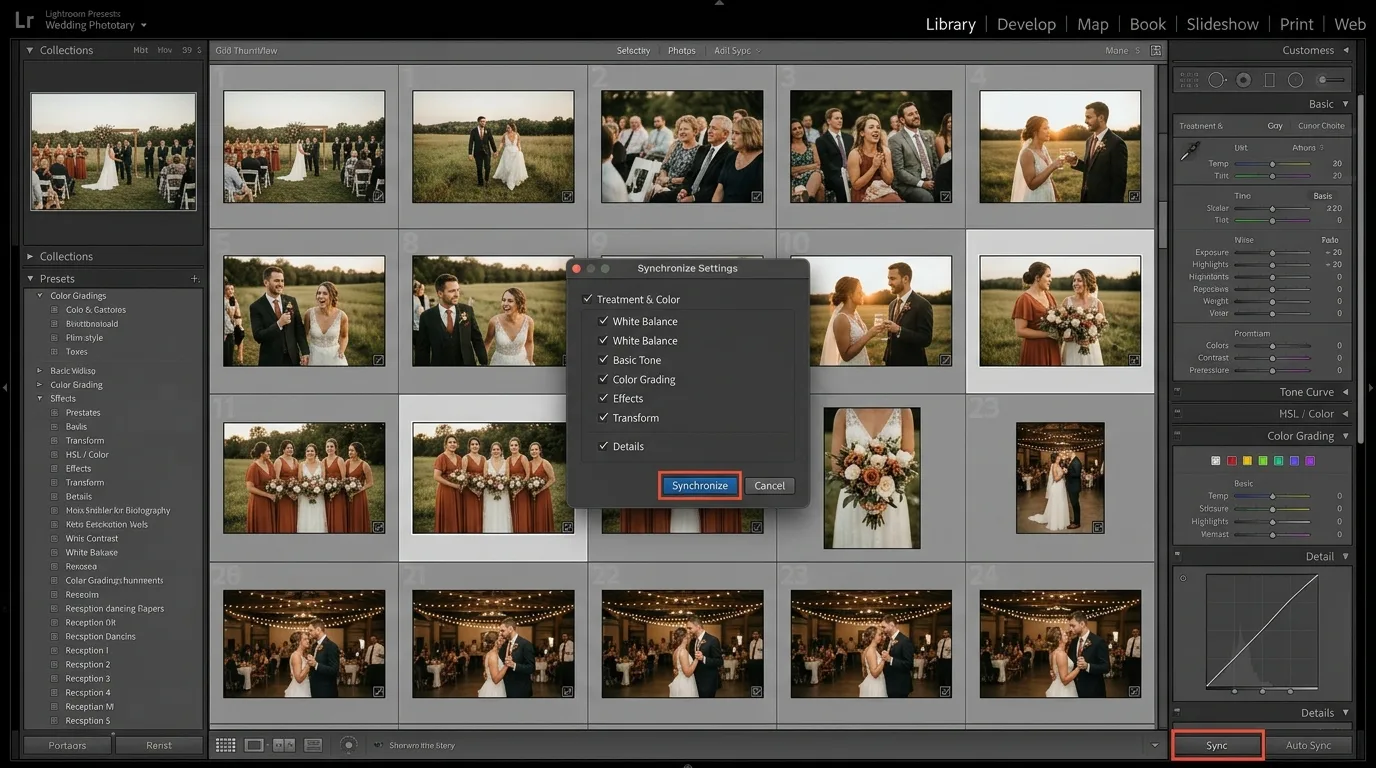
- Click Sync… (bottom-right of Develop module) or press Ctrl/Cmd+Shift+S.
- In the Synchronize Settings dialog, check only: White Balance, Tone Curve, Color Grading (or Split Toning), Sharpening, Noise Reduction, Lens Corrections, Calibration, Process Version.
- Uncheck: Exposure, Highlights, Shadows, Whites, Blacks (unless light was identical), Crop, Spot Removal, Masks/Local Adjustments, Transform.
- Click Synchronize.
The safe-vs-unsafe table — the core of good batch editing:
| Setting | Sync it? | Why |
|---|---|---|
| White Balance | Usually yes | Same light = same WB |
| Tone Curve | Yes | Signature contrast |
| Color Grading / HSL | Yes | Signature color |
| Sharpening | Yes | Same camera/lens |
| Noise Reduction | Yes (same ISO range) | Same sensor noise |
| Lens Corrections | Yes (same lens) | Profile-based |
| Exposure | Rarely | Every frame differs |
| Highlights/Shadows | Carefully | Varies with framing |
| Crop / Straighten | Never | Per-photo composition |
| Spot Removal | Never | Dust spots move per frame |
| Masks / Local Adjustments | Never | Subject position differs |
In Lightroom Desktop / Mobile: select the anchor, tap Copy Settings, select the group, tap Paste Settings, then uncheck the same unsafe items.
After syncing, flip through the group at Loupe view. Any photo that is too bright/dark or has a wrong white balance gets a 5-second individual nudge. That is the unique 20% — and it is fast because 80% is already done.
Stage 5: Photoshop Actions, Image Processor & Droplets — Pixel-Level Batch Work
For edits that live in Photoshop — skin retouching, background removal, watermarking, resizing for web — use Actions and batch processing.
Photoshop Actions (record once, run forever):
- Open one photo. Go to Window > Actions. Click Create New Action, name it, hit Record.
- Perform your steps — e.g., duplicate layer, run frequency separation, add watermark text layer, flatten, save. Click Stop when done.
- Run on a folder: File > Automate > Batch. Choose your action, choose the source folder, set a destination folder. Check “Suppress File Open Commands” and “Suppress Color Profile Warnings.”
Image Processor (the hidden gem):
- File > Scripts > Image Processor. Resize, convert to JPEG/PSD/TIFF, and run an action — all in one dialog, no setup. Best for “resize everything to 2048px and save as JPEG quality 80.”
Droplets (drag-and-drop):
- File > Automate > Create Droplet saves an Action as a tiny executable file. Drag a folder of photos onto it and the action runs on every one. Perfect for assistants or a second computer.
Free alternatives: XnConvert (80+ batch actions, 500+ formats, free), IrfanView (Windows, fast batch resize/rename), ImageMagick (command-line, scriptable, free). For export format choices, a guide to image formats compared covers JPEG vs PNG vs WebP for batch output.
Stage 6: AI Batch Editing — When Volume Is the Problem
For 1,000+ photo jobs (weddings, events, sports), even syncing takes hours. AI batch editors learn your personal editing style and apply it per-photo — adjusting exposure and white balance uniquely for each frame while keeping your signature look.
| Tool | Best for | How it works | Price |
|---|---|---|---|
| Imagen AI | Wedding/event, style learning | Builds a Personal AI Profile from your Lightroom catalog; applies your style per-photo | ~$10–20/mo + credits |
| Aftershoot | Culling + editing | AI culls (closed eyes, blur, duplicates) then edits with your profile | ~$10/mo |
| Evoto AI | Portraits, skin, background | Per-subject intelligence — won’t apply a child’s skin preset to an elder | Subscription |
| RapidPhoto | Mac, no subscription | 500-photo batch, AI tools, IPTC metadata, rename | One-time purchase |
| Pixelbin | Ecommerce/product | Batch AI transforms: background, watermark, resize, shadow | Usage-based |
Key truth: AI does not replace your taste — it replaces your repetition. You still review every delivered photo, but instead of editing each from scratch, you nudge each from 90% to 100%. Imagen’s own data says this cuts editing time by up to 96%. For studios scaling past one editor, a guide to cloud storage for photos covers the backup and delivery side of the pipeline.
Stage 7: Batch Export — The Step That Saves You Twice
Editing is done. Now export everything once, correctly, so you never have to do it again.
Lightroom Export dialog, batch settings:
- File Settings: JPEG, sRGB, Quality 80–90 (web) or TIFF/PSD (print/archive). A guide to image formats covers when to use which.
- Image Sizing: Resize to fit — Long Edge 2048px (web/social), 3600px (print). Check “Don’t Enlarge.”
- Output Sharpening: Sharpen For: Screen (web) or Matte/Glossy Paper (print), Amount: Standard.
- Watermarking: Check “Add Watermark” and choose a saved preset — text or graphic. Never deliver client photos without your watermark for preview galleries.
- Metadata: Include Copyright info (your name + year + rights). Embed IPTC: title, creator, copyright status. This is your legal protection.
- Post-Processing: Choose “Show in Finder/Explorer” or open in another app.
Save these as an Export Preset (click Add at the bottom of the Export dialog). Next time, one click exports the whole batch with identical settings. For print delivery, create a second export preset: TIFF, Adobe RGB, no resize, no watermark.
5 Common Batch-Editing Mistakes
- Syncing exposure across mixed light. Half the batch ends up too bright or too dark. Group by light first; nudge exposure per photo after sync.
- Syncing crop or spot removal. A crop that looks great on one photo ruins the next; a spot-healing brush applied to the wrong place clones a face. Never sync these.
- Not culling first. You spend an hour editing 500 photos, then delete 200. Cull to delivery number before editing.
- Forgetting metadata and watermark on export. Delivered photos with no copyright info are unprotected. Build it into the export preset.
- Trusting AI output without review. AI gets you to 90%, not 100%. Flip through every delivered photo at Loupe view; nudge the ones that need it.
Frequently Asked Questions
How do I batch edit photos in Lightroom?
Edit one fully-edited “anchor” photo from a group shot in the same light. Select it plus the rest of the group (Shift-click), click Sync (or Ctrl/Cmd+Shift+S), check only the safe settings (white balance, tone curve, color grading, sharpening, noise reduction, lens corrections), uncheck exposure, crop, spot removal, and masks, then Synchronize. Nudge each photo individually afterward.
What settings should I never sync in batch editing?
Never sync crop, spot removal, masks, or local adjustments — these are unique to each photo. Sync exposure only if every photo was shot in identical light (rare). Usually sync white balance, tone curve, color grading, sharpening, noise reduction, and lens corrections.
Can AI batch edit photos in my style?
Yes. Tools like Imagen AI and Aftershoot build a personal AI profile from your past Lightroom catalogs, then apply your style per-photo — adjusting exposure and white balance uniquely for each frame while keeping your signature look. They cut editing time by up to 96%, but you still review every delivered photo.
How do I batch resize and watermark photos?
In Photoshop, use File > Scripts > Image Processor — resize, convert format, and run an action all in one dialog. In Lightroom, build an Export preset with Image Sizing, Add Watermark, and Copyright metadata, then select all photos and click Export. Free tools: XnConvert and IrfanView.
What is the difference between a preset and sync?
A preset is a saved set of adjustments you apply to any photo — generic. Sync copies the exact adjustments from one specific photo to others — contextual. For batch work, edit one anchor, then sync; presets are better for import-time baselines and signature looks.
How do I batch edit on a phone?
In Lightroom Mobile, edit one photo, tap Copy Settings, select multiple photos, tap Paste Settings, and uncheck unsafe items like crop and exposure. Snapseed and VSCO offer batch-style presets, but they are less precise. For heavy volume, use desktop — phone batch editing is for small sets.
How many photos can I batch edit at once?
Lightroom handles 1,000+ selected photos fine, but sync speed depends on your computer. For very large batches, work in groups of 200–500 by lighting condition. AI tools like Imagen process in the cloud, so volume is limited by credits, not hardware.
Final Verdict
Batch editing is not a shortcut — it is a system. Cull to your delivery number, group by light, edit one anchor, sync only the safe settings, let AI handle the per-photo exposure nudges, and export once with watermark and metadata built in. Do that, and a 500-photo wedding that used to take ten hours takes two — with more consistent results than editing each photo from scratch ever gave you. The photos that get the unique 20% of your attention are the ones worth it, and the rest get your signature look for free.