How to Remove Reflections from Photos: Glass, Glasses, Windows, and Water — Type-by-Type Fixes
TL;DR: The Short Answer
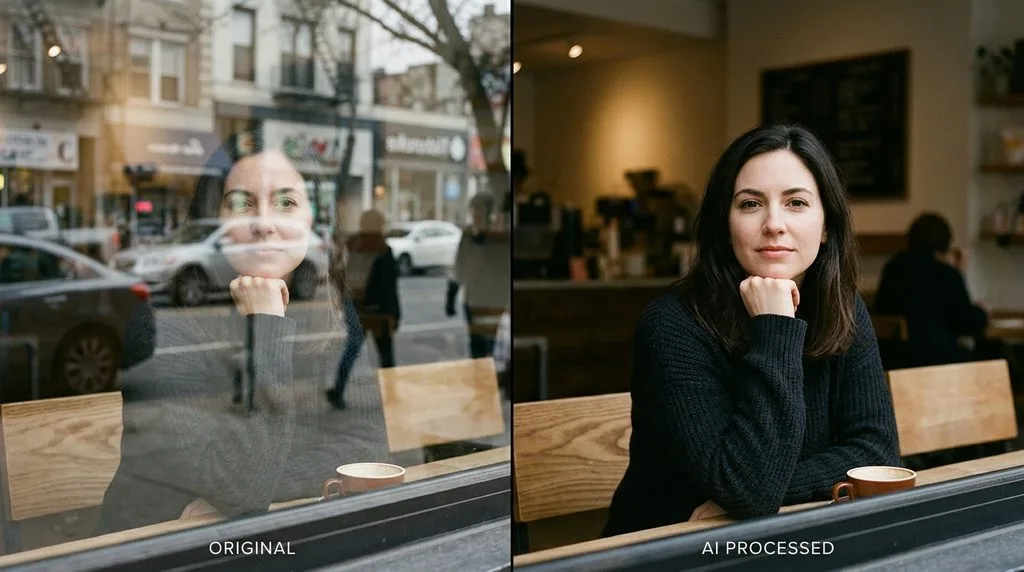
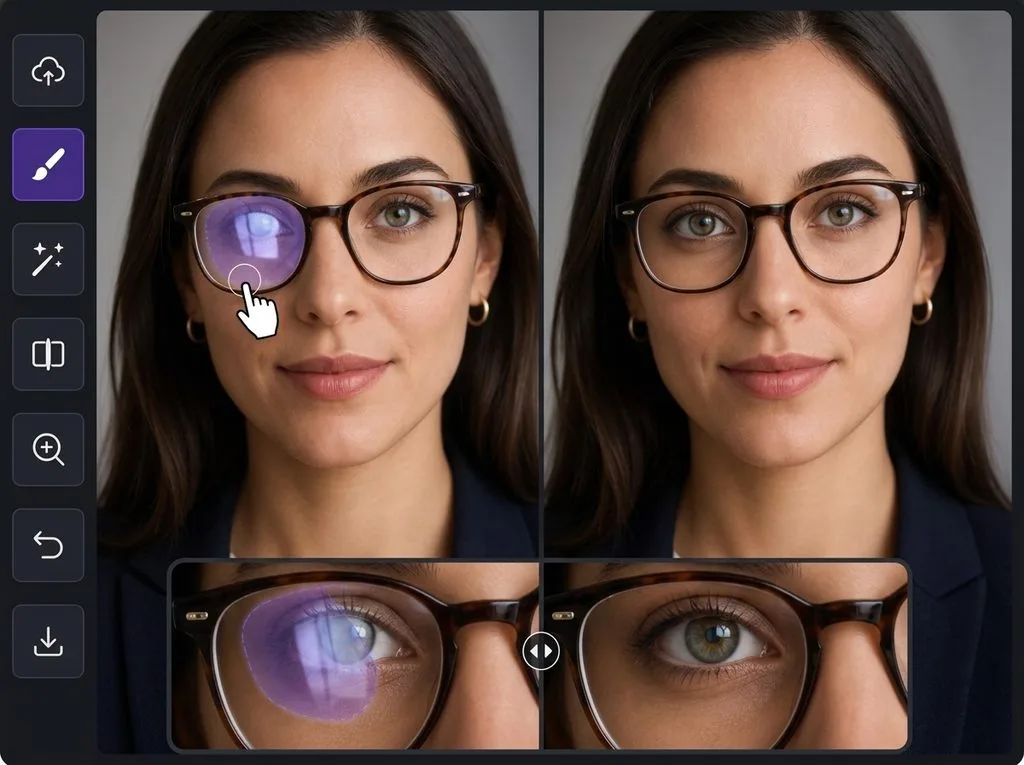
Reflections come in types, and the type determines the fix. Window/glass reflections: try Photoshop’s dedicated Reflection Removal tool (Edit > Reflection Removal, 2024+) first — it creates a separate reflection layer with an Amount slider (0–100%). Then Generative Fill (select the reflection, prompt “remove reflection” or leave blank) for what remains. Glasses glare (hardest): Clone Stamp on a new layer, Sample: Current & Below, blend mode Darken, opacity 30–50% — this darkens bright glare without touching skin. Heavy glare over the iris: Generative Fill with “remove glare preserve eye detail,” or copy the other eye flipped horizontally.
Small spots: Healing Brush / Spot Healing (J) or the AI Remove Tool. Product/metal reflections: CPL doesn’t work on metal — use angle, black card, or post. Prevention beats every fix: a circular polarizer (CPL) removes reflections from non-metallic surfaces (glass, water, plastic, glossy paint) at capture — rotate the front ring until reflections vanish (costs 1.5–2 stops). For glasses: tilt frames slightly down, light from the side, never flash straight into lenses. Honest caveat: glare covering eyes means the eye detail was never captured — AI invents it. Verify identity after Generative Fill.
Reflection Type → Best Fix (The Master Table)
| Reflection type | What it looks like | Best fix | Difficulty |
|---|---|---|---|
| Window/glass (whole scene) | Reflected sky/buildings over what’s behind glass | Photoshop Reflection Removal tool → Generative Fill | Medium |
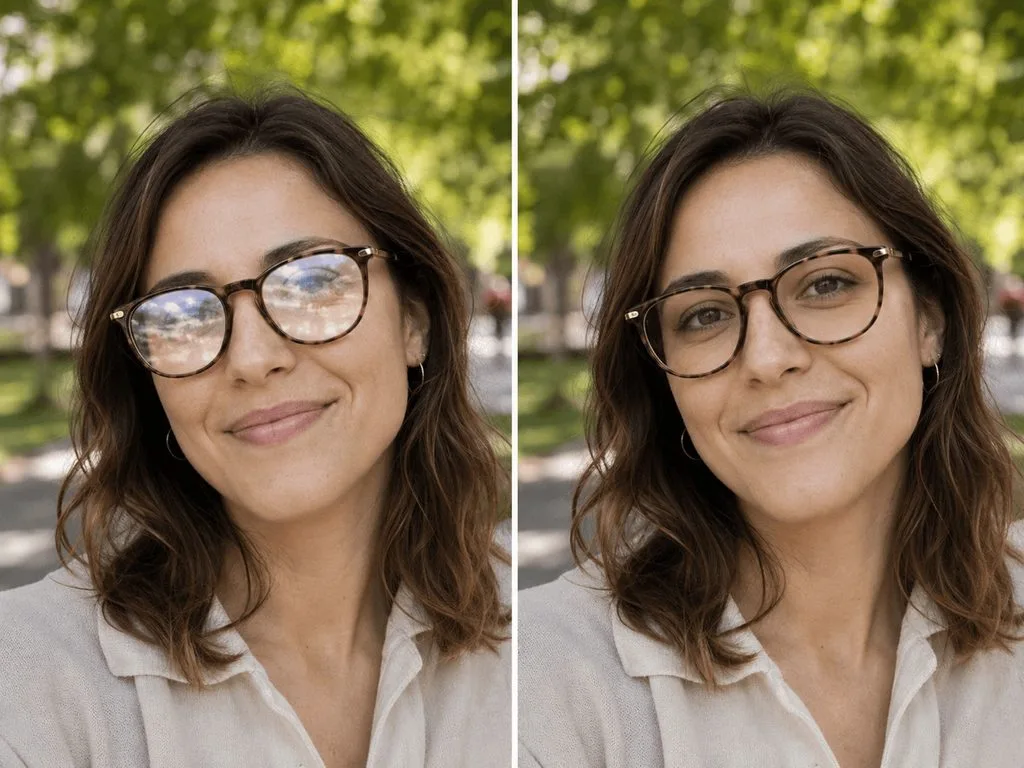
| Glasses/sunglasses glare | Bright white/colored spot over lens, often over eye | Clone Stamp (Darken blend) → Generative Fill → copy other eye | Hard |
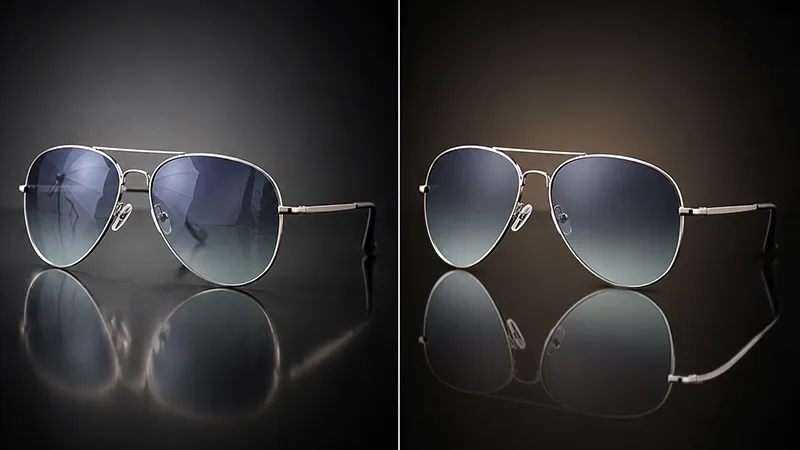
| Product/metal shine | Hot specular highlight on bottle/jewelry/car | Dodge/Burn, Clone Stamp, angle at capture | Medium |
| Water reflection | Sky/subject reflected on water surface | CPL at capture (can remove or enhance); post rarely fixes well | Easy (at capture) |
| Mirror/selfie | Camera/photographer visible in mirror | Generative Fill (blank prompt) or Clone Stamp | Medium |
| Flash glare on skin | Shiny forehead/nose from on-camera flash | Dodge/Burn, Frequency Separation, Airbrush app | Easy |
| Small specular spot | Tiny bright dot on eye/glass/jewelry | Spot Healing / Remove Tool (J) | Easy |
A guide to removing glasses glare in Photoshop covers the hardest case in depth; a guide to removing objects from photos covers Generative Fill selection technique; a guide to portrait retouching covers skin matching after glare removal; a guide to photo editing for beginners covers the basic layer workflow.
Fix #1: Photoshop Reflection Removal Tool (2024+, First Try)
Photoshop 2024+ added a dedicated AI tool:
- Open image. Edit > Reflection Removal.
- Check “Create separate reflection layer” (non-destructive — you can paint back in where it over-corrected).
- Quality: Preview (fast) → Standard → Best (slowest, most accurate).
- Click OK. Then adjust the layer opacity, or use a black brush on the layer mask to restore areas where the AI removed something you wanted (e.g., a real reflection that adds depth).
- Also available via Filter > Camera Raw Filter > Optics > Reflection Removal with an Amount slider (0–100%).
This tool works best on window/glass reflections where the reflection is a semi-transparent overlay. It struggles with glasses glare (small, high-contrast, over an eye) — move to Fix #2 for those.
Fix #2: Generative Fill (Second Try, for What Remains)
When Reflection Removal leaves artifacts:
- Lasso (L) a loose selection around the remaining reflection — include a little clean border for context.
- Click Generative Fill in the Contextual Taskbar.
- Leave the prompt blank (typing “remove reflection” often confuses it — blank = context-aware fill). Or type “clean glass, no reflection” / “remove glare preserve eye detail.”
- Generate 3 variations, pick the best. 2026 update: attach a reference image if identity matters (e.g., a specific eye behind glasses).
- If the fill is close but edges are off, use a soft eraser at 20–40% to blend.
Fix #3: Glasses Glare — The Clone Stamp Darken Trick (Most Underused)
Glasses glare is the hardest reflection because it sits over an eye — the most important feature. The pro technique:
- Create a new blank layer above the background (non-destructive).
- Select Clone Stamp (S). In top options: Sample: Current & Below, Blend Mode: Darken, Opacity 30–50%, soft brush (Hardness 0–30%).
- Zoom to 300–400%. Hold Alt/Option and click a clean area of the lens/iris near the glare.
- Paint over the glare. Darken blend mode = only pixels darker than the glare get replaced — the bright white glare disappears, but skin/iris tone stays intact. This is why it works better than Normal mode (which would paste a flat patch).
- Re-sample often (Alt-click) as you move across the glare. Multiple light passes beat one heavy pass.
- If glare covers the iris/pupil entirely: Generative Fill “remove glare preserve eye detail,” or copy the other eye (Lasso select, Ctrl+J, Edit > Transform > Flip Horizontal, position, match color with Curves clipped to that layer).
- Match lens tint: add a Color Balance or Hue/Saturation layer clipped to the repair layer so the fixed lens matches the other lens.
Fix #4: Small Spots — Healing Brush / Remove Tool
For tiny specular highlights (eye catchlight that’s too big, a dot on glass, a sparkle on jewelry):
- Spot Healing Brush (J): Content-Aware checked, brush slightly larger than the spot, one click.
- Remove Tool (J, 2024+): AI-powered, paint over the spot — better than Spot Healing for spots on textured surfaces.
- Healing Brush (J): Alt-click a clean source, paint over the spot — more control than Spot Healing.
- Always work on a new blank layer with Sample: Current & Below.
Fix #5: Mobile & Online (No Desktop)
- Snapseed (free): Tools > Healing — tap small glare spots. Best for tiny specks. Manual for larger areas.
- TouchRetouch (~$2 one-time): Objects > Brush or Lasso over glare > GO. Has a dedicated Remove Glare mode. Best mobile all-rounder.
- Apple Photos Clean Up (iPhone 15 Pro / 15 Pro Max / 16+): built-in, brush over small reflections.
- Facetune / Airbrush: flash glare on skin (shiny forehead) — their “glare removal” or “de-shine” tool.
- Online (free): cleanup.pictures, Magic Eraser, Photoroom — brush over reflection, AI fills. Upload original, download at max resolution.
Prevention: CPL Polarizer (Removes Reflections at Capture)
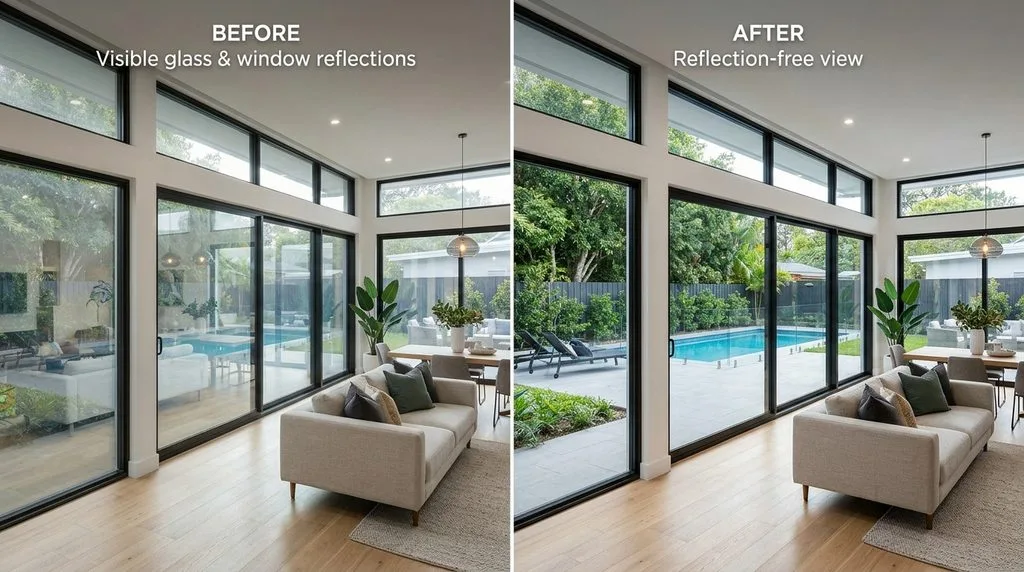
A circular polarizer (CPL) is the single most effective reflection-prevention tool — and it’s one of the few filter effects you CANNOT recreate in post:
- Screw the CPL onto your lens. Rotate the front ring while looking through the viewfinder/Live View. Reflections fade in and out as you rotate. Stop at the point where they’re weakest (or strongest, if you want to enhance water reflection creatively).
- Works on: glass, water, plastic, glossy paint, leaves, wet rocks — non-metallic surfaces. Makes skies deeper blue, foliage more saturated.
- Does NOT work on: metal (chrome, jewelry, stainless steel). Metal reflections are not polarized — change your angle or use a black card instead.
- Costs 1.5–2 stops of light — compensate with slower shutter, higher ISO, or wider aperture.
- Shooting through glass (window/museum): press the lens hood (or a black cloth) against the glass to kill reflections. Angle 30–40° to the glass, not straight-on.
- Product photography: use a light tent (softens light, kills reflections) + black card (held to one side to replace a white reflection with black on glossy products).
- Glasses at capture: tilt the frames slightly down (10–15°), position lights at 45° to the side and above, never fire a flash straight into lenses (it bounces straight back).
The Full Removal Workflow (Step by Step)
- Try AI first: Edit > Reflection Removal (window/glass) or Generative Fill blank prompt. Check at 100%.
- Spot-fix remaining: Clone Stamp Darken blend (glasses glare), Healing Brush/Remove Tool (small spots).
- Reconstruct missing detail: copy other eye flipped, or Generative Fill with reference image for identity.
- Match color/lighting: add a clipped Curves/Color Balance layer to the repaired area so it matches surroundings — AI fills often have a subtle color shift.
- Check both lenses/eyes in a portrait — one fixed, one natural, looks mismatched. Match tint and brightness.
- Final: light sharpen on the repaired area (AI fills are often slightly soft).
5 Common Reflection-Removal Mistakes
- Using Clone Stamp in Normal mode on glasses glare. It pastes a flat patch. Use Darken blend mode — it only replaces the bright glare, preserves tone.
- Typing “remove reflection” in Generative Fill. Blank prompt works better for removal. Type only for reconstruction (“natural eye behind lens”).
- Forgetting to match the other lens. One lens fixed, one with original tint = mismatched. Clip a Color Balance layer to the repair.
- Expecting CPL to work on metal. It won’t — chrome/jewelry/stainless steel reflections are not polarized. Use angle or black card.
- Removing ALL reflections. A small catchlight in an eye or a subtle reflection on glass adds realism. Remove the distracting ones, keep the natural ones.
Frequently Asked Questions
How do you remove reflections from photos?
First try Photoshop’s Reflection Removal tool (Edit > Reflection Removal, 2024+) for window/glass, or Generative Fill (select reflection, leave prompt blank). For glasses glare: Clone Stamp on a new layer, Sample Current & Below, blend mode Darken, opacity 30–50%. For small spots: Healing Brush or Remove Tool (J). Prevention: CPL polarizer filter at capture removes glass/water reflections.
How do you remove glare from glasses in photos?
Clone Stamp is the pro method: new blank layer, Sample: Current & Below, blend mode Darken, soft brush, opacity 30–50%, Alt-click clean lens near glare, paint over it. Darken mode only replaces the bright glare, not skin tone. For heavy glare over the iris: Generative Fill “remove glare preserve eye detail,” or copy the other eye, flip horizontally, and match color. Verify identity — AI can change eye shape/color.
Does a polarizing filter remove all reflections?
No — a CPL removes reflections from non-metallic surfaces (glass, water, plastic, glossy paint, leaves). It does NOT work on metal (chrome, jewelry, stainless steel). Rotate the front ring to find minimum reflection; it costs 1.5–2 stops of light. It can also enhance water reflections if rotated the opposite direction (creative control).
Can you remove reflection from glasses on iPhone?
Yes — Snapseed Healing (free, small spots), TouchRetouch (Object Removal brush + GO, dedicated Remove Glare mode), or Apple Photos Clean Up (iPhone 15 Pro+/16). For heavy glare over an eye, mobile apps struggle — transfer to desktop Photoshop for Clone Stamp Darken + Generative Fill.
What is the best app to remove glare from photos?
Desktop: Photoshop (Reflection Removal + Generative Fill + Clone Stamp Darken). Mobile: TouchRetouch (best all-rounder, one-time purchase), Snapseed (free, small spots), Facetune/Airbrush (flash glare on skin). Online: cleanup.pictures, Magic Eraser (free, fast). For glasses glare specifically, Photoshop still beats all apps.
How do you prevent glasses glare in portraits?
Tilt the frames slightly down (10–15°) so lenses don’t face the light directly. Position lights at 45° to the side and above, not straight-on. Never fire on-camera flash straight into lenses (it bounces back as glare). Use a larger light source (softbox) — softer reflections are less noticeable. A polarizer on the camera helps if the glasses are not too curved.
Can AI remove reflections from eyes behind glasses?
Partially. Generative Fill can reconstruct a plausible eye, but if the glare completely covers the iris, the AI invents the eye — it may change eye color, shape, or even the person’s identity. Use the 2026 reference-image feature (attach a clear photo of the person) to lock identity, or copy the other eye flipped. Always verify the result looks like the same person.
How do you remove reflection from a mirror selfie?
The camera/photographer visible in a mirror: select it with Lasso, Generative Fill with blank prompt (Photoshop will reconstruct the mirror/surroundings). Or Clone Stamp from clean mirror areas. If the mirror reflects a room you want to keep but the photographer is in the way, use Content-Aware Fill with a custom sampling area (Edit > Content-Aware Fill, paint in the sampling brush where you want pixels sampled from).
Final Verdict
Reflection type determines the fix: window/glass → Photoshop Reflection Removal + Generative Fill; glasses glare → Clone Stamp Darken blend mode (the pro trick) + Generative Fill for eyes; small spots → Healing Brush; metal → angle/black card at capture, CPL won’t help. Always work on new layers, match color/lighting afterward, and verify identity when AI reconstructs eyes. And prevent it next time: a CPL polarizer kills glass/water reflections at capture for $30–80 — cheaper and cleaner than any post fix. Get the type right and most reflections disappear in under five minutes.