How to Fix Color Cast: Remove Yellow, Blue, and Green Tints — The Neutral-Gray Method
TL;DR: The Short Answer
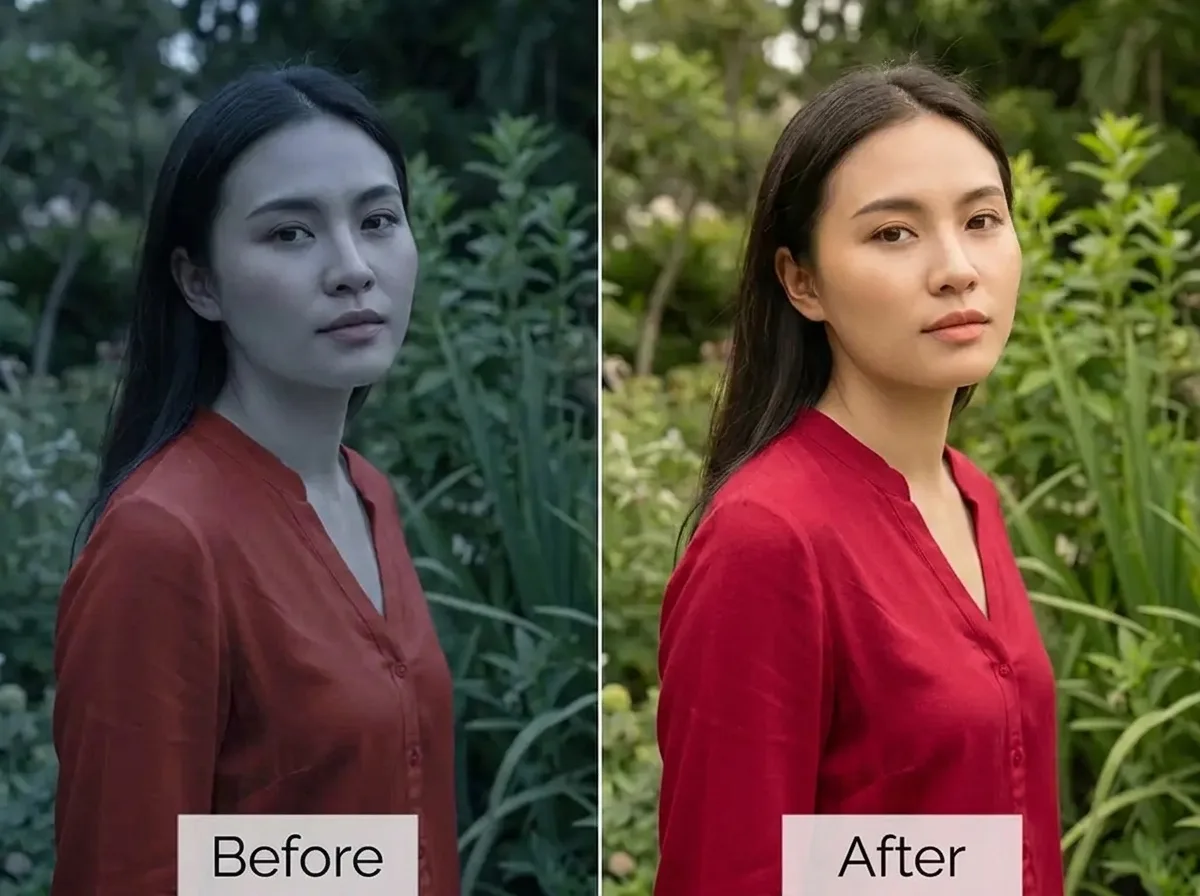
A color cast is an unwanted tint — yellow from tungsten bulbs, blue from shade, green from fluorescent lights, yellow/magenta from old photos — that shifts every color in the frame. The fix is to find something in the photo that should be neutral gray (R=G=B) and click it with the White Balance eyedropper (Lightroom: W key; Camera Raw: I key; Photoshop Levels/Curves: middle eyedropper). The software instantly recalculates Temperature and Tint to neutralize that point. Temperature slides on the blue↔yellow axis (left=cool, fixes yellow; right=warm, fixes blue). Tint slides on green↔magenta (right=magenta, fixes green; left=green, fixes magenta). For one-click Photoshop: Image > Adjustments > Match Color > tick Neutralize, or Auto Color (Shift+Ctrl+B).
For stubborn casts: Color Balance (Cyan-Red / Magenta-Green / Yellow-Blue, per shadow/midtone/highlight), Selective Color (target Yellows/Neutrals), or Curves black/white/gray eyedroppers. For localized casts (mixed lighting): fix global WB, then brush/gradient the offending area. Old photos yellow because paper brighteners break down with age — Auto Color or Curves gray point, then Vibrance (not Saturation). Shoot RAW — white balance is fully adjustable with zero quality loss; with JPEG, keep Temp shifts under ±15 to avoid banding.
What Causes Color Cast (6 Common Types)
Every light source has a color temperature, and your camera’s white balance must match it. When it doesn’t, you get a cast. Six types cover 99% of cases:
| Cast color | Cause | Kelvin | Fix direction |
|---|---|---|---|
| Yellow/orange | Tungsten/incandescent bulbs, candlelight, sunset | 1500–3200K | Temp left (cooler, toward blue) |
| Blue/cold | Shade, cloudy day, snow, open sky | 6500–10,000K | Temp right (warmer, toward yellow) |
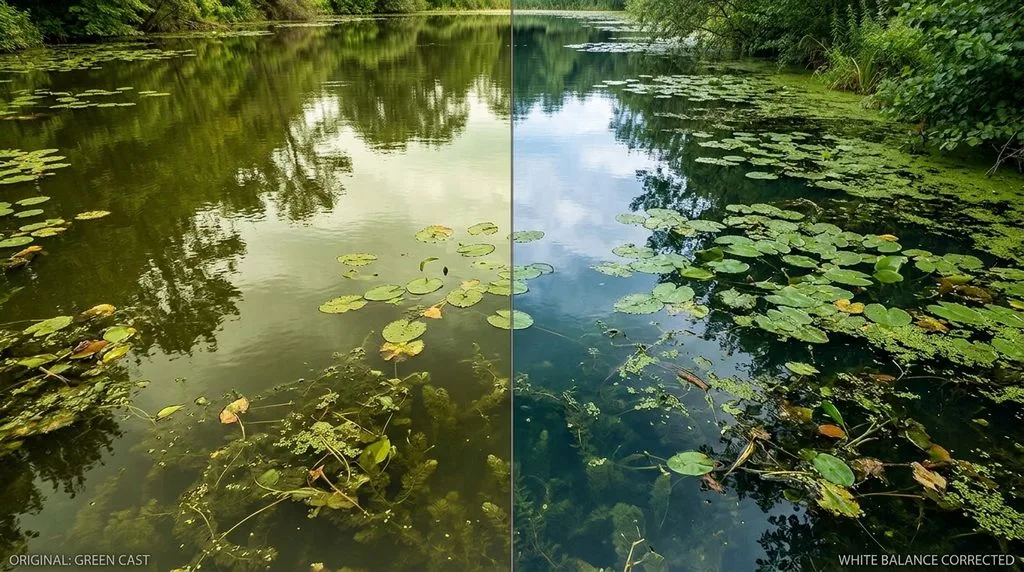
| Green | Fluorescent tubes, cheap LED, underwater, foliage bounce | 4000–5000K + green spike | Tint right (toward magenta) |
| Magenta/pink | Some LED, old film dye shift | — | Tint left (toward green) |
| Yellow/brown | Old photo fading (paper brighteners break down) | — | Auto Color / Curves gray point + Vibrance |
| Mixed/local | Tungsten lamp + window daylight in same room | — | Fix global WB, brush local area |
A guide to color grading in Photoshop covers creative color work after correction; a guide to portrait retouching covers skin-tone checks; a guide to photo editing for beginners covers the basic workflow; a guide to image formats compared covers why RAW beats JPEG for WB recovery.
Step 1: Find the Neutral Gray (The Master Method)
This single step fixes 80% of color casts. Something in almost every photo should be neutral — a white shirt, concrete, a gray wall, a whiteboard, a cloud, the whites of an eye (careful — eyes are tricky). Here’s how:
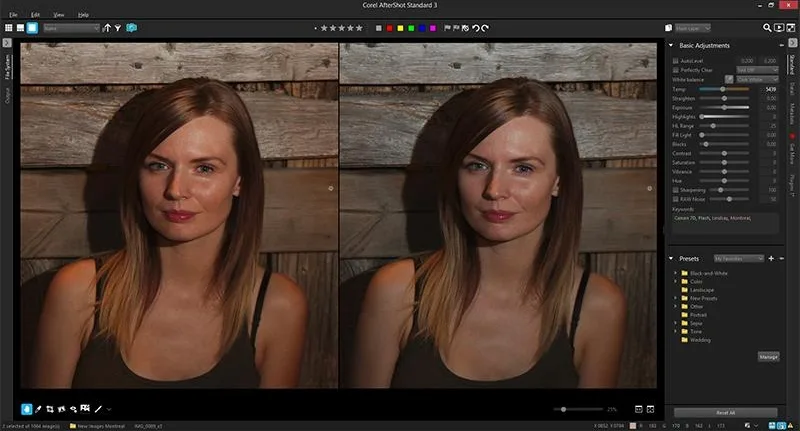
- Lightroom / Camera Raw: Press W (White Balance Selector). Hover over the image — the Loupe shows RGB values. Click a spot where R ≈ G ≈ B (within 5–10 points of each other) and that is NOT blown out (not pure white 255) or pure black. Lightroom sets Temp and Tint so that spot becomes neutral.
- Photoshop (Levels/Curves): Add a Levels or Curves adjustment layer. Double-click the middle (gray) eyedropper. Set target to neutral gray (R=G=B=128, or use the default). Click the neutral area in the image. The whole cast shifts. Also set the black point (left eyedropper on darkest shadow) and white point (right eyedropper on brightest non-clipped highlight).
- No neutral in the photo? Use the Match Color > Neutralize one-click (below), or estimate with Temp/Tint sliders. Skin tones are a good reality check — if skin looks natural, the WB is probably right.
Step 2: Fine-Tune Temp and Tint (Two Sliders, Two Axes)
After the eyedropper, fine-tune by hand. Two sliders control everything:
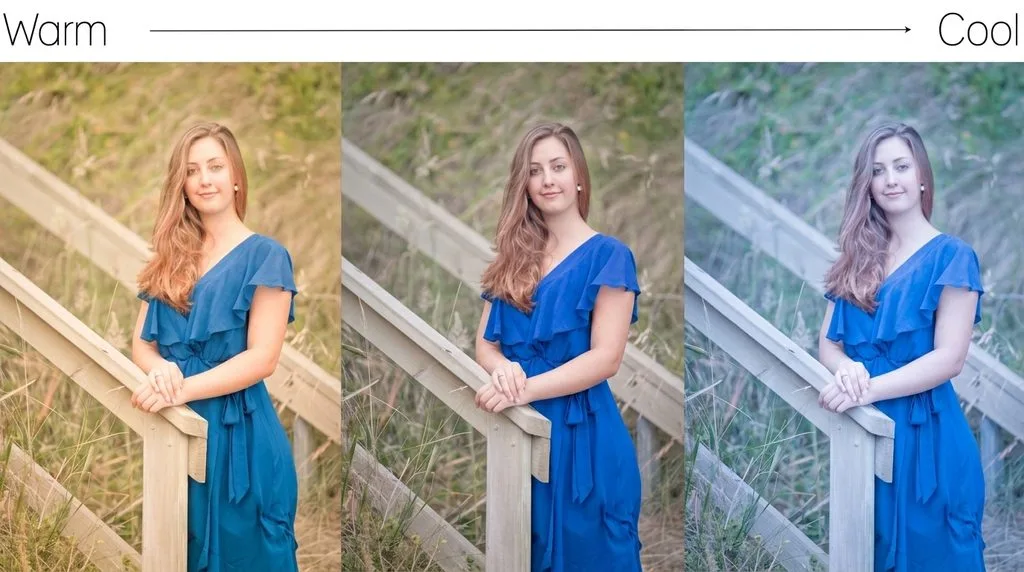
- Temperature (blue ↔ yellow): Slide left to cool (fixes yellow/orange tungsten cast — often a big move, 1000–2000K or more). Slide right to warm (fixes blue shade/snow cast).
- Tint (green ↔ magenta): Slide right toward magenta (fixes green fluorescent/underwater cast — cheap LEDs often need +20 to +40). Slide left toward green (fixes magenta/pink cast).
Reality checks: White looks white. Gray looks gray. Skin tones look natural (not green, not blue, not jaundiced-yellow). If you’re unsure, toggle the before/after (backslash \ in Lightroom) — the corrected version should feel “unremarkable,” not dramatic.
Step 3: Photoshop One-Click Methods (When You Can’t Find Neutral)
Method A — Auto Color (fastest): Image > Auto Color (Shift+Ctrl+B / Shift+Cmd+B). Photoshop finds the darkest, lightest, and most-neutral pixels and remaps them. Works on ~60% of photos. Use it as a starting point, then refine with Temp/Tint or Color Balance.
Method B — Match Color Neutralize (best one-click): Flatten a copy (or work on a merged layer: Ctrl+Alt+Shift+E). Image > Adjustments > Match Color. Even with no source image selected, tick the Neutralize checkbox — Photoshop finds the dominant cast and removes it. Pull back Fade if it over-corrects. This is your safety net when there’s no clean neutral to click.
Method C — Camera Raw Filter: Filter > Camera Raw Filter (Shift+Ctrl+A). Same WB eyedropper and Temp/Tint as Lightroom, inside Photoshop. Great for JPEGs.

Step 4: Stubborn Casts — Color Balance & Selective Color
If Temp/Tint can’t fix it (usually because the cast lives in only one tonal range — e.g., blue shadows + yellow highlights in mixed light), go deeper:
- Color Balance adjustment layer (Layer > New Adjustment Layer > Color Balance): Three axes — Cyan↔Red, Magenta↔Green, Yellow↔Blue — applied separately to Shadows, Midtones, Highlights. If shadows are blue but highlights are yellow (mixed light), add yellow to Shadows and blue to Highlights independently.
- Selective Color adjustment layer: Pick a color channel (Yellows, Neutrals, Whites, Blacks) and adjust Cyan/Magenta/Yellow/Black within it. To kill a yellow cast in neutrals: select Neutrals, pull Yellow slider toward Cyan (subtract yellow). To kill green in midtones: select Greens, add Magenta.
- HSL/Color Mixer (Lightroom): If only one color is off (e.g., grass is too neon green), desaturate or shift that single Hue instead of global WB.
Step 5: Localized Casts (Mixed Lighting) — Brush It Out
Mixed lighting (a tungsten lamp + a window in the same room) means no single global WB fixes both. Workflow:
- Set global WB for the subject/skin (usually the most important).
- Use a gradient filter, radial filter, or adjustment brush (Lightroom) or a Curves/Color Balance layer with a layer mask (Photoshop) on the offending area.
- Nudge Temp/Tint on just that region. For a warm lamp spill on a wall, brush cool (left Temp) + slightly green (left Tint).
- Feather the mask edge hard so the correction blends.
Old Photos: The Yellow/Magenta Fading Cast
Old photos yellow because photographic paper contains optical brighteners that break down with age and light — the paper base itself shifts from white toward cream/yellow. Color dyes also fade unevenly (cyan fades fastest, leaving yellow/magenta). Fix:
- Auto Color or Match Color Neutralize — often enough.
- Curves gray eyedropper on a neutral area (the edge of the print border, if white, is a great reference).
- Color Balance midtones — add Cyan/Blue to counter yellow; add Green to counter magenta.
- Vibrance, not Saturation — after removing the cast, colors look flat. Vibrance boosts muted colors without over-saturating skin. Saturation pushes everything and can look fake.
- If the print is physically faded (not just color-shifted), pair with contrast/exposure recovery and a light denoise.

Prevention (Better Than Any Fix)
- Shoot RAW. White balance is metadata — fully adjustable in post with zero quality loss. JPEG bakes WB in; keep shifts under ±15 Temp to avoid banding.
- Use a gray card. Shoot one frame with a gray card in the scene; click it in post. 100% accurate WB every time.
- Set a custom white balance in-camera for tricky lighting (fluorescent studios, mixed venues).
- Avoid mixed lighting — turn off the tungsten lamp near a window, or gel the window to match.
- Check the back of the camera — zoom in on a white/gray object; if it looks tinted, fix WB before you leave.
5 Common Color-Cast Mistakes
- Clicking a blown-out white as “neutral.” Pure white (R=G=B=255) has no color data — the eyedropper can’t read it. Click a light gray or non-clipped white instead.
- Over-correcting to “clinical white.” Sunset photos should be warm; snow in shade can be a little blue. Correct casts, don’t erase mood. Use creative white balance intentionally.
- Ignoring skin tones. If skin looks green or blue, the WB is wrong even if whites look white. Skin is the ultimate reality check for portraits.
- Pushing JPEG Temp too far. Beyond ±15 you’ll get banding in skies and shadows. Shoot RAW for big WB shifts.
- Forgetting to check all tonal ranges. A global WB fix can leave blue shadows or yellow highlights. Use Color Balance (per tonal range) or a masked brush.
Frequently Asked Questions
How do you fix a color cast in a photo?
Click the White Balance eyedropper (Lightroom: W, Camera Raw: I) on an area that should be neutral gray (R≈G≈B, not blown out). The software sets Temp and Tint to neutralize it. Fine-tune Temp (blue-yellow) and Tint (green-magenta) by hand. In Photoshop: Match Color > Neutralize, Auto Color (Shift+Ctrl+B), or Curves/Levels gray eyedropper. For stubborn casts: Color Balance and Selective Color adjustment layers.
What causes a color cast?
Mismatched white balance. Tungsten light = yellow/orange cast (2700–3200K). Shade/snow/open sky = blue cast (6500–10,000K). Fluorescent and cheap LED = green cast (4000–5000K + green spike). Old photos = yellow/brown from fading paper brighteners. Underwater = green/blue. Mixed lighting = localized casts in different parts of the frame.
How do I fix a yellow color cast?
Move the Temperature slider left (cooler, toward blue) — for tungsten indoor shots this is often a big move (1000–2000K). Or click a neutral gray with the WB eyedropper. In Photoshop: Auto Color, or Match Color > Neutralize, or Selective Color > Neutrals > pull Yellow toward Cyan. For old yellowed photos: Curves gray point + Vibrance.
How do I fix a blue color cast (shade/snow)?
Move the Temperature slider right (warmer, toward yellow). Shade and snow reflect the blue sky, so the cast is often strong — don’t be afraid to push Temp +1000K or more. Check skin tones; if skin looks natural, you’re there.
How do I fix a green color cast (fluorescent/underwater)?
The Tint slider, not Temperature. Move Tint right (toward magenta) — cheap fluorescent LEDs often need +20 to +40. Underwater: also raise Temperature toward yellow to counter blue water. Fluorescent WB preset in-camera helps at capture.
Can you fix color cast in a JPEG?
Yes, but with limits. JPEG bakes white balance in — big Temp shifts (beyond ±15) cause banding in skies and shadows. Use the eyedropper first (smallest shift), then gentle Color Balance. Shoot RAW for unlimited WB recovery — it’s the single best prevention.
What is Match Color Neutralize in Photoshop?
Image > Adjustments > Match Color > tick the Neutralize checkbox. Even with no source image, Photoshop analyzes the dominant color cast and removes it. Pull back the Fade slider if it over-corrects. It’s the fastest one-click fix when you can’t find a neutral gray to click.
How do I fix color cast in old photos?
Old photos yellow because paper brighteners break down with age; dyes fade unevenly (cyan fades fastest, leaving yellow/magenta). Fix: Auto Color or Curves gray eyedropper (use the white print border as reference), Color Balance midtones (add Cyan/Blue to counter yellow), then Vibrance (not Saturation) to bring colors back. Pair with contrast/exposure recovery if the print is physically faded.
Final Verdict
Color cast is a white-balance problem, and the neutral-gray eyedropper fixes 80% of it in one click. Find something that should be gray, click it, fine-tune Temp and Tint, and check skin tones. For one-click Photoshop: Match Color > Neutralize or Auto Color. For stubborn or localized casts: Color Balance per tonal range, Selective Color, and masked brushes. Old photos need the gray-point + Vibrance combo. And prevent it next time: shoot RAW, use a gray card, and avoid mixed lighting. Get the whites white and the skin natural, and every other color falls into place.