How to Fix a Corrupted SD Card (and Recover Your Photos) — Step-by-Step Guide
TL;DR — The short answer: Yes, most corrupted SD cards can be fixed. Stop using the card immediately, recover your files to another drive with data-recovery software, then repair it — try a different card reader/USB port first, run chkdsk X: /f /r on Windows or First Aid in Disk Utility on Mac, and only format the card (preferably in your camera) as a last resort. If the card is physically cracked or the data is irreplaceable, skip DIY and send it to a professional recovery lab.
1. First: Is Your Card Actually Corrupted?
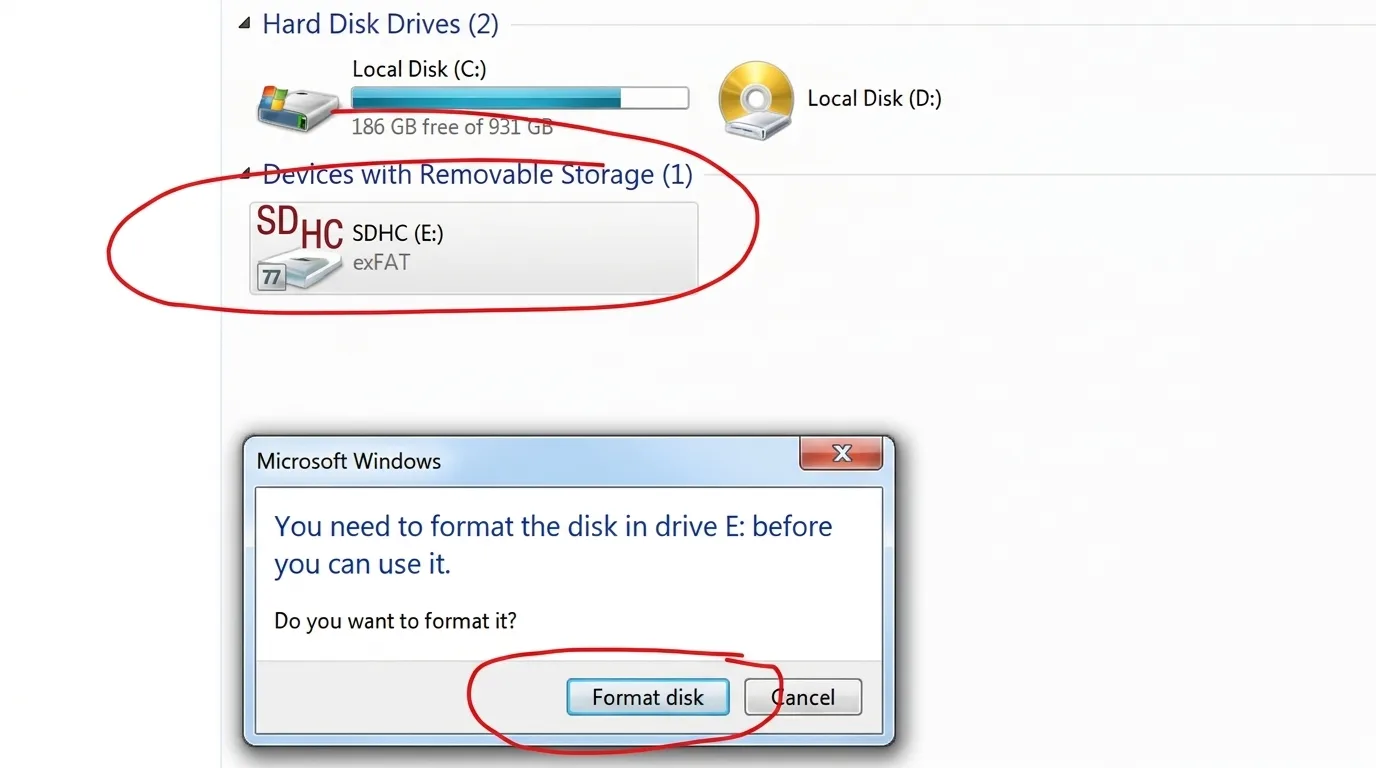
You slide the card out of your camera, plug it in, and your stomach drops. Windows says, “You need to format the disk in drive E: before you can use it.” Your camera flashes “SD CARD ERROR.” Or the files you know are there simply won’t open. Before you panic, let’s confirm what you’re dealing with — because half the time, “corrupted” is really just a bad connection.
Here are the most common warning signs and what each one usually means:
| Symptom | What it usually means |
|---|---|
| “You need to format the disk before you can use it” | File system damage; card shows as RAW |
| “SD card is damaged. Try reformatting it” (Android) | Logical corruption or a failing card |
| Card appears empty but used space shows data | Files hidden by a virus, or damaged directory |
| Photos load partially / with grey bands | Bad sectors on the flash memory |
| Card not detected at all (any device) | Reader/port problem, dead controller, or physical damage |
| Write-protected / read-only error | The physical lock switch is on, or the card is failing |
| Files disappear after transfer | Interrupted write or counterfeit/fake card |
If you see any of these, do not click “Format.” That button is the single fastest way to make recovery harder. Your files are almost certainly still on the card — the map that points to them is just broken.
2. Why Do Memory Cards Corrupt in the First Place?
Understanding the cause tells you whether the card is worth saving. These are the usual suspects, in order of how often we see them:
- Interrupted write operation — yanking the card out mid-transfer, a camera battery dying while shooting, or a sudden power cut. This is the #1 cause and usually fully repairable.
- Improper removal — never “Safely Remove Hardware” before pulling the card? Over time, that catches up with you.
- Virus or malware — less common now, but a card shared between many devices can pick up something that hides or damages files.
- Bad sectors from wear — flash memory has a finite life, measured in program/erase cycles. A card in a dash cam or action cameras recording continuously can wear out in 12–24 months, while a card used only for occasional photo shoots can last a decade or more.
- Physical damage — cracked casing, bent pins, water exposure, or a broken write-protect tab. DIY usually stops here.
- Counterfeit cards — that “512GB” card you bought for $8 on a marketplace? It’s often a 16GB chip lying about its size, and it will corrupt the moment you exceed its real capacity.
A quality name-brand card used normally stays reliable for roughly a decade before failure rates climb meaningfully; cheap no-name cards fail two to three times faster. If you’re unsure how much footage your card should even hold, a 32GB memory card holds far less than a fake 512GB one pretends to — mismatch between advertised and real capacity is a classic red flag.
3. The Golden Rule: Recover Before You Repair
This is the mistake that turns a bad day into a disaster. Every repair command — CHKDSK, First Aid, and especially formatting — writes to the card. Writing to a corrupted card can permanently overwrite the very photos you’re trying to save. So the correct order is always:
- Stop using the card. No more shooting, no more deleting, no more “let me just try one more thing.”
- Recover your files to a different drive (your computer’s internal drive or an external hard drive — never back onto the same card).
- Repair or reformat the card once your data is safe.
Even after a format, your data often still physically exists — the card just marks those blocks as free to overwrite. That’s why the Framework Films recovery story recovered every file from a week of shooting in Banff: they stopped, didn’t format, and ran recovery software first.
How to recover your files
Connect the card via a good card reader (a flaky reader is itself a common failure point — a quality memory card reader is worth every penny), then run recovery software. Popular, reliable options include Disk Drill, EaseUS Data Recovery Wizard, Recoverit, Stellar, and the free, open-source PhotoRec (bundled with TestDisk). Most let you preview found files before paying.
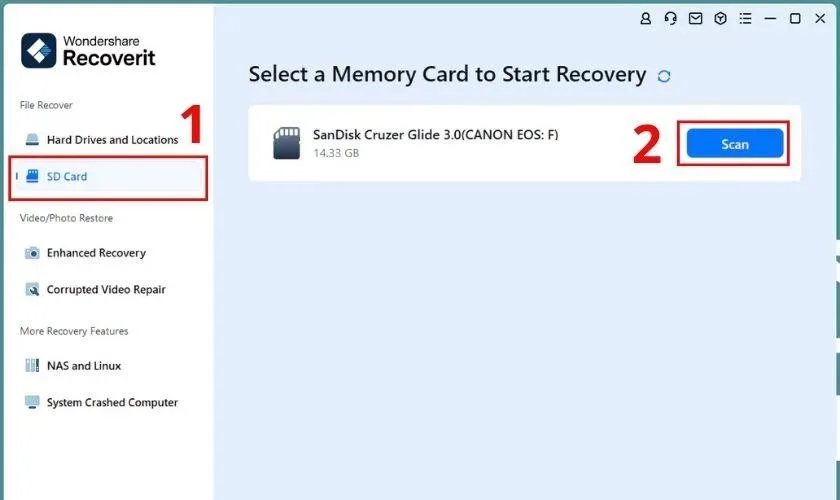
The process is basically the same across all of them: select the card, run a full (deep) scan, preview the photos and videos it finds, then recover everything to a folder on your main drive. A deep scan on a large card can take an hour or more — let it finish. Once your files are safely copied elsewhere, you’re free to try the repair methods below.
4. Step-by-Step: How to Repair the Corrupted Card
Work through these in order. Stop at the first one that works.
Step 1 — Rule out the simple stuff (5 minutes)
Before any command-line magic, eliminate the obvious:
- Try a different USB port, then a different card reader, then a different computer. If the card works on another machine, your reader or port was the problem.
- For microSD cards, swap the SD adapter — adapters fail all the time.
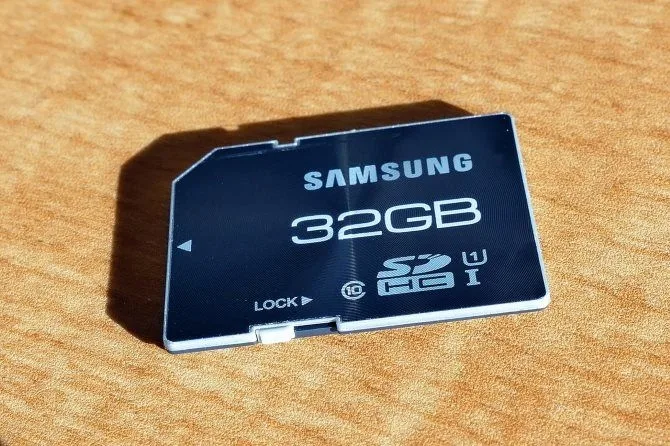
- Check the physical write-protect switch on the side of a full-size SD card. Slide it fully toward the gold contacts (unlocked). If the tab is broken off, a tiny piece of tape in the “unlocked” position can sometimes get you one read-only session to pull data off.
Step 2 — Windows: run CHKDSK
CHKDSK is Windows’ built-in file-system repair tool, and it fixes the majority of logical corruptions. Only run it after you’ve recovered your data, because it modifies the card’s directory structure.
- Right-click the Start menu → Terminal (Admin) or Command Prompt (Admin).
- Find your card’s drive letter in File Explorer (e.g.,
F:). - Type:
chkdsk F: /f /r /x(replaceFwith your letter) and press Enter./ffixes file-system errors,/rlocates bad sectors and recovers readable data,/xforces the drive to dismount first.
- Wait — on a large card this can run for hours. Don’t interrupt it.
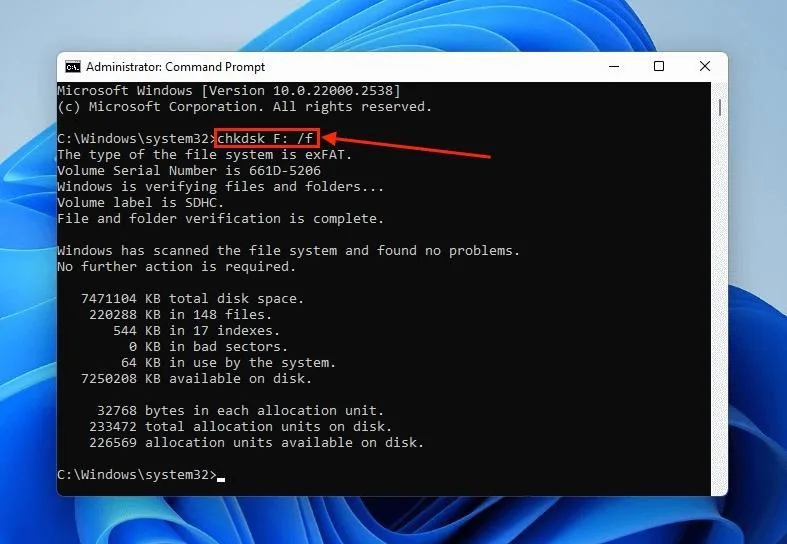
The graphical version (right-click the drive → Properties → Tools → Check → Scan and repair drive) does the same basic job but only the equivalent of /f — it doesn’t scan for bad sectors. For a truly stubborn card, the command line with /r is stronger. You can read the official Microsoft CHKDSK documentation for the full parameter list. Note: CHKDSK won’t work on a card showing as RAW — it needs a recognizable file system, so if you get “CHKDSK is not available for RAW drives,” skip to Step 5.
Step 3 — Assign a drive letter or reinstall drivers
If the card is physically connected but doesn’t appear in File Explorer at all, Windows may have failed to assign it a drive letter. Right-click Start → Disk Management, find your card (verify by size), right-click it → Change Drive Letter and Paths → Add, and assign any free letter. If it still misbehaves, open Device Manager, find the card under Portable Devices or Disk drives, right-click → Uninstall device, then unplug and reconnect the card so Windows reinstalls the driver.
Step 4 — Mac: run First Aid in Disk Utility
On a Mac, the equivalent repair is First Aid:
- Open Applications → Utilities → Disk Utility.
- Choose View → Show All Devices (critical — otherwise you may only see the volume, not the physical card).
- Select the card’s volume in the sidebar and click First Aid → Run.
- If that succeeds but the card still acts up, run First Aid again on the container and then the physical device, moving upward in the sidebar.
Apple’s official guide to repairing a storage device with Disk Utility walks through the same steps. If First Aid reports failure and your data is already recovered, use Erase with exFAT (cross-platform) or MS-DOS (FAT) only for cards ≤32GB that need old-device compatibility.
Step 5 — RAW partition? Use TestDisk
If the card shows as RAW, unallocated, or “unformatted” and CHKDSK refuses to run, the free, open-source TestDisk can often rebuild the lost partition table without formatting. It’s a command-line tool aimed at confident users — take it slow, verify the disk by its size before selecting it, and always recover your data first. Its companion tool PhotoRec ignores the file system entirely and carves files directly from raw flash, which is why it can rescue photos even from severely damaged cards.
Step 6 — Format as the last resort
When every repair fails, a fresh format is what brings the card back to life. It erases the file system and rebuilds it clean — which is exactly why you recovered your data first.
- In your camera (best for camera cards): the camera creates the exact DCIM folder structure it expects. This is the most reliable format.
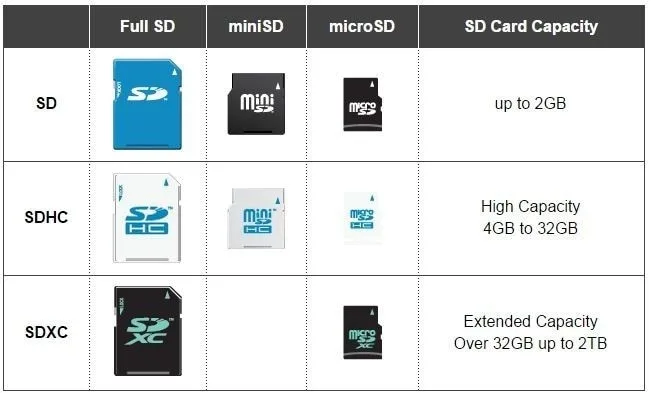
- On a computer: use the official SD Association Memory Card Formatter rather than Windows’ quick format — it applies the correct file system for the card’s capacity tier (FAT32 for ≤32GB, exFAT for larger). If you’re unsure which tier your card is, SDHC vs SDXC explains the capacity and file-system split clearly.
- For Android: reinsert the formatted card and use Settings → Storage to set it up as Portable Storage.
After formatting, copy a few test files on and off the card to confirm it’s stable. If it corrupts again within days, the flash memory is wearing out — retire it.
5. When to Stop DIY and Call a Professional
Some situations are beyond a home fix. Send the card to a professional data-recovery lab if:
- The card is physically damaged — cracked, bent, water-logged, or with pins torn off.
- It’s not detected by any computer or reader after you’ve ruled out cables and ports.
- The data is irreplaceable (a wedding, a once-in-a-lifetime trip) and your first recovery scan came up empty.
- You opened the card and saw chip-off / monolithic construction — modern microSD and many full-size SD cards store everything on one monolithic chip and require specialist equipment.
Expect to pay roughly $200–$400 for a logical repair, and $1,200–$1,500 for chip-off recovery on a monolithic card. Reputable labs work on a “no data, no fee” basis and give you a firm quote after a free evaluation. It’s expensive, but for irreplaceable photos it’s often worth it. If you’re recovering GoPro or action-cam footage specifically, this GoPro SD card recovery guide is a good companion read.
6. Prevention: How to Never Deal With This Again
An ounce of prevention here is genuinely worth a pound of recovery. Build these habits:
- Format in-camera, regularly — not on your computer. It keeps the file system matched to your device.
- Always “Eject” / “Safely Remove” the card before pulling it, and never yank it while the access light is blinking.
- Buy name-brand cards from reputable sellers — SanDisk, Lexar, Samsung, Kingston, ProGrade. A fake card will fail you at the worst moment.
- Rotate and retire cards — flash wears out. If a card is several years old or has seen heavy continuous recording, demote it to non-critical use or replace it. Endurance is measured in TBW (terabytes written); a pro-grade 256GB card may be rated around 500TBW, while budget cards are far lower.
- Backup immediately after every shoot — copy files to your computer and to cloud storage or an external drive. The 3-2-1 rule (3 copies, 2 media types, 1 offsite) exists for exactly this scenario.
- Don’t fill the card to 100% — leaving headroom reduces write-amplification wear. If you shoot RAW vs JPEG, your RAW files are much larger, so you’ll hit capacity faster; a 64GB card holds fewer RAW frames than you might think, so carry spares rather than overfilling one card.
- Keep cards in a case, away from extreme heat, moisture, and static.
A card that has corrupted once is slightly more likely to fail again. Once you’ve recovered your data and reformatted, keep using it — but consider demoting it from “wedding-day primary” duty.
7. Frequently Asked Questions
Can a corrupted SD card be fixed without losing data?
Usually yes, if you act fast. Recover the files to another drive first, then repair the card with CHKDSK (Windows) or First Aid (Mac). The data loss happens when you format or run repairs before recovering.
How can I fix my SD card without formatting?
Try, in order: a different reader/port/computer, chkdsk X: /f /r on Windows, First Aid on Mac, assigning a drive letter, and TestDisk to rebuild a lost partition. Format only if all of those fail.
Why does my SD card say it needs to be formatted?
That message means Windows can’t read the file system — it’s showing as RAW. It does not mean your data is gone. Recover first, then decide whether to format.
Can I recover photos after formatting the card?
Often yes, especially after a quick format, because a format only clears the file map, not the actual data. Stop using the card immediately and run recovery software; the more you shoot on it afterward, the more gets overwritten.
How do I fix a corrupted microSD card on my Android phone?
Android has no built-in repair tool. Power off the phone, remove the card, connect it to a computer via a reader, recover your data, then run CHKDSK or format it on the computer before reinserting it.
Is it safe to use a corrupted SD card after formatting?
If it formats cleanly and passes a read/write test, yes — but treat it with suspicion. If it corrupts a second time, the flash memory is degrading and you should retire it.
How long do SD cards last?
Under normal photo-shooting use, a quality card lasts 5–10 years or more. Under continuous recording (dash cams, security cameras, constant video), expect 1–3 years. Lifespan is measured in write cycles, not calendar time.
Can a virus corrupt an SD card?
Yes — malware can hide files, damage the directory, or encrypt content. Scan the card with a reputable antivirus after recovery, and reformat it before reuse.