How Big Is a 16×20 Photo? The Complete Size, Frame & Print Guide (2026)
Quick Answer: How Big Is a 16×20 Photo?
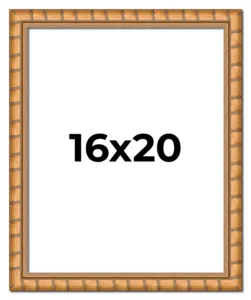
A 16×20 photo measures 16 inches by 20 inches, which equals 40.64 × 50.8 centimeters, 406.4 × 508 millimeters, or roughly 1.33 × 1.67 feet. The print covers about 320 square inches of wall space and uses a 4:5 aspect ratio (portrait) or 5:4 (landscape).
If you want a gallery-sharp result, aim for a 300 DPI image file measuring 4,800 × 6,000 pixels — around 28.8 megapixels.
Key Takeaways at a Glance
- Size in inches: 16 × 20
- Size in centimeters: 40.64 × 50.8 cm
- Size in millimeters: 406.4 × 508 mm
- Size in feet: 1.33 × 1.67 ft
- Aspect ratio: 4:5 portrait, 5:4 landscape
- Best DPI for print: 300 DPI
- Ideal file size: 4,800 × 6,000 pixels (~28.8 MP)
- Popular framed footprint: 20 × 24 inches (with a 2-inch mat)
- Most common uses: wedding portraits, family portraits, above-sofa wall art
How Big Is a 16×20 Photo in Real-World Terms?
A 16×20 print looks significantly larger in person than most people expect on paper. Picture four sheets of standard US Letter paper (8.5 × 11 inches) tiled in a 2×2 grid — that footprint sits close to a 16×20.
This size fills the visual “sweet spot” for wall art. It commands attention without overwhelming a room, and it stays light enough to hang with basic hardware. Photographers, framers, and interior designers keep 16×20 in every catalog because it works in nearly every room of a modern home.
What Are the Exact Dimensions of a 16×20 Photo?
Below is a complete conversion table you can reference in any unit your printer, framer, or shipping service uses.
| Unit | 16×20 Dimensions |
|---|---|
| Inches | 16″ × 20″ |
| Centimeters | 40.64 × 50.8 cm |
| Millimeters | 406.4 × 508 mm |
| Feet | 1.33 × 1.67 ft |
| Meters | 0.406 × 0.508 m |
| Total print area | ~320 sq in (≈2,064.5 sq cm) |
The “16” always refers to the shorter side and the “20” to the longer side. Whether you display it as portrait (tall) or landscape (wide) is a personal design choice, not a size difference.
Portrait vs Landscape: Which Orientation Should You Choose?
Both orientations use the same 16×20 canvas, but they create different moods.
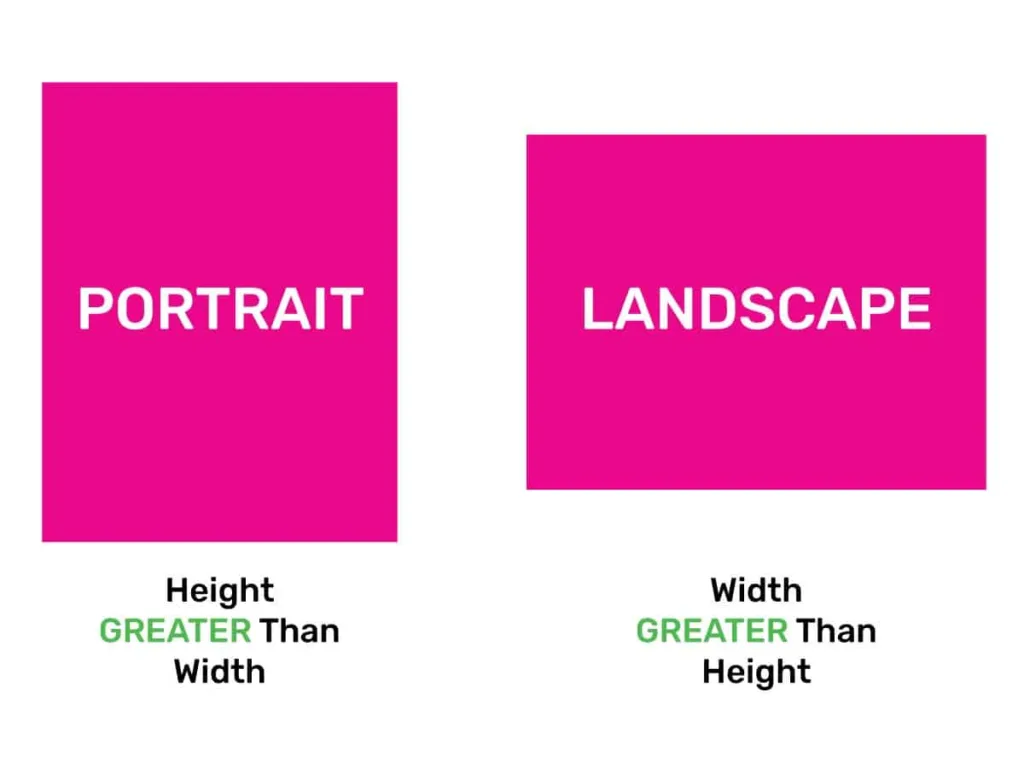
- Portrait (16″ wide × 20″ tall) — best for single subjects, standing poses, wedding portraits, and vertical landscapes like waterfalls or tall architecture.
- Landscape (20″ wide × 16″ tall) — best for group photos, horizontal scenery, wide interiors, and film-style compositions.
Portrait feels more intimate and personal. Landscape feels cinematic and expansive. Choose based on what dominates your subject — vertical lines or horizontal ones.
What Is the Aspect Ratio of a 16×20 Photo?
The aspect ratio is 4:5 in portrait orientation and 5:4 in landscape. In decimal form, that’s a ratio of 1.25 — the shape falls between a square (1:1) and a classic 3:2 camera frame.
This ratio matters because it decides how much of your original photo survives the crop. A quick reference from the technical breakdown at Aspect Ratio Calculator confirms that a 3:2 source photo (most DSLRs and mirrorless cameras) will lose a noticeable strip of width when cropped to 5:4.
Sizes That Share the Same 4:5 Family
- 4 × 5 inch
- 8 × 10 inch
- 16 × 20 inch
- 20 × 25 inch
- 24 × 30 inch
- 40 × 50 inch
Because these all share the 4:5 ratio, you can enlarge from an 8×10 to a 16×20 without re-cropping. That is one reason wedding photographers and studios love this size — the same composition scales cleanly across their entire print package.
Native Camera Ratios vs 16×20
| Device / Ratio | Native Aspect | 16×20 Compatibility |
|---|---|---|
| DSLR / mirrorless | 3:2 | Requires side crop |
| Micro Four Thirds | 4:3 | Slight top/bottom crop |
| Smartphone (default) | 4:3 or 16:9 | Slight crop either side |
| Medium format | 4:3 or 5:4 | Near-native fit |
Always preview the 4:5 crop in your editor before ordering. Leave visual breathing room around key subjects — heads, hands, and eyes should never sit within the outer half-inch.
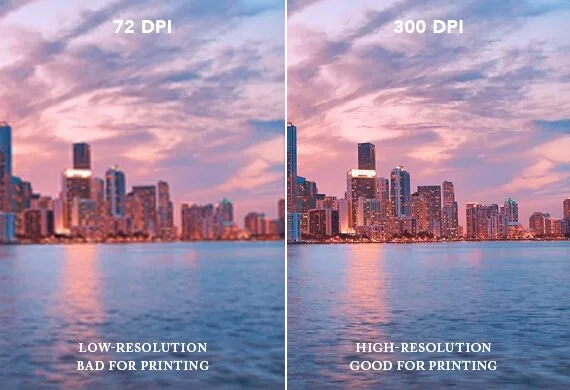
How Many Pixels Do You Need for a Sharp 16×20 Print?
Resolution decides whether a 16×20 looks gallery-crisp or noticeably soft. Because the print is large and often viewed from arm’s length, the eye catches pixelation quickly.
The 300 DPI Gold Standard
At 300 DPI, a 16×20 needs a file measuring 4,800 × 6,000 pixels — about 28.8 megapixels. Professional photo labs, wedding studios, and fine-art printers treat this as the benchmark for prints that will be inspected up close.
Recommended Pixel Sizes by Viewing Distance
Not every 16×20 needs 300 DPI. The correct target depends on how far viewers will stand from the print.
- Under 3 feet (hallway, desk, close-up viewing): 300 DPI → 4,800 × 6,000 px
- 3–6 feet (typical living-room wall): 200 DPI → 3,200 × 4,000 px
- 6+ feet (high placement, large open room): 150 DPI → 2,400 × 3,000 px
Even the minimum listed by pro labs like Nations Photo Lab’s resolution guide is 2,000 × 2,500 px for a 125 PPI print — usable, but not sharp under close inspection.
What Happens if You Print Below the Minimum?
Prints made from tiny files show visible soft spots. You’ll notice:
- Fuzzy edges around eyes, teeth, and jewelry
- Blocky JPEG compression in skies and gradients
- Loss of fine texture in hair, skin, and fabric
- Aliased “stair-step” lines on rooflines and cables
Modern software can rescue borderline files. A good AI upscaler rebuilds detail intelligently rather than simply stretching pixels, and it often makes an under-resolution file printable at 16×20.
File Format & Color Space Checklist
- Save master file as TIFF or JPEG at maximum quality
- Use sRGB color space for consumer labs; Adobe RGB only if the lab confirms support
- Convert to 8-bit if the lab does not accept 16-bit files
- Flatten all layers before exporting
- Apply gentle output sharpening (Unsharp Mask ~60 amount, 0.8 radius)
If you shoot in multiple formats or receive files from clients, a quick refresher on image formats helps you choose the right file for print without quality loss.
How Does 16×20 Compare to Other Popular Print Sizes?
Seeing 16×20 next to sizes you already own makes the scale click. Here is how it stacks up.
| Print Size | Aspect Ratio | Roughly As Big As | Best Use |
|---|---|---|---|
| 4 × 6 | 3:2 | Postcard | Wallets, albums |
| 5 × 7 | 7:5 | Greeting card | Desk frames |
| 8 × 10 | 4:5 | Notebook page | Portraits, certificates |
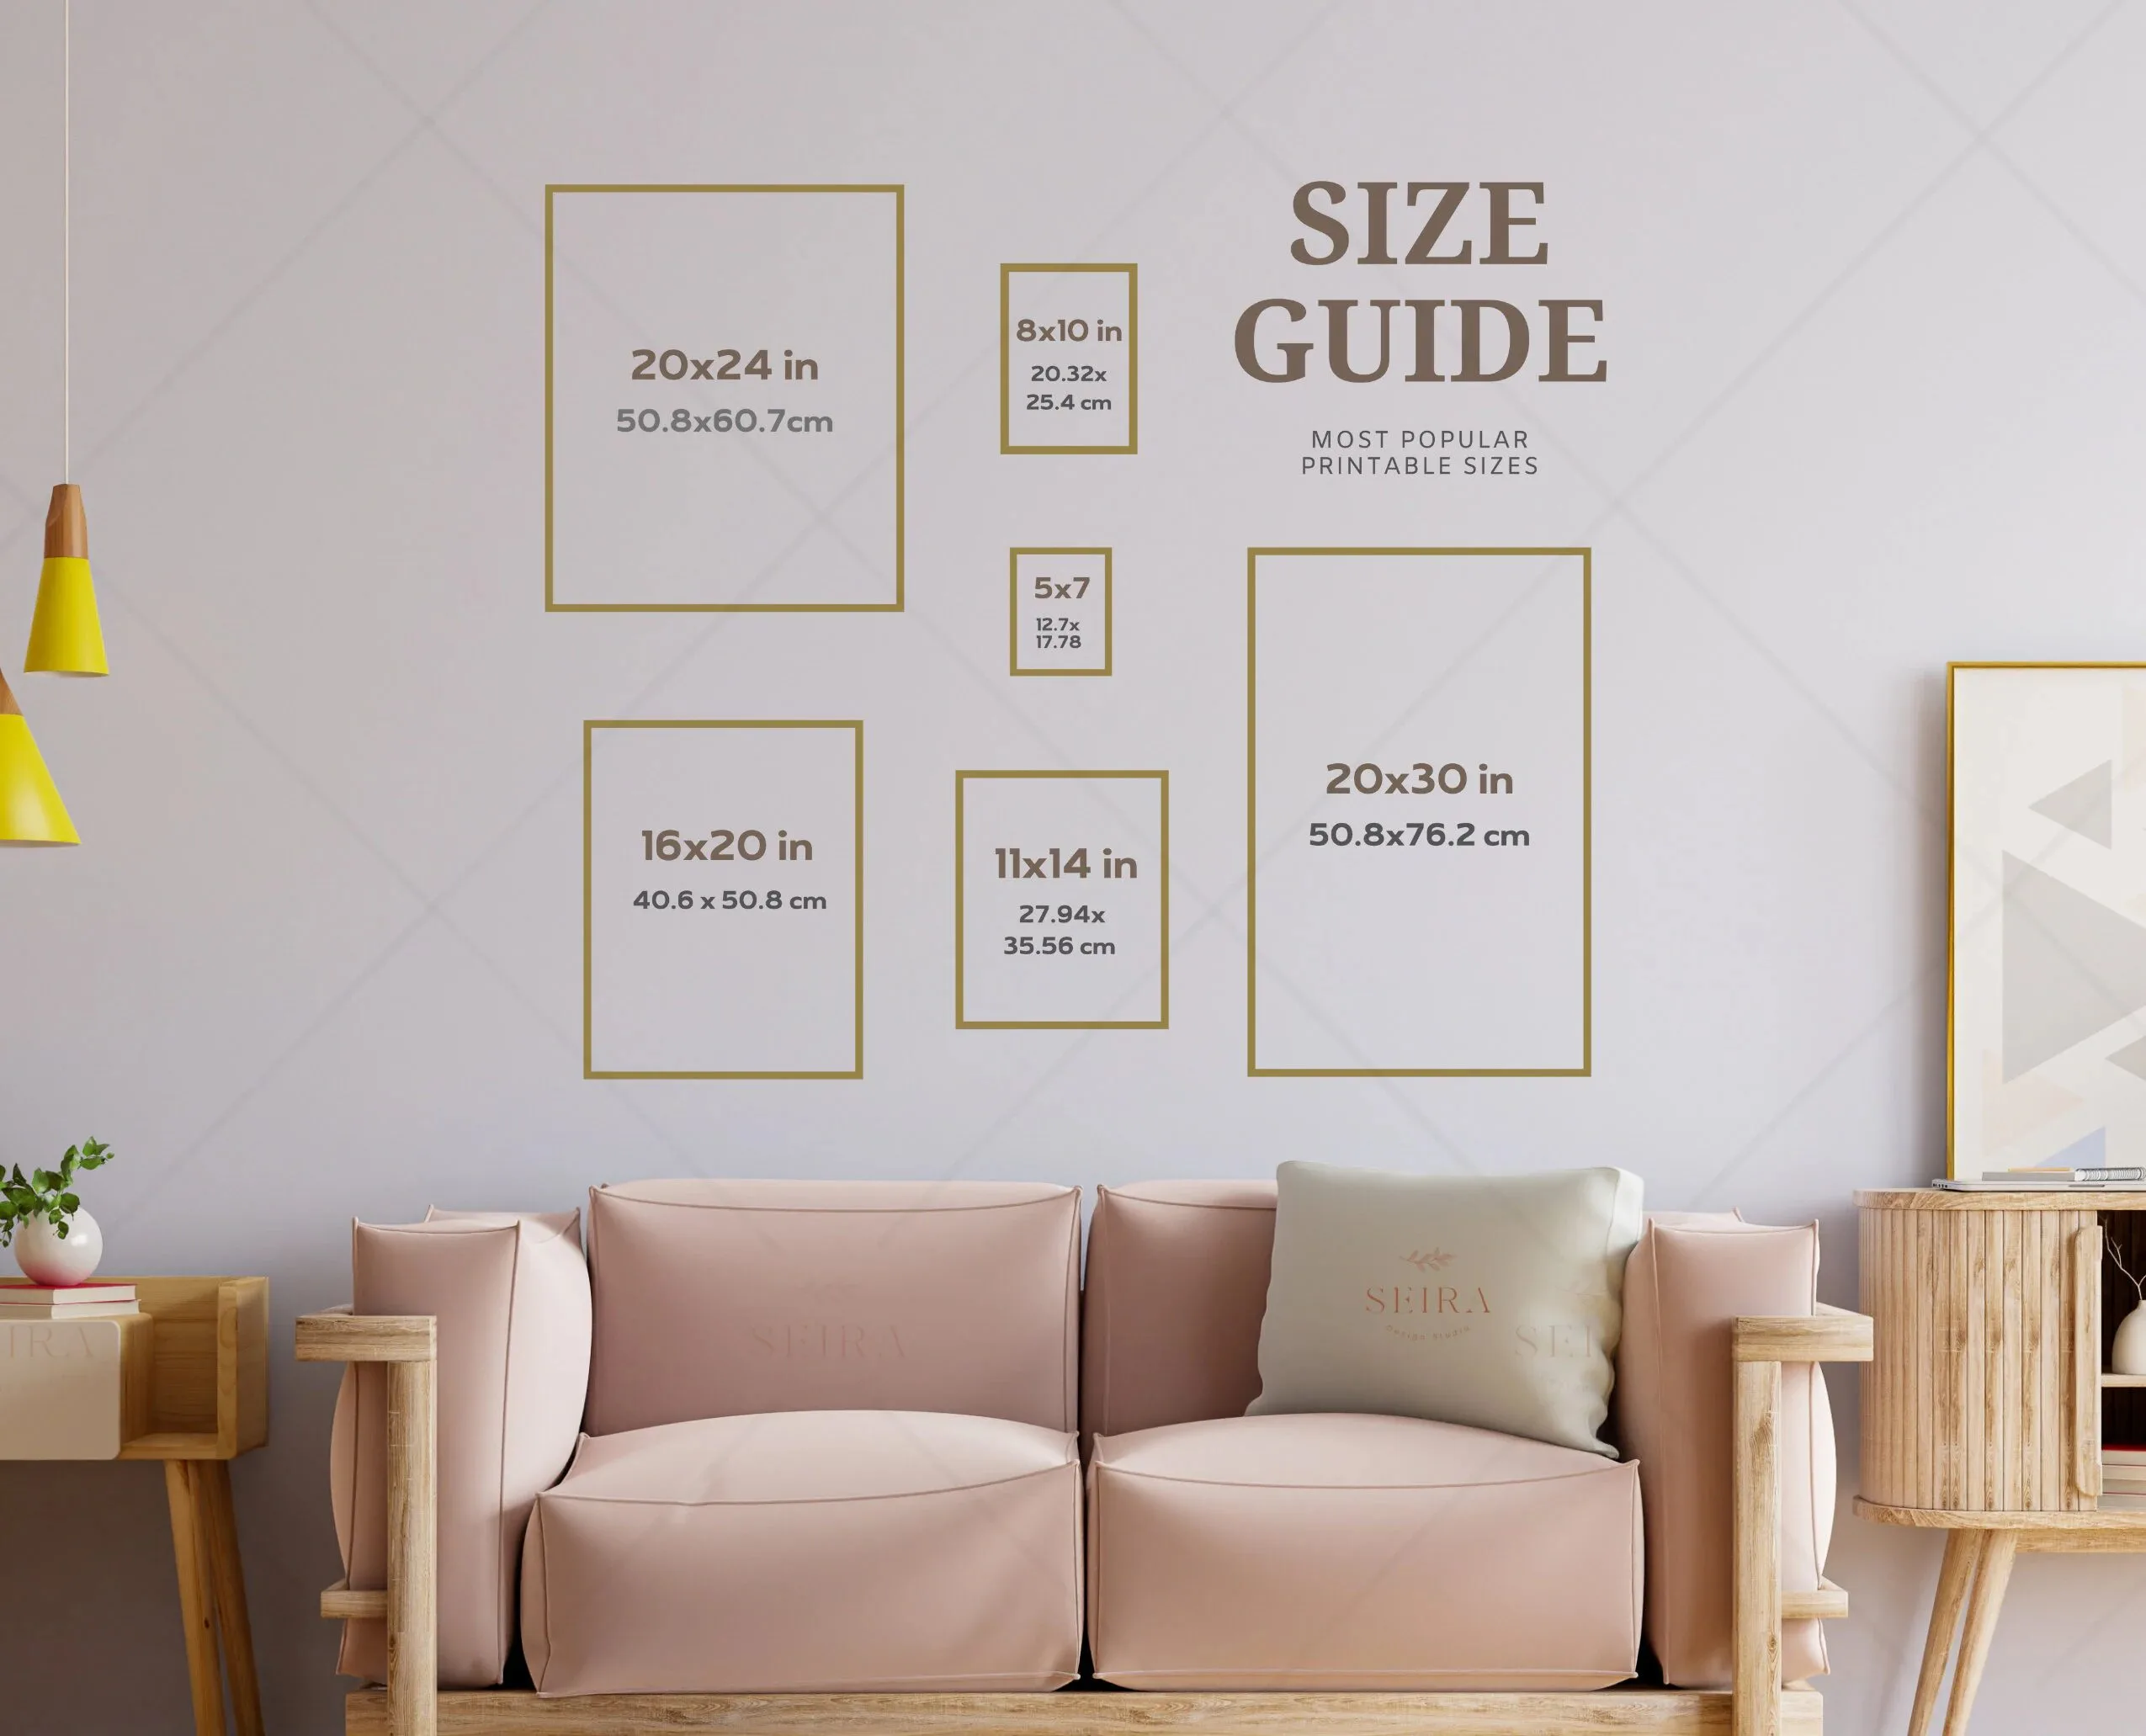
| 11 × 14 | 14:11 | Small poster | Bedroom decor |
| 16 × 20 | 4:5 | Half a movie poster | Statement wall art |
| 20 × 30 | 3:2 | Large poster | Focal-point pieces |
| 24 × 36 | 3:2 | Full movie poster | Oversized art |
At 16×20, a portrait subject typically appears close to life-size from the shoulders up. That’s the exact reason it dominates wedding-package upgrades and family portrait sales.
What Frame Sizes Fit a 16×20 Photo?
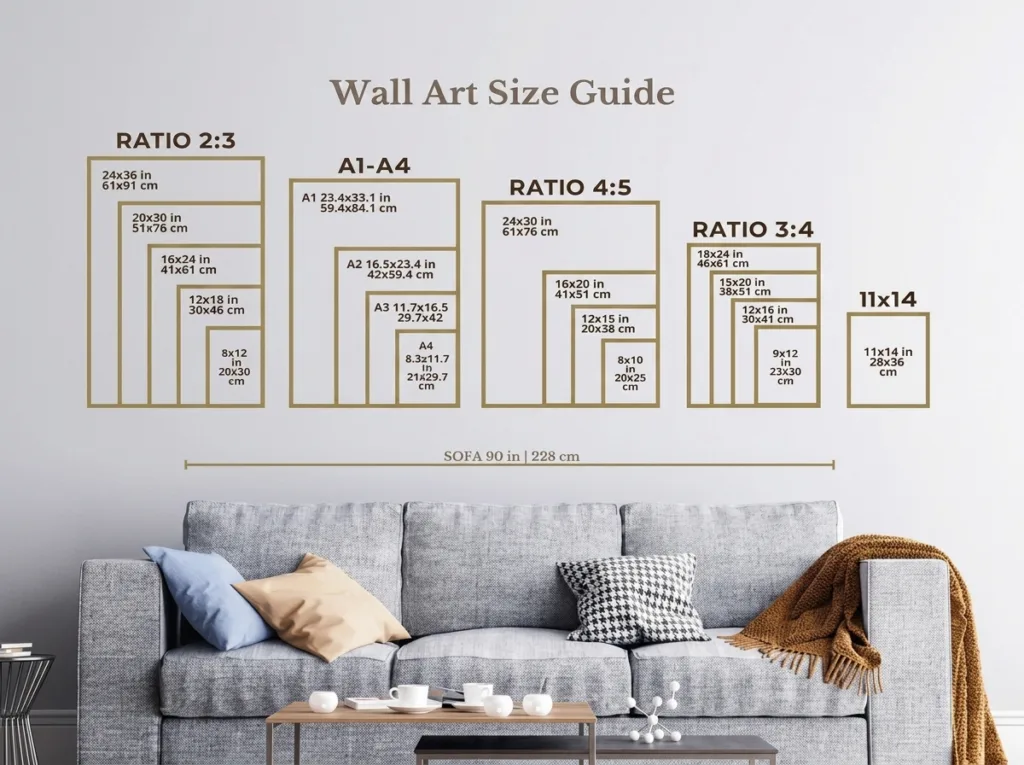
Framing decisions change how much wall your 16×20 actually occupies. Below are the most common configurations professional framers use.
Option 1: 16×20 Frame Without a Mat
The simplest choice keeps the frame 16×20 inches on the outside. Because most frames have a small lip that overlaps the print, the visible area is roughly 15.5 × 19.5 inches. This works beautifully for full-bleed photography, posters, and dramatic landscapes.
Option 2: 20 × 24 Frame With a 2-Inch Mat
The gallery-standard upgrade. Add a 2-inch mat around your 16×20, and the finished frame lands at 20 × 24 inches. This adds significant visual weight, protects the print surface from touching glass, and instantly elevates the piece to gallery quality.
Option 3: 18 × 24 Frame With Asymmetric Mat
A slightly narrower outer frame with about 1 inch of mat on the sides and 2 inches on the top and bottom. This configuration feels dramatic without overwhelming smaller walls or hallways.
Option 4: 22 × 28 or Larger Statement Frame
For maximum impact, pair the 16×20 with a wider 3–4 inch mat and a chunky molding. The finished piece commands a 26 × 30 inch wall footprint — perfect for entryways and above-fireplace displays.
Framing Specs at a Glance
- Print size: 16 × 20 inches
- Visible area (no mat): ~15.5 × 19.5 inches
- Common outer frame sizes with mat: 18×24, 20×24, 22×28
- Preferred molding width: 1.25 inches (industry favorite)
- Best glazing: UV-protective acrylic or non-reflective museum glass
- Preferred hardware: two D-rings, no wire
Can You Put Smaller Prints Inside a 16×20 Frame?
Yes, and it is one of the smartest uses of the size. A 16×20 frame with a wide mat instantly turns a smaller print into a museum-quality display. Here are the standard combinations professional framers use.
- 11 × 14 print in a 16×20 frame: Mat opening cut to about 10.75 × 13.75 inches (a 1/4-inch overlap hides the print edges).
- 8 × 10 print in a 16×20 frame: Mat opening around 7.75 × 9.75 inches, creating dramatic 3–5 inch borders.
- 12 × 16 print in a 16×20 frame: Mat opening near 11.5 × 15.5 inches for a balanced, professional look.
The 1/4-inch overlap rule matters. Cutting a mat opening exactly to print size looks sloppy because the edges slip through and shadows form. Always undersize the opening slightly.
What Paper Types and Finishes Work Best for a 16×20?
Paper choice defines the mood of your final print as much as the image itself. At 16×20, the paper is large enough that surface texture becomes visible from across the room.
Glossy Paper
- Delivers deep blacks and vibrant colors
- Reflects light heavily — best in rooms with controlled lighting
- Shows fingerprints and glare easily
- Ideal for landscapes, sports, and vivid subject matter
Matte Paper
- Softer contrast, no glare
- Fingerprint-resistant surface
- Perfect for portraits, weddings, and black-and-white work
- Considered the more “artistic” finish by fine-art printers
Lustre / Satin (Semi-Gloss)
- The most popular finish for portrait photographers
- Subtle sheen without harsh reflections
- Handles fingerprints better than pure glossy
- The default choice of most wedding labs
Metallic and Fine Art Papers
- Metallic adds three-dimensional shimmer to skies, water, and reflective subjects
- Cotton rag and baryta papers deliver gallery-grade archival quality
- Higher price point, but exceptional longevity (75+ years)
An excellent primer on finishes is available from Red River Paper, a leading US photo-paper manufacturer. For soft-proofing your file against different paper profiles before printing, our photo printing software roundup covers the top tools.
Paper vs Canvas vs Metal vs Acrylic: Which Should You Choose?
A 16×20 image can be printed on several very different substrates, and each one changes the visual character entirely.
| Substrate | Look & Feel | Best For | Price Range (2026) |
|---|---|---|---|
| Photo paper | Traditional, sharp detail | Portraits, family photos, framed art | $8–$60 |
| Canvas gallery wrap | Textured, painterly | Landscapes, warm home decor | $40–$120 |
| Metal print | Vibrant, luminous, modern | Bold colors, ocean, city scenes | $80–$180 |
| Acrylic face-mount | High-end glass-like depth | Studio portraits, gallery pieces | $150–$400 |
| Wood print | Rustic warmth | Nature scenes, farmhouse decor | $60–$150 |
Metal and acrylic prints ship ready to hang without a separate frame. Canvas wraps skip glass entirely, which reduces glare in bright rooms. Paper prints remain the most flexible because you can reframe and remat them over the years.
Where Should You Hang a 16×20 Photo?
A 16×20 hits the design sweet spot — bold enough to fill a wall on its own, small enough to work in a grouping. Here is how designers actually place them.
Living Room
- Above the sofa: A single 16×20 fits perfectly above a loveseat or narrow console. Above a full-length sofa, pair two or three side-by-side for balance.
- Fireplace mantel: Leaning rather than hanging creates a casual gallery vibe.
- Console table: The size sits perfectly at eye level when centered.
Bedroom
- Above the headboard: A calming landscape or couple’s portrait becomes the natural focal point.
- Dresser wall: A single 16×20 lifts a plain dresser instantly.
Hallway and Staircase
- Gallery row: Three or four 16×20 frames lined up at consistent spacing.
- 2×2 grid: Four 16×20 frames with a 2-inch gap create a striking 40 × 40 inch visual block.
Office and Professional Spaces
- Behind-desk feature: Adds authority to video calls and in-person meetings.
- Reception walls: Studios, real estate offices, and clinics rely on 16×20 hero shots.
Kitchen and Dining Room
- Food photography: Herbs, produce, or vintage cookbook illustrations warm up a plain wall.
- Family memories: Casual candid shots feel intimate at this scale.
How Do You Hang a 16×20 Photo Correctly?
Hanging looks simple until the frame ends up two inches too high or slightly off-center. These designer-approved rules keep the result balanced.
The 57–60 Inch Eye-Level Rule
Position the center of the frame between 57 and 60 inches from the floor. Museums and galleries have used this range for decades because it matches the average adult sightline. A helpful hanging-height reference from Architectural Digest also confirms this benchmark.
Furniture Clearance
Leave 6 to 10 inches between the top of your furniture and the bottom of the frame. Any closer feels cramped; any farther breaks the visual connection.
Best Hardware for a 16×20
- Two D-rings (no wire): the most stable option for a print of this weight
- Standard picture wire + one wall hook: acceptable, but slightly harder to level
- Wall anchors: required on drywall when a stud is not available
- Command strips: okay for lightweight paper frames under 3 lbs; not recommended for glass
Multi-Frame Layouts That Work
- Triptych: three 16×20 frames side-by-side with 3 inches between each
- 2×2 grid: four 16×20 frames with 2-inch gaps
- Five-in-a-row: ideal above a long dining table or hallway console
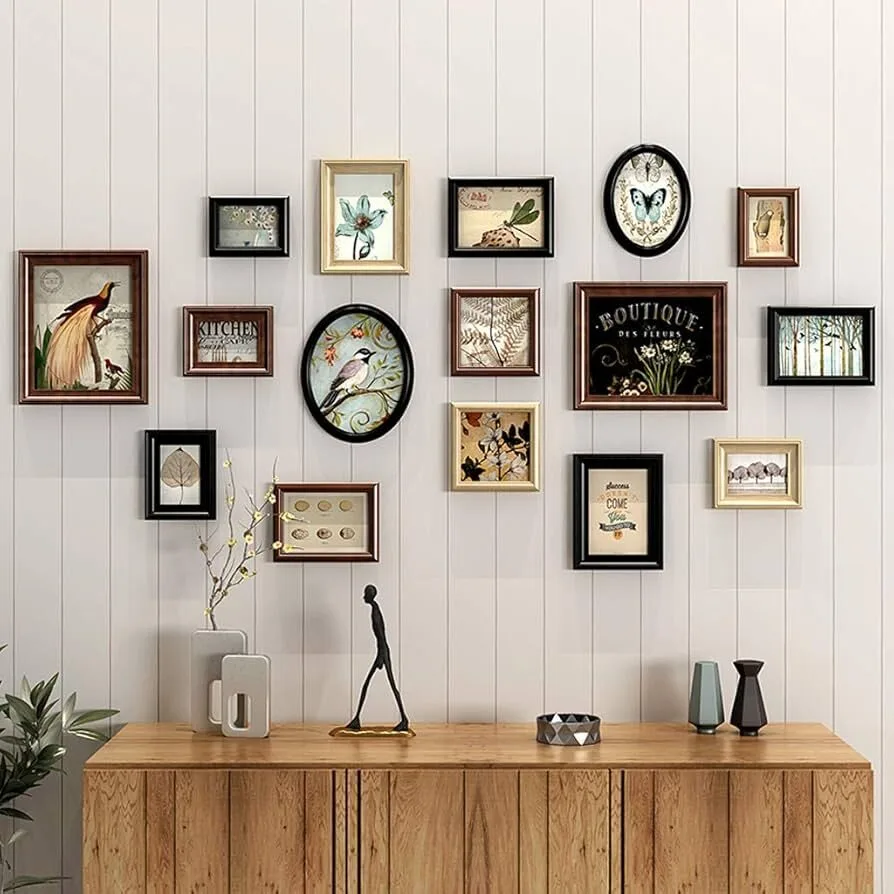
- Salon-style mix: combine 16×20 with 8×10 and 11×14 frames for a curated gallery
What Are the Most Common Uses for a 16×20 Photo?
The size dominates certain photography categories because it hits the balance of impressive but affordable.
- Wedding portraits — the signature framed couple’s shot
- Family portraits — sized right for above a fireplace
- Senior and graduation photos — a staple of school photo packages
- Real estate hero images — used in office lobbies to showcase flagship listings
- Fine-art landscapes — the entry-level gallery size
- Corporate headshots — for boardrooms and executive offices
- Restaurant decor — chef portraits, plated dishes, ingredient still lifes
- Nursery keepsakes — milestone photos and whimsical illustrations
Photographers who shoot with today’s high-megapixel bodies rarely worry about print quality at 16×20. Our roundup of the highest resolution cameras shows exactly how much detail today’s flagship bodies deliver.
How Should You Handle, Store & Ship a 16×20 Print?
At 16×20, prints are large enough that mishandling causes visible creases, corner dings, and dust marks. A few careful habits protect the investment.
Before Framing
- Handle by the edges only — fingerprints on glossy paper are almost impossible to remove
- Let rolled prints flatten for 24–48 hours under a few heavy books before framing
- Wear cotton gloves when working with matte or fine-art papers
- Keep prints out of direct sunlight during the framing process
Storing 16×20 Prints Long-Term
- Flat storage in an archival portfolio with acid-free tissue is ideal
- Rolled storage works only in a rigid tube at least 4 inches wide, print facing outward
- Never lean prints against a wall for extended periods — they’ll bow permanently
- Keep humidity between 30–50% to prevent warping and mildew
Shipping a 16×20 Print
- Thin, flexible papers: roll gently into a sturdy 4-inch cardboard tube
- Thick fine-art papers: ship flat between two rigid boards in an oversized mailer
- Always mark packages “DO NOT BEND” in large lettering on both sides
- Use tracked shipping for prints valued over $50
Backing up your master files matters just as much as protecting the physical print. If you shoot large volumes, our guide to cloud storage walks through the best photo-backup platforms.
How to Prepare Your File for a 16×20 Print
A gallery-worthy 16×20 starts before you upload. Your file needs the right dimensions, color space, and sharpening.
Pre-Print Checklist
- Confirm pixel dimensions — target 4,800 × 6,000 px for 300 DPI
- Set color space to sRGB for consumer labs, Adobe RGB only if the lab supports it
- Convert to 8-bit if your lab does not accept 16-bit files
- Apply mild output sharpening
- Soft-proof using the lab’s ICC profile when provided
- Save as high-quality JPEG or TIFF, and flatten all layers
Because ink dots spread slightly on paper (called dot gain), your file should look faintly over-sharpened on screen. A useful starting point in Photoshop: Unsharp Mask at amount 60, radius 0.8, threshold 3 on the full-resolution 16×20 file.
If your source file arrived with visible noise, tackle it first — our tutorial on fixing grainy photos shares the exact workflow professional retouchers use.
Common Mistakes to Avoid With 16×20 Prints
Even careful photographers trip on the same issues at this size. Watch for these before ordering.
- Uploading a compressed JPEG — social media downloads and screenshots have already lost detail
- Ignoring the 4:5 crop preview — heads and hands often get sliced off in the final crop
- Choosing high-gloss for portraits — glare and skin reflections rarely flatter faces
- Skipping the mat — a bare 16×20 in a thin frame looks unfinished on most walls
- Hanging too high — the most common decorating error; keep the center at 57–60 inches
- Using cheap hanging wire only — a 16×20 in a wood frame benefits from two D-rings
How Much Does a 16×20 Photo Print Cost in 2026?
Prices swing widely depending on paper, framing, and lab quality. Below are realistic 2026 ranges.
| Format | Typical Price Range |
|---|---|
| Standard lustre print, unframed | $8–$20 |
| Fine-art paper, unframed | $25–$60 |
| Basic framed 16×20 | $50–$100 |
| Premium framed (mat + moulding) | $120–$300 |
| Canvas gallery wrap | $40–$120 |
| Metal print | $80–$180 |
| Acrylic face-mount | $150–$400 |
Ordering in multi-packs from labs such as Printique, Nations Photo Lab, Bay Photo, or Mpix drops the per-print cost noticeably. Many labs also run seasonal 20–40% promotions during holidays.
Frequently Asked Questions
1. Is a 16×20 photo considered large?
Yes. A 16×20 is classified as a “large” enlargement in consumer printing. It measures roughly four times the area of an 8×10 and works as a stand-alone statement piece on most residential walls.
2. How many pixels do I need for a 16×20 print?
For gallery quality, you need 4,800 × 6,000 pixels (~28.8 MP) at 300 DPI. For a print viewed from 3–6 feet, 3,200 × 4,000 pixels at 200 DPI is enough. And, for high-placement art viewed from 6+ feet, 2,400 × 3,000 pixels at 150 DPI still holds up.
3. Will my phone photo print sharply at 16×20?
Most current flagship phones (iPhone 15/16 series, Samsung Galaxy S24/S25, Google Pixel 8/9) capture 12–48 MP files, which is more than enough for a sharp 16×20 — as long as you shoot in good light and avoid heavy digital zoom.
4. What frame size do I need for a 16×20 with a mat?
The most popular matted setup uses a 20 × 24 outer frame with a 2-inch mat around the 16×20 print. Other common options include 18 × 24 with a narrow mat and 22 × 28 for wider gallery-style borders.
5. What is the aspect ratio of a 16×20 photo?
The aspect ratio is 4:5 in portrait orientation and 5:4 in landscape. It matches 4×5, 8×10, 20×25, and 24×30 exactly, so you can scale between these sizes without re-cropping.
6. What is the best paper finish for a 16×20 portrait?
Lustre (semi-gloss) and matte finishes work best for portraits. Lustre delivers subtle richness with minimal glare, while matte offers a softer, more artistic feel that flatters skin tones. Glossy suits landscapes and vivid subjects better than faces.
7. Can I print a 16×20 from a cropped social media photo?
Not usually. Social media platforms compress images heavily during upload, and screenshots typically max out around 1080–2000 pixels wide — far below the 4,800 pixels a sharp 16×20 needs. Always print from the original file whenever possible.
8. How much wall space does a 16×20 need to look balanced?
A single 16×20 needs at least 4–5 feet of clear wall width around it to feel balanced. For groupings or triptychs, plan for the total footprint plus 12–18 inches of breathing room on each side.
Final Thoughts
The 16×20 print has held its place as a photography favorite for one simple reason — it lands in the exact size window where impact meets practicality. It’s large enough to command a room, standardized enough that frames and mats are easy to source, and light enough to hang with basic hardware.
Whether you’re framing a wedding portrait, a landscape, or a family milestone, understanding the 4:5 aspect ratio, the 300 DPI benchmark, and the frame-plus-mat combinations puts you in complete control of the final result. Prepare the file carefully, choose paper that matches your subject, hang it at the right height, and the print will look every bit as good on your wall as it did in your imagination.